| Table of Contents |
|---|
On WINDOWS OS
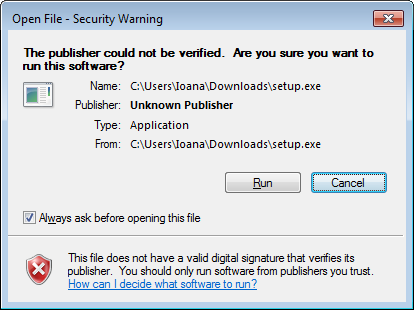
Double click the setup installer that you have received from us.

A new window will popup, depending on your security settings, in which you just need to hit Run.
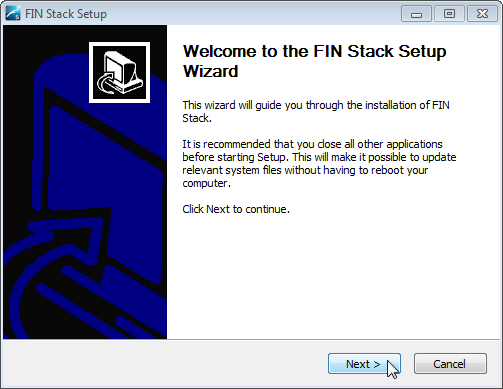
This will start the setup, with the welcome wizard. To continue, click Next.
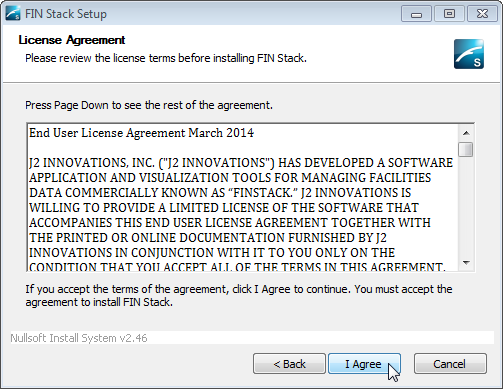
Next step of the setup will ask you to agree with the License Agreement. Click I agree to continue.
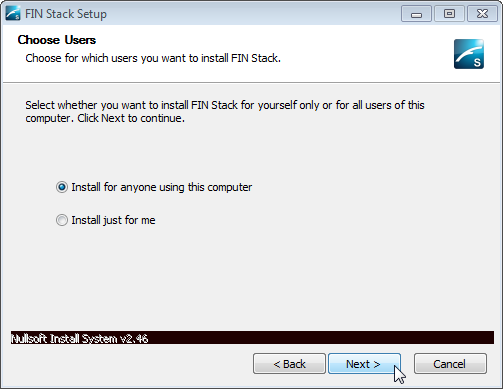
The next step allows the user to chose if they will install FIN Stack for all users using the current computer or only for the current user. Just select the option that suites your needs and click Next:
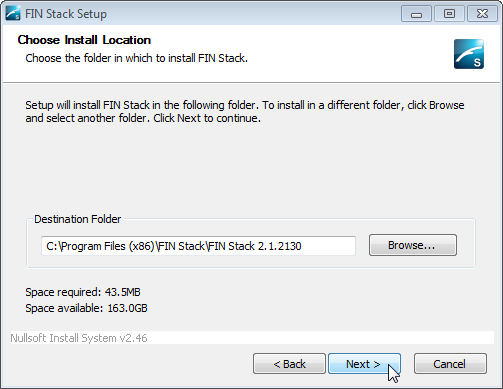
The user will next choose the location for the installation. To change the predefined location, the user will just click Browse... and select the desired new location. In the end just click Next.
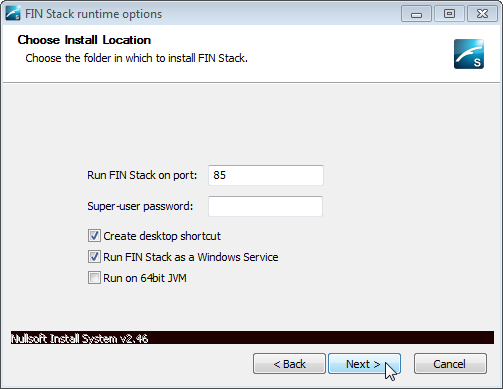
The next set of options allows the user to make several custom settings:
- Run FIN Stack on port: by default FIN Stack will ran on port 85, but the user can type in inside the field any preferred port
- Super-user password: inside this field the user can define the password for the super user, or just leave the field empty
- Create desktop shortcut: if checked this option will create a desktop shortcut for FIN Stack at the end of the installation process
- Run FIN Stack as a Windows Service: needs to be checked when installing FIN Stack
- Run on 64bit JVM: the user will check this option only if he uses the Java Virtual Machine on 64bit
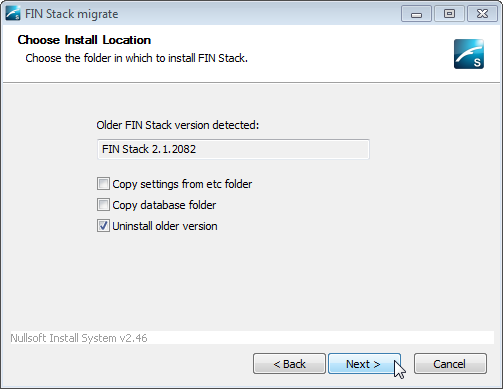
Next, if the user has any previous version of FIN Stack installed, the installer will detect it and will give 3 options:
- Copy settings from etc folder: if checked, will keep any special settings made by the user to the server
- Copy database folder: if checked, will copy paste all the databases they user has created
- Uninstall older version: if checked, will install the previous version after doing the first 2 steps
| Info |
|---|
If the user wants a clean install then only the uninstall older version should stay checked. Also this window will only appear if the user has any other previous version installed, otherwise it won't be part of the process. |
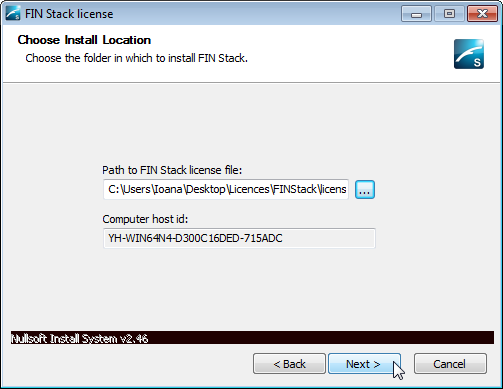
This next step will only appear if the user is making a clean or first time install. The user will be prompted to select his FIN Stack license location and will be provided with the host ID needed to get the FIN Stack license. If at this point the user doesn't have a valid license file, the installation process can go further by hitting next.
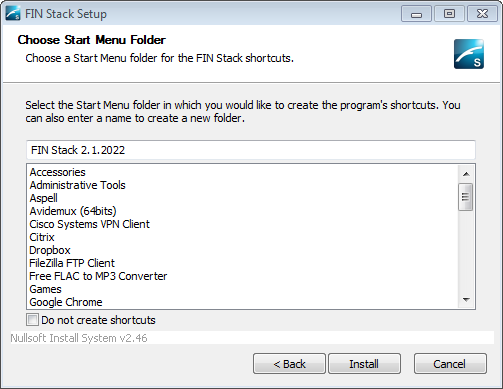
And finally the user will select the name of the folder that will be created in the Start Menu and hit Install. Of course if the user doesn't want to create a folder in the Start Menu, he will just check the: " Do not create shortcuts" option.
| Info |
|---|
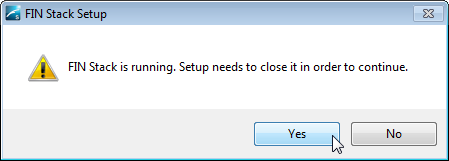
If the user gets prompted that the FIN Stack service is running, it means that he has forgotten to stop the service before he started the installation process. At this point the user will manually stop the service and then hit YES.
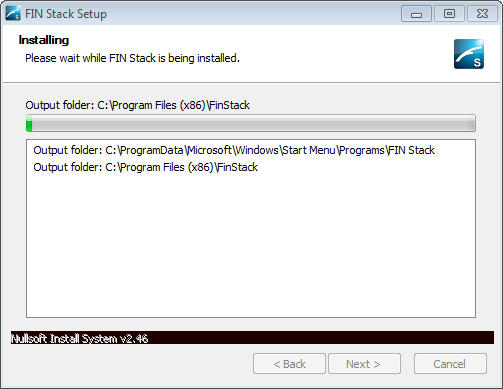
Once the user selects YES the installation will begin. |
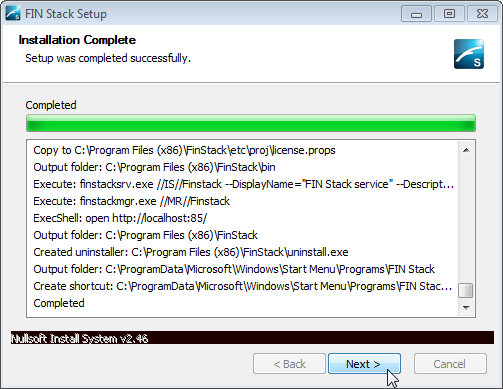
Once the installation is done, FIN Stack will automatically open in the default set browser.
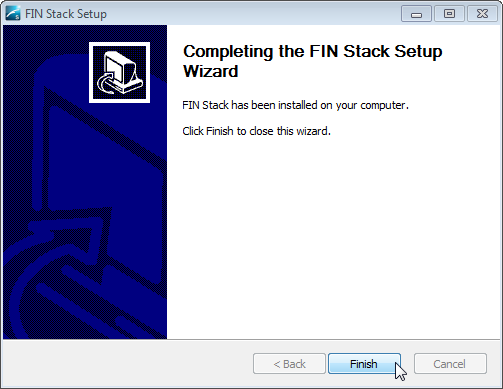
To close the installation wizard, the user will hit one more time Next and then Finish.
If the user has marked the "uninstall older version" once the installation process is done, the uninstall will begin.
| Warning | ||
|---|---|---|
| ||
Before uninstalling, make sure you have created a snapshot and saved it somewhere on your computer. Or copy/move your db project out of the old version. If you don't have any kind of backup outside of the old FIN Stack directory, you will lose everything. |
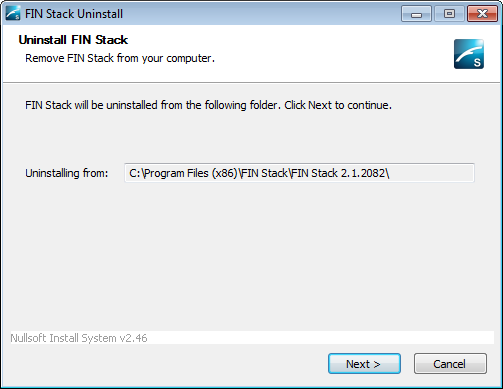
When the user clicks next, there are 2 options:
- Keep settings (etc) folder: if checked, this will keep all the settings of the version
- Keep databases (db) folder: if checked, this will keep all the projects of that version
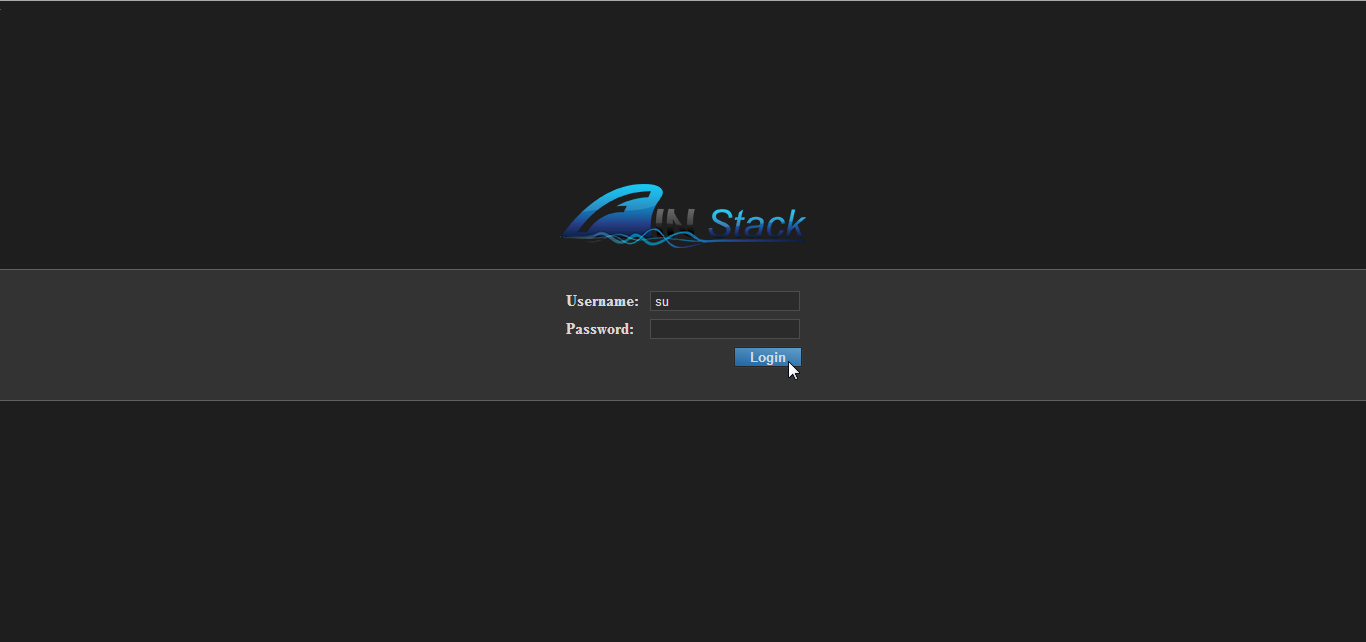
To use FIN Stack, the user will just log in using:
- Username: su
- Password: the password set during the installation process (in case there was one)
On MAC OS
Double click the setup installer that you have received from us. You will find this after you unzip.

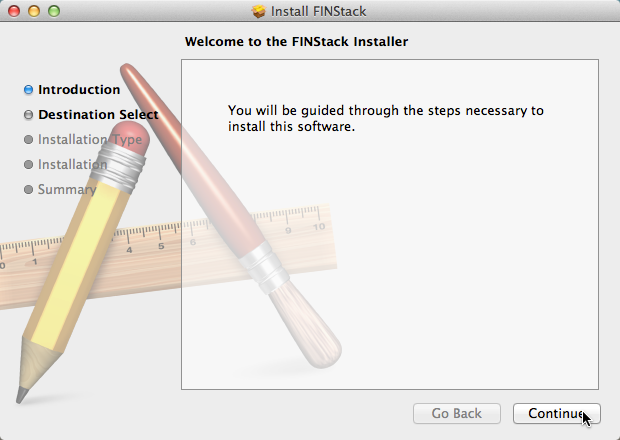
This will start the setup, with the welcome wizard. To continue, click Continue.
The user will next choose the location for the installation. To change the predefined location, the user will just select a different HD and click Continue.

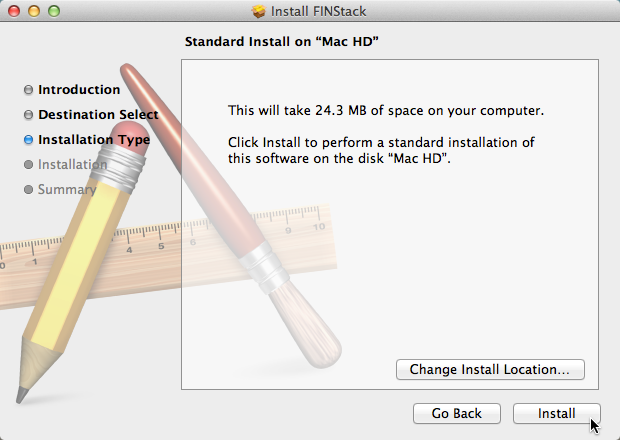
Next window will start the installation process, by hitting Install.
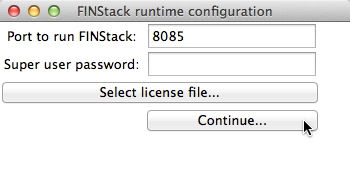
During the installation process a configuration window will pop-up and will all the user to make a couple of custom settings:
- Port to run FIN Stack : by default FIN Stack will ran on port 8085, but the user can type in inside the field any preferred port
- Super user password: inside this field the user can define the password for the super user, or just leave the field empty
- Select license file...: at this point in the installation process the user can select the license file or just hit Continue... to finish the installation and do the license upload later.
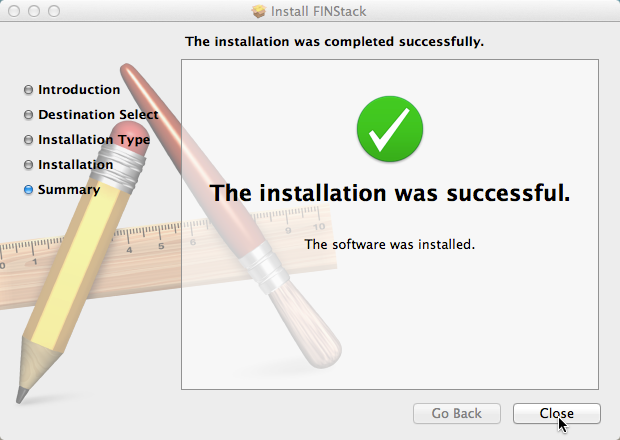
Once the installation is done, FIN Stack will automatically open in the default set browser.
To close the installation wizard, the user will hit Close.
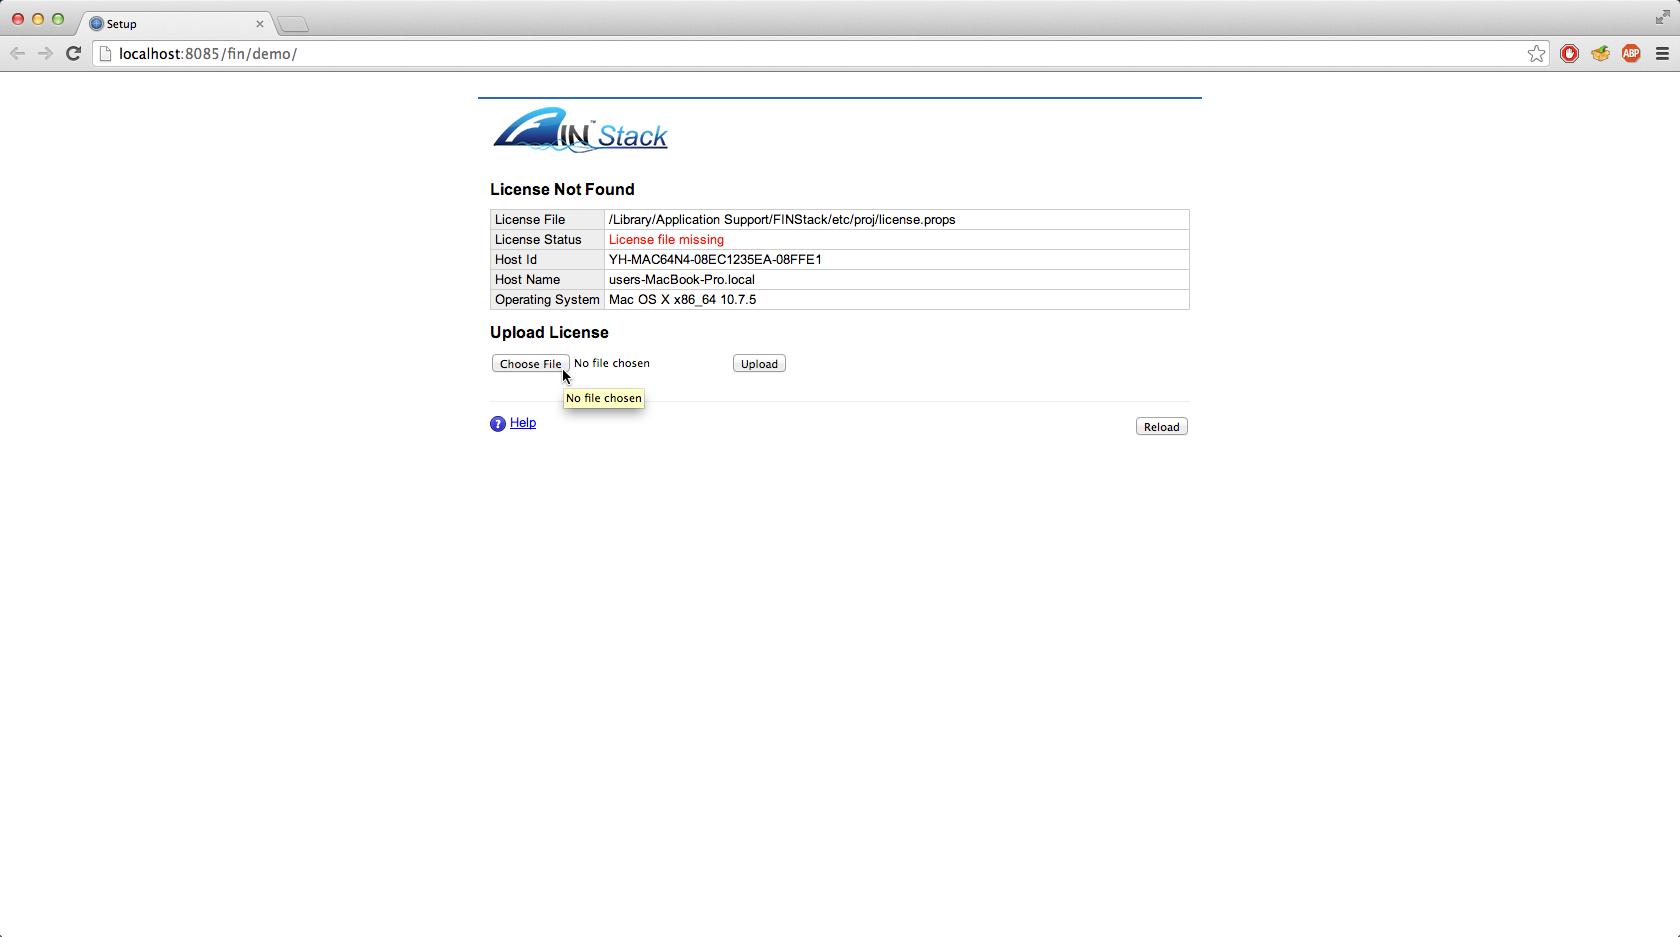
Since during installation we haven't selected a valid license file the user will be prompted right now to do so:
To use FIN Stack, the user will just log in using:
- Username: su
- Password: the password set during the installation process (in case there was one)
MAC Path
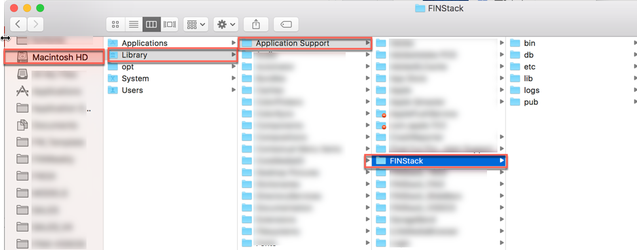
If the user ever needs to find where FIN Stack is located once installed to move dbs or other files, then the path would be like below.
Macintosh HD > Library > Application Support > FIN Stack
Note: Macintosh HD & Library folder are sometime hidden by default.
On Linux OS
Have the install.sh file downloaded to an accessible directory and use the "cd" command to move to that directory. Typing "ls" will show the files and you should see the "install.sh" file (it is highlighted in this example).

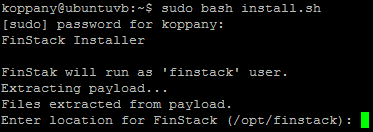
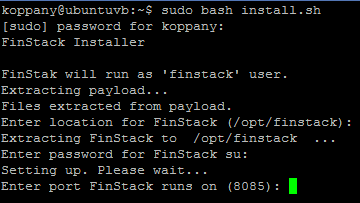
Then execute "sudo bash install.sh" to run the installer as root.

You will most likely be asked to type in your password, do so and keep in mind that the password will not be visible as you type it in.

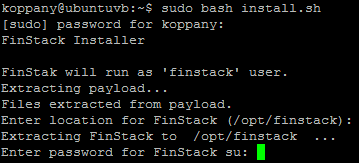
Then you will see the FinStack installer start and it will ask you for a location to install FinStack. The default directory is /opt/finstack and if you want to use that, just press enter, otherwise specify a directory and press enter.
Then you will be asked to enter a password for the FinStack su, type in the password and keep in mind that it will not be visible as you type it in.
Then you will be asked to enter the port that you want FinStack to run on. The default is 8085, press enter to use that one or specify your own port. NOTE: Using a port that is most likely taken such as 80, 85, 21, 22, etc, might cause problems when running the server; use a port that is not used for anything else.
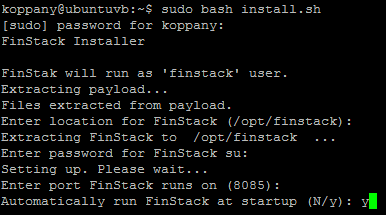
Finally you will be asked if you want FinStack to be automatically run at startup. If so, type "y" and press enter. If you do not want FinStack to run automatically at startup, just press enter and the default value of "N" will be entered.
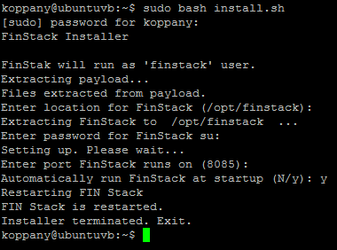
If the installation was successful, the installer will say "Restarting Fin Stack", "Fin Stack is restarted", and "Installer terminated. Exit.", and then you will see the terminal restored.
If you wish to ensure that your FinStack service is running, simply enter the command "ps -ef | grep -i finstack" and you will see a lot of output regarding Java and FinStack. You will see some parts that say "-port 8085" or whatever port you specified.

Finally the user can open their web browser, type in the address of the server plus ":8085" at the end and enjoy FIN Stack.
| Page Tree | ||
|---|---|---|
|