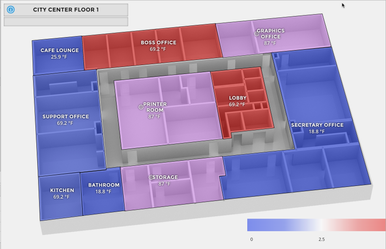
How to make floorplan graphic use room number or description
Its very common for the end user to want to see the actual room numbers or description of the equip on a floorplan rather than the actual equipment's name.
The following steps will guide you on how to create a floorplan graphic where the zones show the equipment's room number/description instead of the navName.
This document assumes that you've already created a floorplan graphic. In Step 1 you can replace the "description/roomNumber" tag with any tag you desire, and in Step 2 the default point is whatever you sleected when creating your floorplan
Add a Description tag to the Equip
In the DB Builder, make sure you've added a 'description' or 'roomNumber' String Property tag to each of your equipment, and filled them all out.
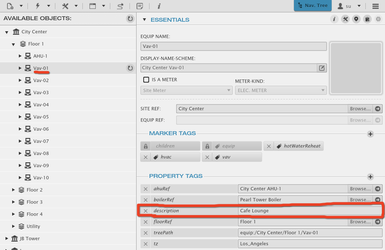 Tip: Create the string property tag on 1 of the equip, then use the clone tags tool to get it to the rest. Then proceed to fill them out.
Copy the tag to the Room Temp (Default Point used on floorplan)
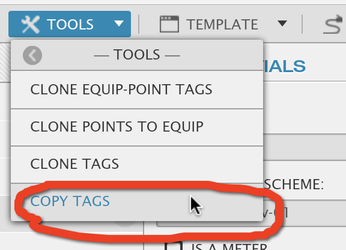
In the DB Builder, select one of the equipment, go up to the tools menu go into Clone > Copy Tags and select that tool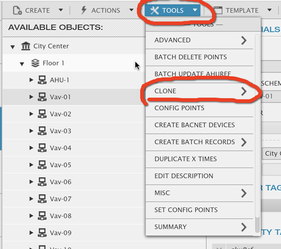
Make sure "move tag" is selected, hit Next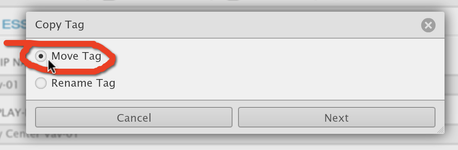
In the "Move From" Filter type in the tag(s) or filter of the equips your going to move from.
In the "Move To" Filter type in the tag or filter of the record (point) your moving the tag to.
The "Tag to Clone" dropdown will be populated by tags found on record filtered by the "Move From" filter. Select the tag your going to be copying.
So in my case, Im looking for the "equip and vav" and then move "description" to the "navName=="Room Temp" of each "equip and vav".
Go to your Floorplan graphic and update the shortNames
Open your floorplan graphic, go to the Components section(in the graphic builder menu to the right),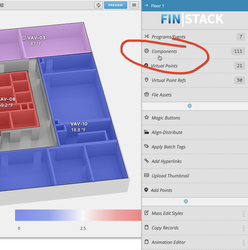
Open the "Smart Label" slide out and click on the "Select' option to select all of your smart labelsGo back to the Builder Menu, and select "Apply Batch Tags"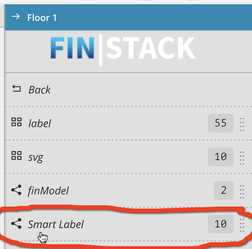
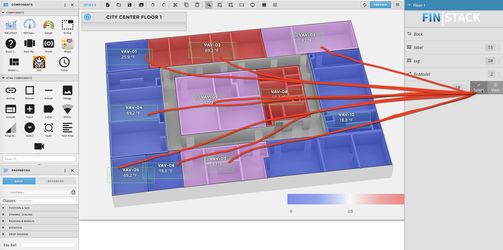

In the Apply Batch Tags:
The filter should already contain the id's of each smart label (since we pre-selected all of them)
In the Apply Tags section, add the following: shortName:"$description"
That will add a shortname tag or update the shortname for every label to use a syntax that will grab the "description" value and display that as the name.
Save & You're DONE!