| Table of Contents |
|---|
How to backup and restore a graphic
Below are the steps on how to backup and restore a graphic. Also how to restore to create a duplicate graphic.
Backup Graphic
To backup a graphic, the user will:
...
2. Select the Graphics Builder tile
3. When the user clicks on the Graphics Builder tile, it will slide out and give the user 3 options
- In this case, the user will select on Menu


4. The user will select on Miscellaneous
...
6. Once Backup is selected, a popup will appear where the user can select a name for the file to download and the selected graphics.

| Info |
|---|
The available options on the Backup window:
|
Then once the user is done, they would click on Backup or Cancel if deciding not to backup anything.
8. Once they select Backup, they will be prompted with the below popup.
...
- The above popup lets the user know that the backup was successful and saved a copy of the zip file in the Files section of Folio
- They are also prompted if they want to download this zipped file or just hit OK to download later manually
- If download, they will be prompted with a normal standard Save As window so that they can choose where to save the zipped file.
That's it, now 9. Now the user has a backup of the selected graphic(s) on their computer or where ever it was saved.
...
2. Select the Graphics Builder tile
3. When the user clicks on the Graphics Builder tile, it will slide out and give the user 3 options
- In this case, the user will select on Menu
4. The user will select on Miscellaneous
...
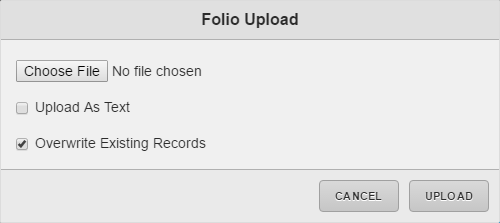
6. Once Restore is selected, a popup will appear where the user can select the backup zip file that contains the graphic(s).
| Info |
|---|
The available options on the Restore window:
|
7. Once the user selects the backup zip file, they would select Upload.
8. Once uploaded, the user will be prompted with the below popup.
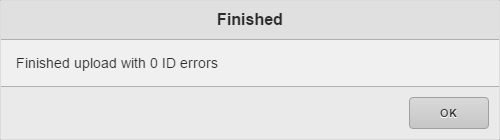
9. It confirms that the graphic was uploaded and now they can find it in the graphics builder app.
| Info | ||
|---|---|---|
| ||
| Info | ||
| ||
When restoring graphics and don't see the graphic show up in the graphics app, go to Menu > Graphics Builder > Graphics > View All Graphics > and find the graphic to check its graphicOn tag. Sometimes we forget what its running on and freak out that it isn't showing up where its supposed to. Also by the way for those using strings in graphicOn, its now supported in v1771 in case you have an older version that doesn't support it. That may be a reason why it won't show up in the graphics app. |
Restoring to create duplicate graphic
| Note | ||
|---|---|---|
| ||
We have included the Save As option in a newer builder v2965. The below won't be necessary with this feature. |
If the user wants to duplicate a graphic without recreating the whole thing, the way to do this is to create a backup and then restore without "Overwriting Existing Records".
1. Select the Menu, which is located on the top left corner ![]()
2. Select the Graphics Builder tile
3. When the user clicks on the Graphics Builder tile, it will slide out and give the user 3 options
- In this case, the user will select on Menu
4. The user will select on Miscellaneous
5. Select the Restore option in the slider menu.

6. Once Restore is selected, a popup will appear where the user can select the backup zip file that contains the graphic(s).
7. With the above window open, the user will select the backup zip file
8. Then uncheck "Overwrite Existing Records"
- What this will do is restore the backup graphic(s) with new ids and so it won't overwrite an existing graphic.
9. Once the user does that and selects Upload, they will be prompted with the below popup.
10. It confirms that the graphic was uploaded and now they can find it in the graphics builder app.
If you get a prompt that says "This project is already open." when trying to open a duplicate graphic at the same time having the original open, the reason is because the id of the world of both graphics are the same. So you would have to open one of the graphics and select the world. In the advanced properties of the world, change its id to something else. What we do is either change the first or last four characters to something random. Then save the graphic and you should be good. |
