Alarm Config
We created an app called Alarm Config that would allow the user to mass configure alarms on points. For this to work, a tag bundle and program need to be created to use with this.
- The tag bundle would be to apply or remove specified tags on points selected in the Alarm Config app
- Then the program would be for the predefined logic to run against those tags if conditions are met
Prerequisites:
- Alarm Config Ext enabled in Settings app if not already enabled (refresh browser once enabled)
- FinDbBuilderFormsExt enabled in the Settings app as well if not already enabled.
- Tag Bundle to use for applying alarms (used in combination with this app)
- Program to generate the alarms by said tags applied on the points (used in combination with this app)
Setting Up For Alarm Config
To use the Alarm Config, first the user would have to make sure to enable the AlarmConfig, then create a tag bundle and program to utilize the Alarm Config app.
Enabling Alarm Config Ext
1. To enable the Alarm Config ext, the user would open the App Launcher top left and select the Settings App.
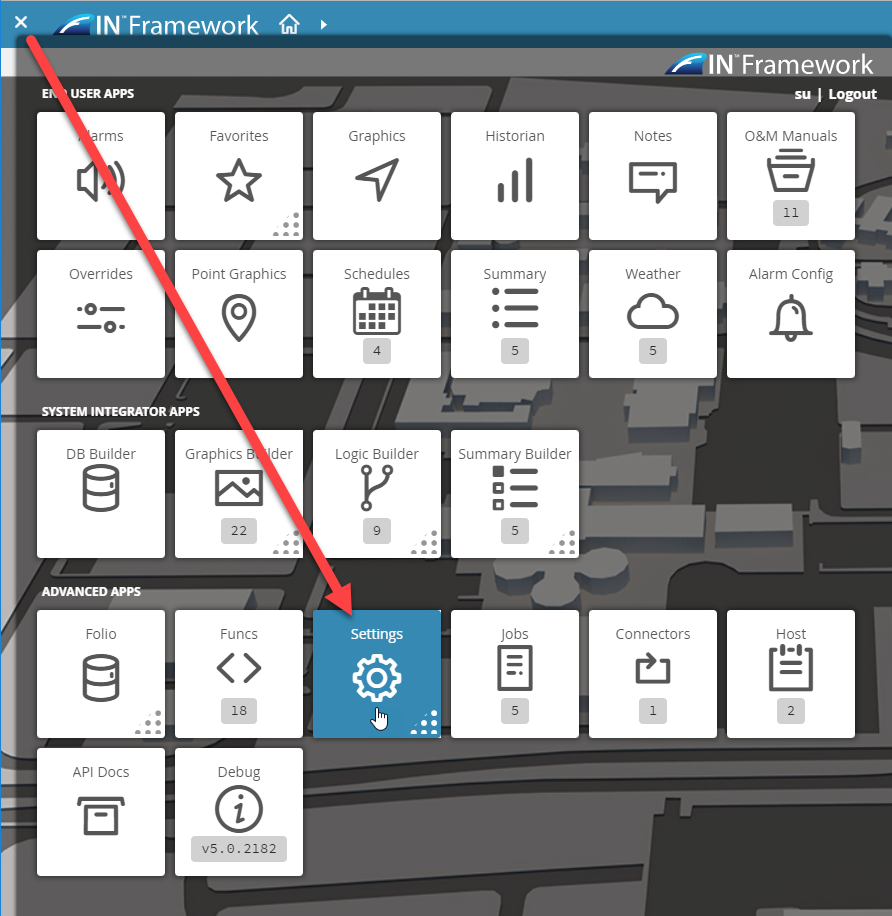
2. Once the Settings app is selected, they would select Ext option to then find the AlarmConfig ext to enable.

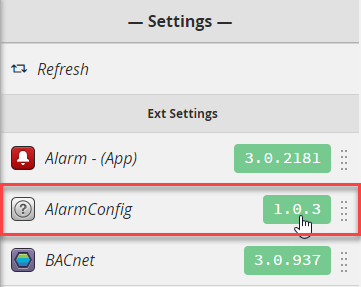
3. Once enabled, the user would refresh the browser to see the Alarm Config app available in the App Launcher.
4. Now that it is enabled, its time to create a Tag Bundle to use.
Creating Tag Bundle Example
1. The user would now need to open DB Builder and open the Tag Bundles tree to create a new tag bundle
- To learn more about the Tag Bundles Tree go here.
2. Once there, the user will click on the ![]() towards the top right to create a new tag bundle.
towards the top right to create a new tag bundle.
3. Once selected, the will be displayed with a popup window called Add Tag Bundle
4. When filled out, the user can select the Apply button to create a tag bundle

- Name (required) - this would be a name for the tag bundle
- Description (optional) - this is where the user can specify a description of what this tag bundle is for
- Allow Filter (optional) - this is where the user can specify which records this will run against and apply/remove the tags
- Tags to Add (optional) - this is where the user can specify what tags to apply to the point records
- Tags to Remove (optional) - this where the user can specify what tags to remove on the point records if any
- Config Type (required for Alarm Config) - this is where the user can specify what type of bundle this would be for. In our case, we choose Alarm in order for it to appear in the Alarm Config app.
- Once Alarm is selected, the user will get another option below it to pick the Point Kind (required) - this is where the user will pick for which type of point this bundle is for (this will make the bundle only appear for appropriate type in the Alarm Config app)

- Once Alarm is selected, the user will get another option below it to pick the Point Kind (required) - this is where the user will pick for which type of point this bundle is for (this will make the bundle only appear for appropriate type in the Alarm Config app)
- Track Bundle (optional) - this is where the user can specify if they want to track the bundle or not. What this does is adds a tag depending on what was chosen above on Config Type. In this case, Alarm was chosen, so it would add an "alarmConfig" tag on the point record and list the name of tag bundle(s) being used by that particular point. If none was selected for Config Type, the tag would be "bundles" and if History was selected, it would by historyConfig, etc.
Example

- Name - we chose "Boolean Alarms" for the tag bundle name.
- Description - we chose "Trigger alarm if bool is true."
- Allow Filter - we chose "point and kind=="Bool"" for the allow filter. This means we can only apply this to points that are boolean types.
- Tags to Add - we chose to add the below tags as examples of what the user can do, but the user can choose anything they want. Only one required is the "allowProgram":
- allowProgram (marker - required) - this tag is needed in order to allow a program to run on points, without it, the program cannot run on it only equips.
- alarmPoint (marker - personal preference) - this is a tag to categorize this point as an alarm point. So instead of using "alarm", we recommend using "alarmPoint" because "alarm" is a system tag that is reserved for the alarms app.
- alarmEnable (boolean - personal preference) - this is a boolean tag that we can use to remove a point from being "alarmable" if we needed to without removing it completely from the alarm configurations as we'll show you later on.
- boolAlarm (boolean - personal preference) - this is to label the point as "boolAlarm" so that we can distinguish it between different programs in the event multiple different programs on running on it for different types of alarms. We'll be using this in the programOn so that the program only runs on these types of points.
- alarmText (string - personal preference) - this is to add a dynamic alarmText instead of making a generic one in the alarmBlock when creating the alarms in the program. We'll be showing you how this is linked in the program later on. "bool" would be the variable name inside the program and the '$' before it is to grab the value of that variable and use it in the alarmText field. For example, if the bool variable returns the point navName, it will inject that navName in the alarmText field and say something like "Fan is true" for example.
- Config Type - we chose Alarm since this is an example of how the Alarm Config works
- Point Kind - we chose Boolean since we'll be created boolean alarms.
- Track Bundle - we enabled this to show you what would happen when applied
Creating Program Example
1. The user will navigate to an equip which the point lives under and create a new program.
- In our case, we navigated to our VAV-01 and created a new program that is below.

The properties we filled out are below:
- Name (required) - we named the program "Bool Alarms"
- Description (optional) - we added a short description of "Trigger an alarm if bool is true"
- Program On (required) - we added "alarmPoint and boolAlarm and alarmEnable==true and kind=="Bool"" as the filter. This program will only run on those points which match this filter.
- alarmPoint - we added this in the filter so that it looks for all boolean points that are tagged as alarmPoint
- boolAlarm - we added this so that we know that this is for boolean alarms not some other logic like occupancy or temps etc
- alarmEnable - this is a boolean tag so we can easily remove a point from being alarmable if we toggle it to false on the point itself. Its not needed but is only an example of what you can do.
- kind - this is a string tag that specifies the type of point to look for and not some other type
2. Once that is filled out, the user will select the OK button to continue and create the program.
3. With the program editor open, the user will select to Add Variables to add some tag variables in the program.


Properties
We'll be adding three tags:
- curVal (boolean) - this would be to get the curVal of the boolean points
- navName (string - variable renamed to "bool") - this would be to get the navName of the point and use dynamically in the alarmText tag. We could have left the variable name as navName and instead of specifying "$bool" in the alarmText, we could have specified "$navName".
- alarmText (string) - this would be to make the alarmText dynamic per point in case we wanted to change what the text says on some instead of all having the same text.
curVal:

- Tag Name - this is the name of the tag we are looking for on the target (point), it is case sensitive
- On - this is to specify where this record is found based on the target that the program is running on. Since the program is running on a point (itself), then we pick a target.
- Data Type - this is a boolean point and the curVal is boolean type, so we need to specify that it's a boolean
- Is - this to know if we are to read or read and write to this tag. In this case, we are only reading the value to trigger an alarm so we leave as read-only.
navName:

- Tag Name - this is the name of the tag we are looking for on the target (point), it is case sensitive
- On - this is to specify where this record is found based on the target that the program is running on. Since the program is running on a point (itself), then we pick a target.
- Data Type - the navName tag is a string because the name can be anything, so we need to specify that its a string
- Is - this to know if we are to read or read and write to this tag. In this case, we are only reading the value of the name so we leave as read-only.
alarmText:

- Tag Name - this is the name of the tag we are looking for on the target (point), it is case sensitive
- On - this is to specify where this record is found based on the target that the program is running on. Since the program is running on a point (itself), then we pick a target.
- Data Type - the navName tag is a string because the name can be anything, so we need to specify that its a string
- Is - this to know if we are to read or read and write to this tag. In this case, we are only reading the value of the name so we leave as read-only.
7. Once the three tag variables are created, the tags will be available to use in the program.
8. Now the user would create the logic they would want
- In our case, it's a simple where if the boolean point is true, we'll be triggering an alarm.

9. We'll toggle to the Alarm routine tab towards top left/center.

10. Then we drag out an alarmBlock from the library bottom left.

We then link that to the routine start block and set the below:
- alarm "Select a variable" - we select the curVal variable to set as the trigger for the alarm since the alarmBlock takes boolean variables only to trigger alarms.
- alarmText - we link the alarmText variable to a strMacro block first, then to the alarmText property. The reason we need a strMacro block, in this case, is that we are using the '$' in the alarmText to generate a dynamic string that pulls the value of a variable. In order for that to work, it needs to go through the strMacro block. If we didn't use that dynamic feature, we would just link directly to the alarmText property on the alarmBlock.
- instructions - we put something random here like "Please check this". Note: this can be made dynamic like the alarmText if the user chose to add another tag called "instructions" to the point. Then they can change it per point if they wanted some to be different.
- priority - we set this to 100

11. Now the user will save the program and we'll be ready to use the Alarm Config app and configure boolean points as alarmable.
Using Alarm Config App
To use the Alarm Config app, the user will:
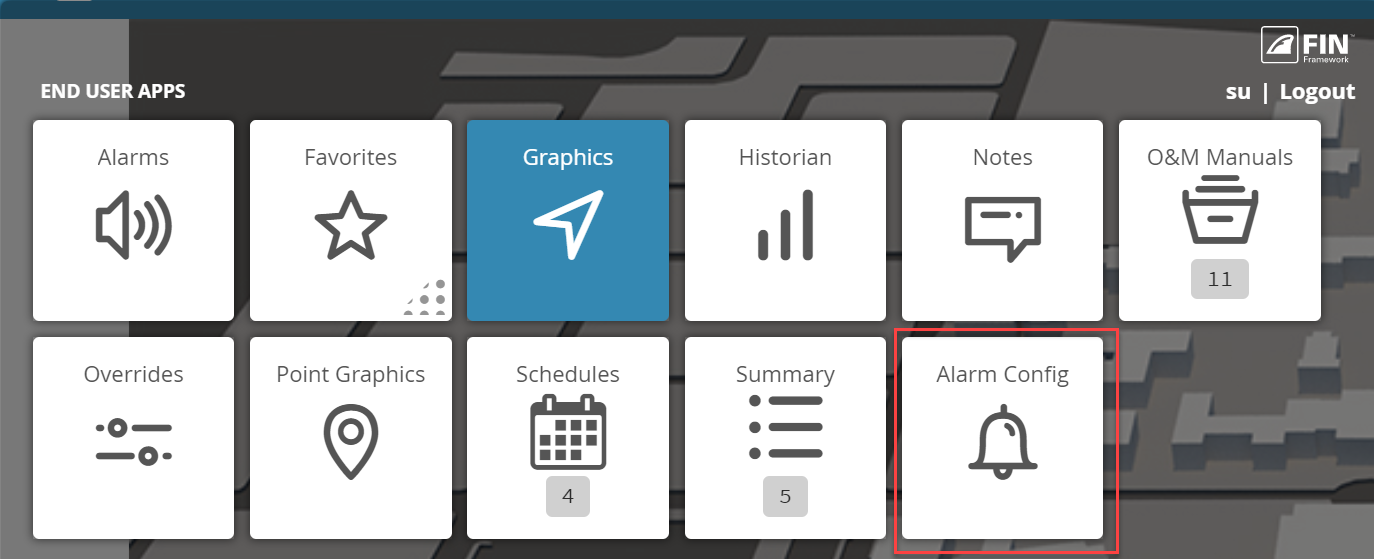
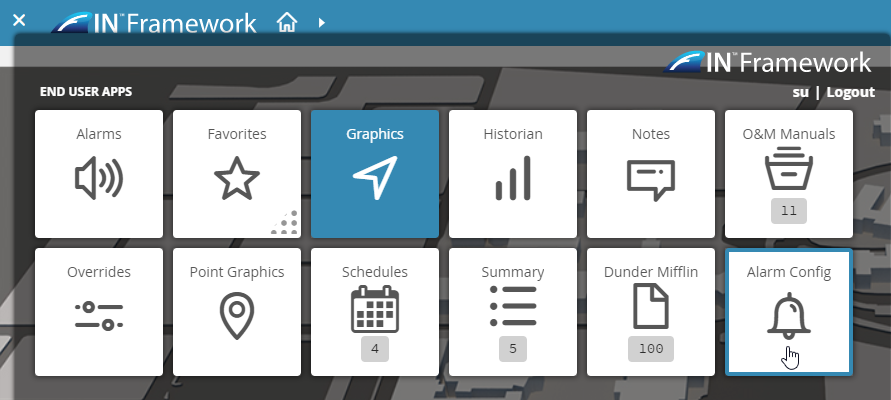
1. Open up the App Launcher top left the corner and select Alarm Config app
2. Once selected, the user will see the below screen
- It is context-sensitive so if the user is on a site level, they would see all the points under a site
- If they are on an equip, they'll only see the equip points from that target
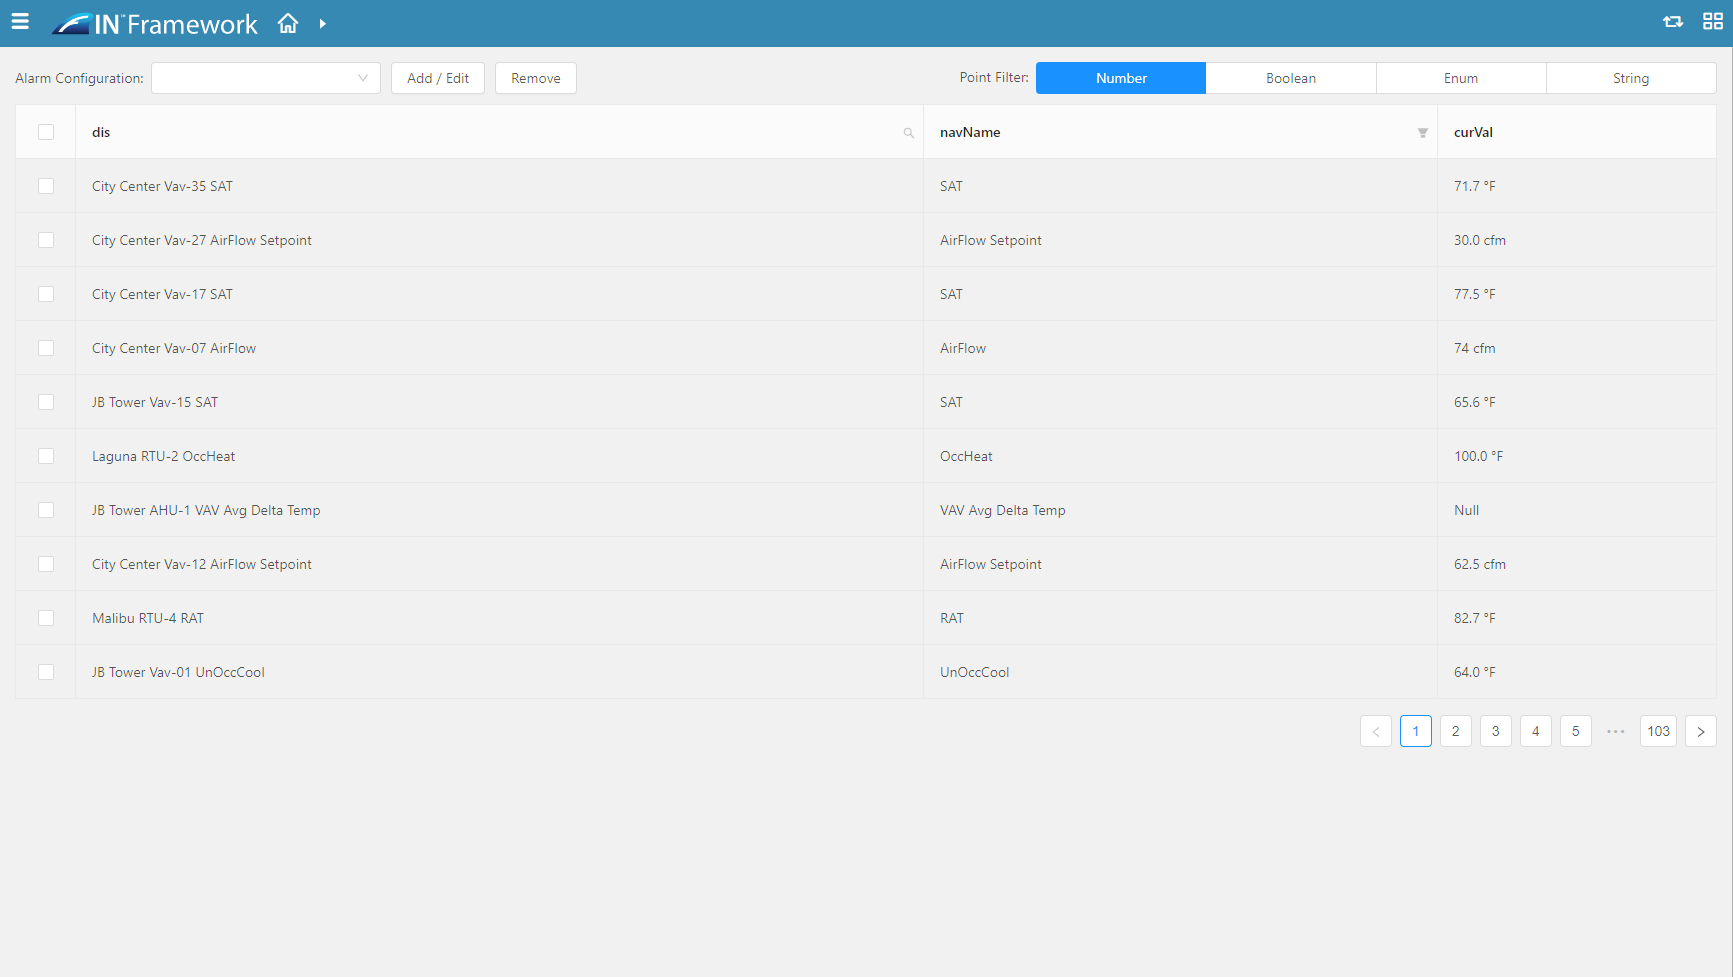
- A. This is where the available tag bundles configured as "Alarm" type would be listed in the dropdown depending on the Point Filter type selected (D).
- B. This is where the user will be able to add or edit the alarm configuration tags that were specified on the tag bundle for selected points in the grid (E).
- C. This is where the user can remove an alarm configuration on selected points in the grid (E) so that they are no longer alarmable. (another way is to uncheck them from the grid view under said config column)
- D. This is where the user can choose a point type to filter through.
- E. This is where the points grid where the points would be listed once an Alarm Configuration was chosen (A).
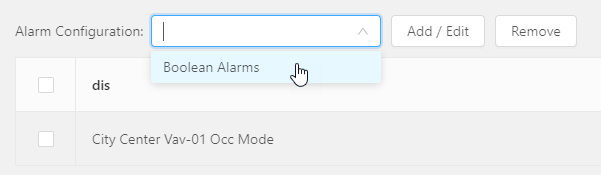
Point Filter
In our example, we'll first have to select the "Boolean" type for the Point Filter since we currently only have a boolean type alarm configuration.

As we do, we only see boolean type points. We are on VAV-01 so we only see one boolean point
- If you want to apply to multiple, you can move up to a higher level in the navigation tree.

Alarm Configuration
Then we are able to see the available boolean alarm configurations we created in the Alarm Configuration dropdown
- We select the Boolean Alarms so that we can apply that to points we want to add to selected points
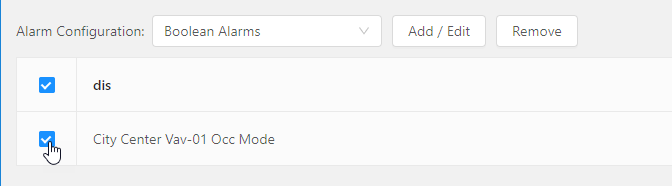
Add/Edit
Once we have selected the Boolean Alarms configuration, we select the points in the grid that we want to apply this too.
- In our case, we select the only boolean point we have under this VAV-01 equip.
We then select the Add/Edit button (B) to open up the below popup.

In this Add/Edit popup, we see the tags that we specified in the tag bundle to add to the points.
From there the user can select "OK" to apply the tags or they can change the property tags in this popup before applying if they wanted to.
Once we select OK, the alarm configuration will be added to the point to become alarmable.

Once added, depending on the alarm configuration, it will add a new column to the point grid with that alarm configuration name
- In our example above, you see "Boolean Alarms" column was added to the end to display that that point is configured to that alarm configuration.
Remove
To remove a point(s) from a certain alarm configuration, the user would first select the point and then select the Remove button or just uncheck the box under that alarm configuration column.

Result
That's it, once an alarm configuration has been applied to a point. The user can then go and check the point to see the tags that were added to the point.

You can see the "alarmConfig" tag was added as well, which is what the "Track Bundle" property does so that the user knows which current alarm configuration is applied to the point.
Also, since the curVal of our boolean point is true, an alarm is generated.
As you can see in the top title of the alarm says "OCC MODE IS TRUE", which is what we specified in the alarmText. Its letting us know the name of the point that is currently true. We could have added other strings to know which equip and site etc its under if we wanted too.

If the user were to have toggled the "alarmEnable" property tag, it would prevent the program from running on it since in the programOn filter we said it had to be true.
Now, if the user were to go back to the Alarm Config app and remove the point from that alarm configuration, all the tags would be removed from that point to make it not alarmable.
