| Table of Contents |
|---|

Description
This model can return 4 values. When the header is clicked will reorder the contents to be ascending and when clicked again, will be descending.
Completed Model (Basic)
Download: RactiveTableractiveTable.zipf5m

to work you must set up a query of what you want to be displayed. In this example we are using readAll(energy).map(row=> row.set("energyData",readById(row->id).hisRead(thisMonth).hisRollup(max,1mo).toRecList()[0]->v0))
With your ractive model selected go under properties and advanced and click the plus icon on the bottom left
call it data query and on the right define your query
Video
Example:
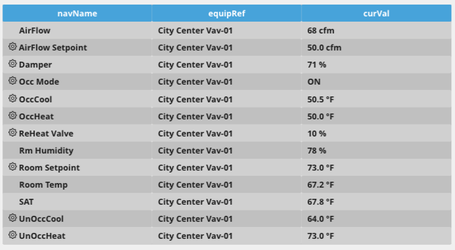
place on an equip
Ractive Code
Template
| Code Block | ||||
|---|---|---|---|---|
| ||||
<table class="view-container s-width"> <tr> <th class="view-superman-value s-pointer {{ sortColumn === "idDis" ? "sorted" : "" }}" on-click='sort:idDis'>Meter<width30">navName</th> <th class="view-superman-value s-pointer {{ sortColumn === "equipRefDis" ? "sorted" : "" }}" on-click='sort:equipRefDis'>Description<width30">equipRef</th> <th class="view-superman-value s-pointer {{ sortColumn === "siteRefDis" ? "sorted" : "" }}" on-click='sort:siteRefDis'>Location</th> <th class="view-superman-value s-pointer {{ sortColumn === "writeDef" ? "sorted" : "" }}" on-click='sort:writeDef'>Usage<width30">curVal</th> </tr> {{#each sort( myPoints, sortColumn, reverseSort ) #myPoints}} <tr> <td class="view-superman-value {{#if @index % 2 == 0}} status-stale {{else}} status-disabled{{/if}}" on-click="magicB">{{idDis#if actions}}</td> <td<label class="viewicon-superman-value {{#if @index % 2 == 0}} status-stale gear s-pointer" on-click="actions"> </label>{{else}} status-disabled {{/if}}"<label on-click="magicB">{{equipRefDisnavName}}</label></td> <td class="view-superman-value {{#if @index % 2 == 0}} status-stale {{else}} status-disabled{{/if}}" on-click="magicBmagicBEquip">{{siteRefDisequipRefDis}}</td> <td class="view-superman-value {{#if @index % 2 == 0}} status-stale {{else}} status-disabled{{/if}}" on-click="magicB">{{writeDef.toFixed(2)curVal}} {{unit}}</td> </tr> {{/eachmyPoints}} </table> |
This specific code returns the idDis, equipRefDis, siteRefDis, and writeDef from the query. To return something different, just change the desired value to the new value in all three spots in the code.
...
| Code Block | ||||
|---|---|---|---|---|
| ||||
{
data: { myPoints: [], sortdata:
function ( array, column, reverse ) { array = array.slice();
array = array.sort( function ( a, b ) {
return a[ column ] < b[ column ] ? -1 : 1;
});
if(reverse)
array = array.reverse();
return array;
},
sortColumn: 'idDis'{
            myPoints: [],
        }
} |
This sets up myPoints to get the data from the query. It also sets up ascending and descending order for when the header is clicked
...
| Code Block | ||||
|---|---|---|---|---|
| ||||
.s-pointer{
    cursor: pointer;
}
.s-width{
    width: 100%;
}
.s-width30{
    width: 30%;
}
.s-width10{
    width: 10%;
} |
s-pointer changes the cursor to a pointer to let the user know that the table headers are clickable
...
| Code Block | ||||
|---|---|---|---|---|
| ||||
this.ractive.fire("obtainData");

this.ractive.on( 'sort', function ( event, column ) {
var current"magicB", function(event) {
    var item    = this.get(event.keypath);
    if (item)
    top.app.ShowRelatedBubbles(item.pointId, item.pointId, true, event);
});

this.ractive.on("actions", function(event) {
    var item    = this.get('sortColumn');
this.set( 'sortColumn', column );
this.set( 'reverseSort', column == current event.keypath);
      var mainWin = window.parent;
     try {
        mainWin.app.ShowActionsFor (item.pointId);
        } catch (err) {console.error(err)}
});

this.ractive.on("magicBEquip", function(event) {
    var item    = this.get(event.keypath);
    if (item)
    top.app.ShowRelatedBubbles(item.pointId, item.pointId, false, event);
}); |
obtainData is what connects the Ractive model to the program, and the rest sorts the data
...
| Code Block | ||||
|---|---|---|---|---|
| ||||
this.ractive.fire("obtainData"); this.ractive.on( 'sort', function ( event, column ) { var current = this.get('sortColumn'); this.set( 'sortColumn', column ); this.set( 'reverseSort', column == current ); }); this.ractive.on("magicB", function(eventvar dataPoints = this; var targetPoint = query('targetPoint and virtualPoint'); var template = this; var target = query('targetPoint'); finstack.eval('readAll(equipRef=='+ targetPoint.pointId +' and point).sort("navName")').then(function(data) { var item myPoints = []; var realPoints = thisdata.result.get(event.keypath);toObj(); realPoints.forEach(function(p,index) { myPoints.push({ curVal if: GetPrettyValue(item)p), top.app.ShowRelatedBubbles(item.id, item.id, true, event navName : p.navName, pointId : p.id, equipRefDis : p.equipRefDis, actions : p.actions || null, write1 : p.write1 || null, write8 : p.write8 || null }); }); template.ractive.set({'myPoints':myPoints}); }); |
dataQuery is what is getting the query
...
- Bring Ractive out from components on the left side menu, and click on it to have the green outline


- Under properties open the ractive editor, and copy and paste from the Ractive Code given above for template, model, style, and init
- After copying and pasting, should look like the screenshots below


After saving go to programs and add a new program
- Name your program, and set the program target filter to stackRactive
- Top right of program editor, click the three dots, and select variables
- Click the gear that appears as you hover over this
- turn Invokes the Function on and change the dropdown to Custom Event
- Type in obtainData in the line below and save
- Copy and paste the above code for program into the main part and save
- Go under properties and select the advanced tab
- On the bottom left select the plus icon
- Call it dataQuery, and next to it define the query you want to be displayed
- Below is what we set as our query, but it can be changed for a different output:
- readAll(energy).map(row=> row.set("energyData",readById(row->id).hisRead(thisMonth).hisRollup(max,1mo).toRecList()[0]->v0))
- Save and you're done!