Create Batch Records
- Michael Whalen (Unlicensed)
- Ricky Villa
- Aaron Sanchez
- Kimberly Cruz (Unlicensed)
The forms for creating batch records are used to complement the instructions given in the Batch Record Creator. The purpose is to simplify the process of saving user-created records.
First Method
1. To create records, you may select sites, floors, equips or points. You may select multiple of each, but only of the same type. Multiple equips are selected in the picture, but it is also possible to select just one item.
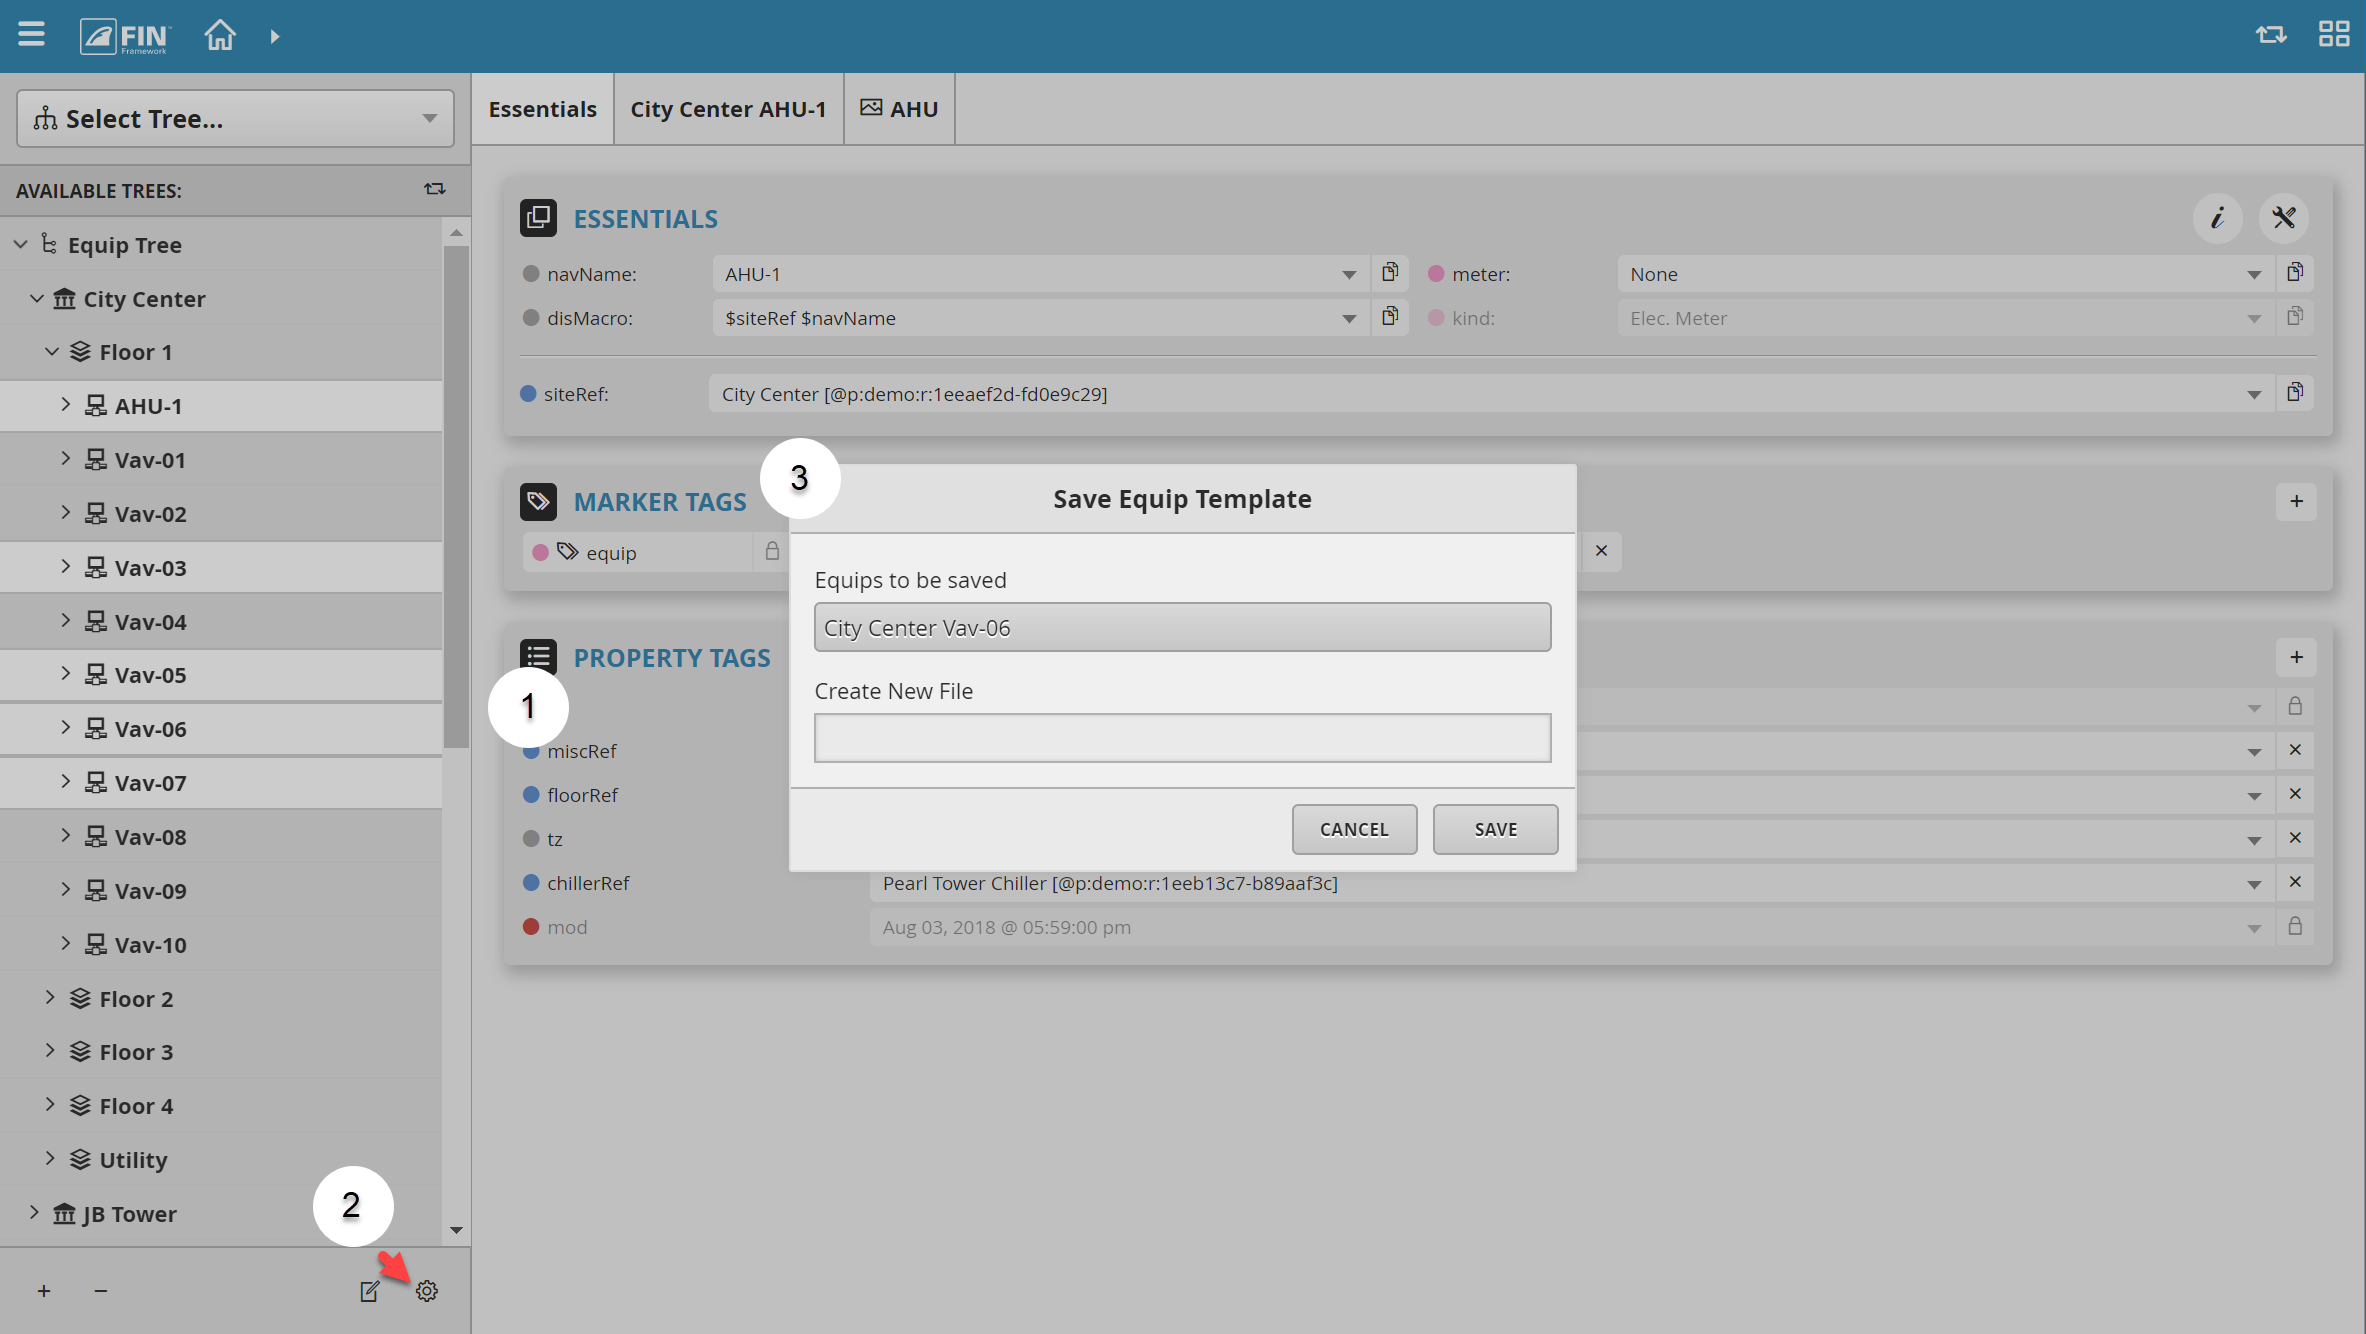
2. Once you have selected your pieces, click on the Tools menu and then on the Create Batch Records menu.
- You will see a tool that says "Save (type of object you selected) Records". Click on that to save the records.
3. A form will pop up showing what you selected. You cannot interact with the list, it is just there to show you what will be saved.
4. When you are ready to continue, click Save.
Upon clicking Save, the form will disappear and a zinc file will be made in the directory "C:\Program Files (x86)\FIN Stack\FIN Stack <your version>\db\<your project>\io". \
- Depending on what kind of object was selected, it will have that name plus "Records.zinc".

This method will work for anything that follows the default navMeta of /site/floor/equip/point and will save a zinc file starting with any one of those
- The form will also append newly created objects into the corresponding file
- So a new point may be saved into the PointRecords.zinc file
Second Method
Specified records may be saved through the Tools menu in the Folio app.
This method allows saving of any kind of object as long as it follows the navMeta of the project, which can be default or user-specified. Objects will also be auto-sorted so it is possible to specify floors and equips and have each put into it's own file, so a filter of "point and floor" will make two files, one for points and one for floors; this also works with other tags and Rec ID's.
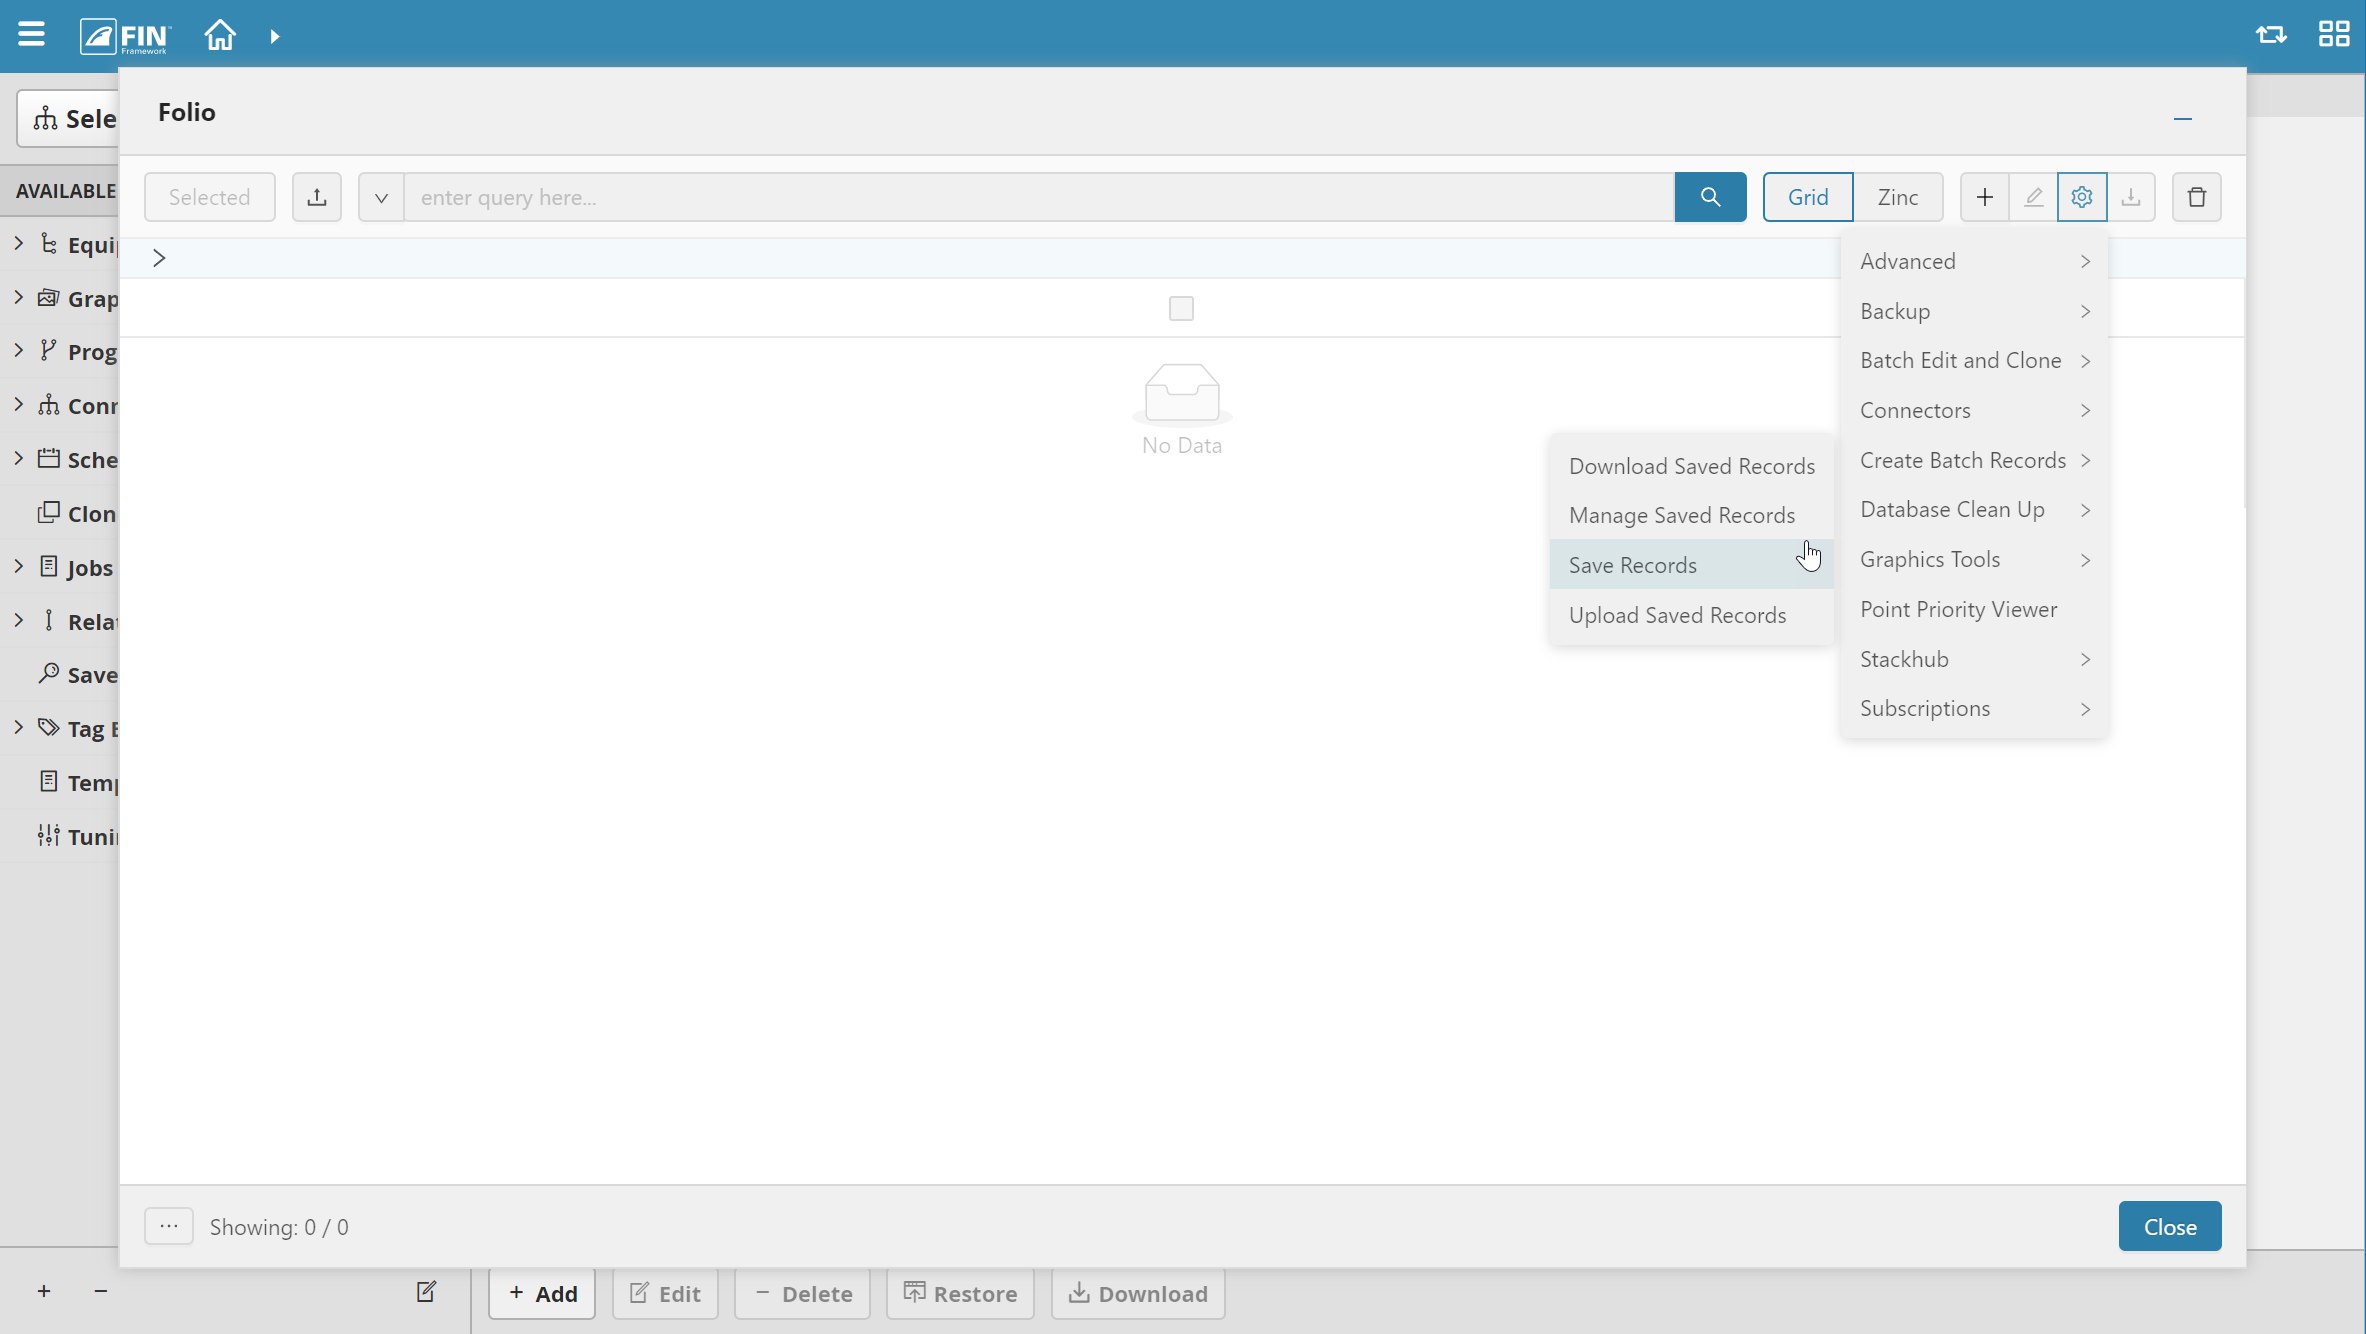
1. The same part applies for clicking on the Tools menu and then clicking on the Create Batch Records menu.
2. You will be presented with a tool called "Save Records". Click on it to begin selecting records to save.
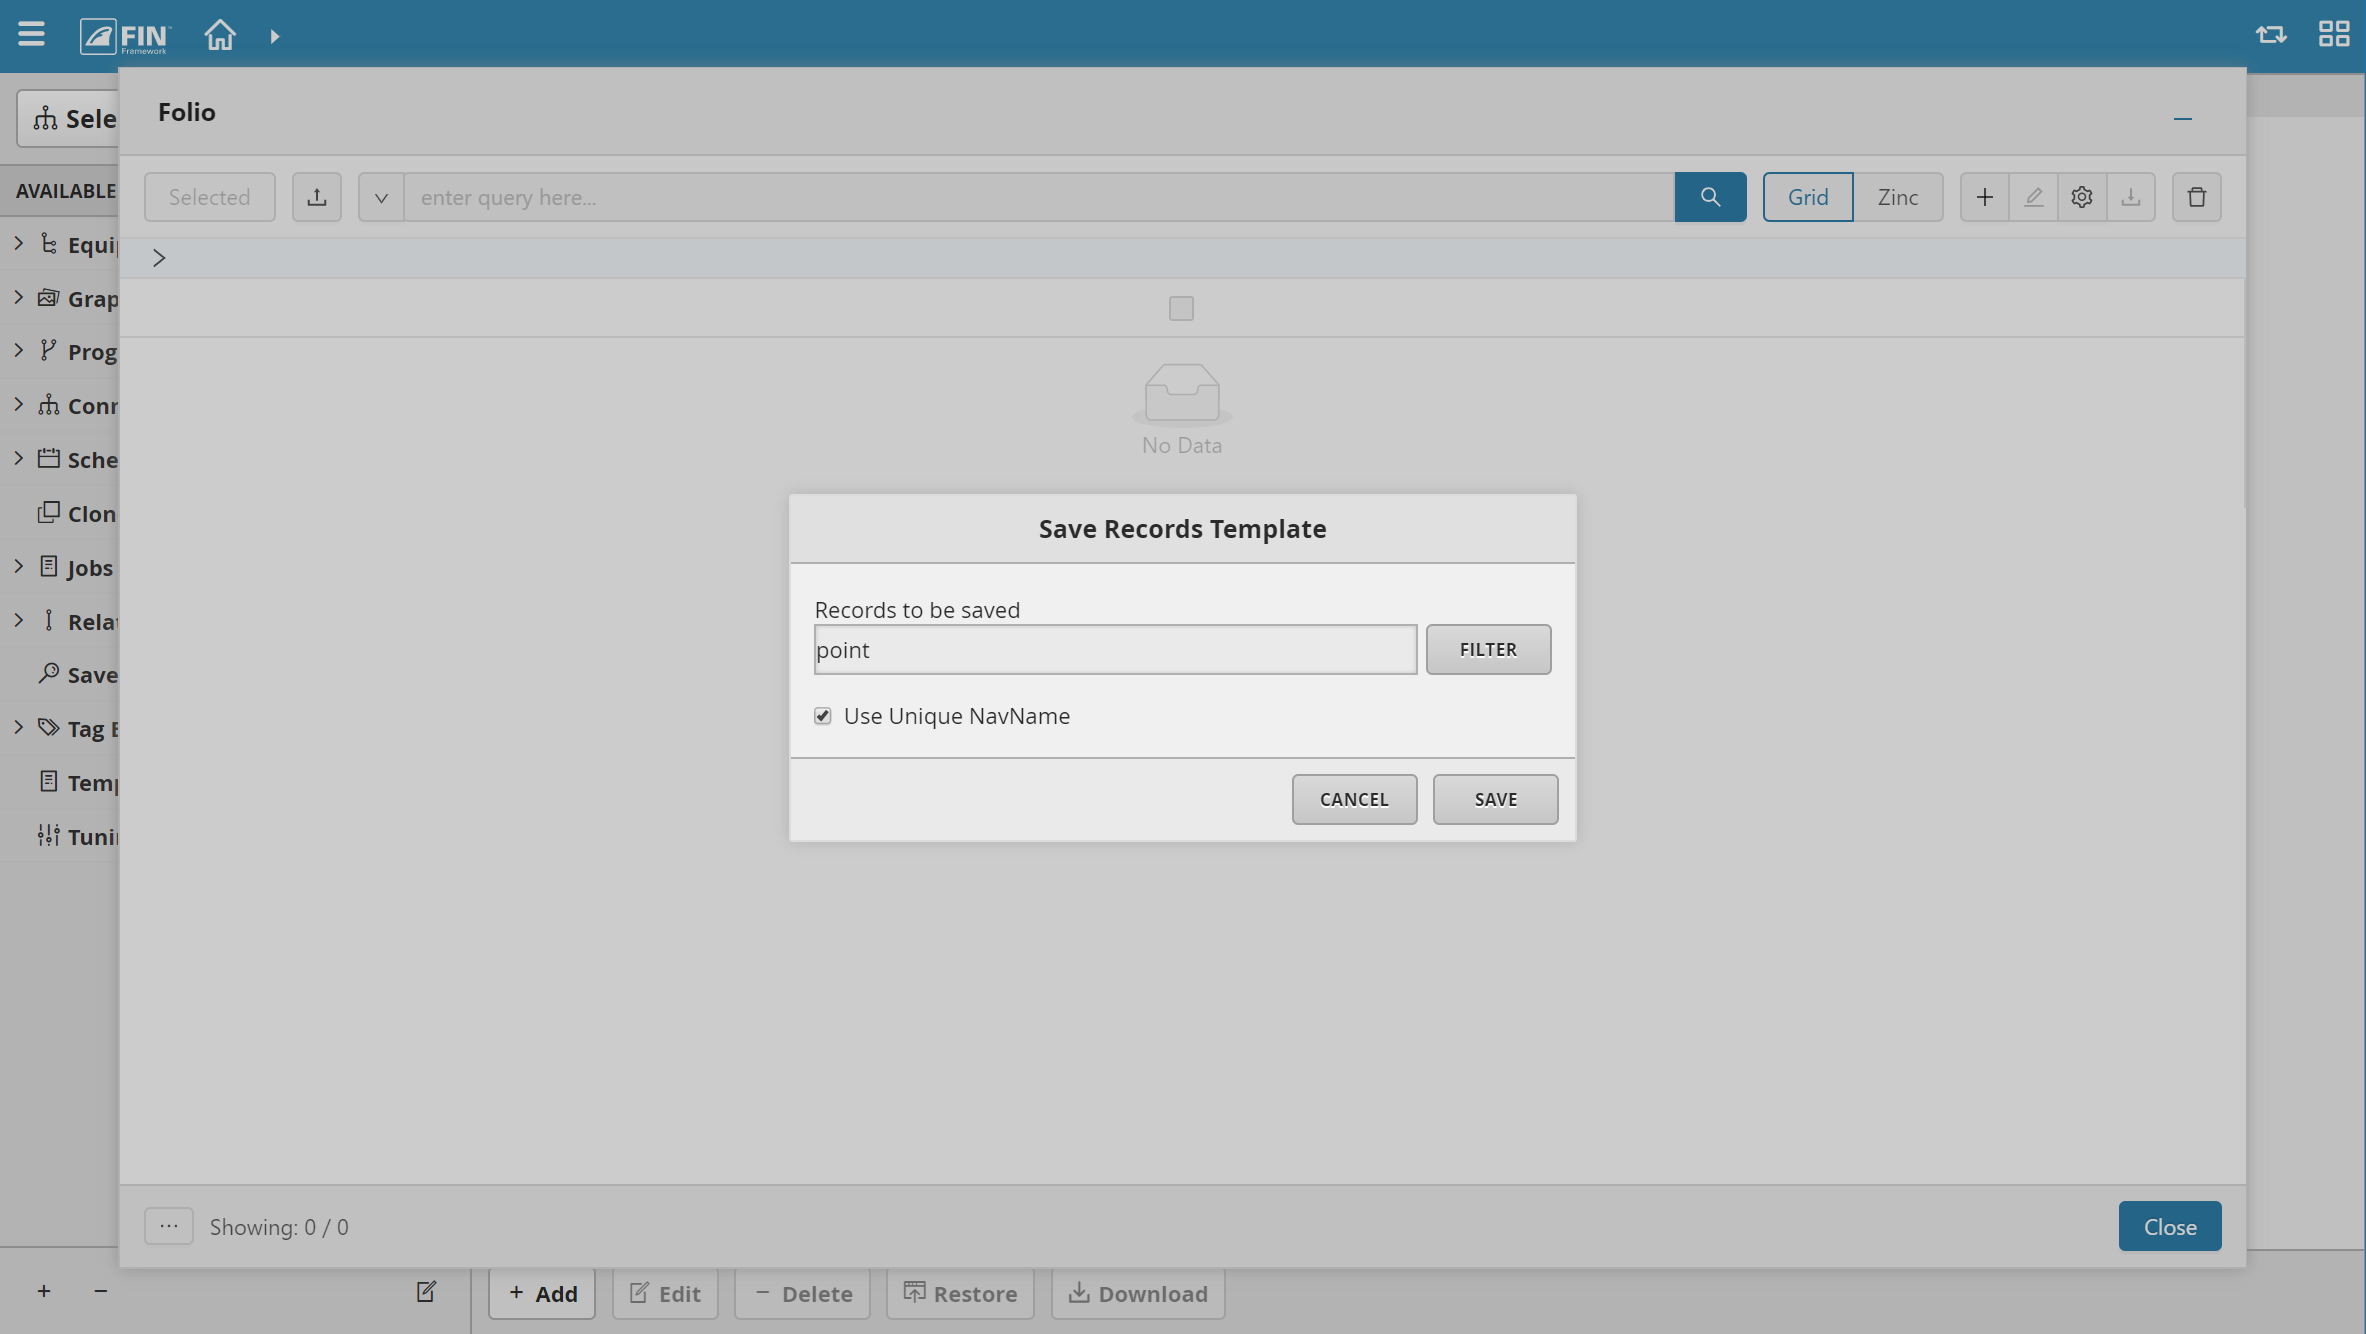
3. Clicking on it will open a form with a filter box and a checkbox.
- The filter is used for entering the specified objects that you wish to save a record of. Take points for example.

4. By clicking Save, you will save a record of every single point, which may be desired at certain times, but will mostly give redundant data when you use the Batch Record Creator
- Notice how there are three Room Setpoint records that were saved, this will end up using more memory, taking more time, and simply making the list longer.

5. The solution to this is to use the "Use Unique NavName" checkbox
- Doing so will save only one of every point with the same name, this way you will only have one Room Setpoint and one of each other type of point.
Concluding
When you are ready to use the records you saved with these forms, simply follow the guide at this link: Batch Record Creator.
Download: