Fin Mobile Mapping
Fin Mobile Mapping
Fin Mobile Mapping is for customers who wish to add their own custom point images.
Icon Dimensions
Make sure you create your icons as 80px x 80px.
How to add custom point images
First, the user can download example zinc templates for custom icons: ZincTemplates.
Now with those files, the user can follow the below steps to implement them.
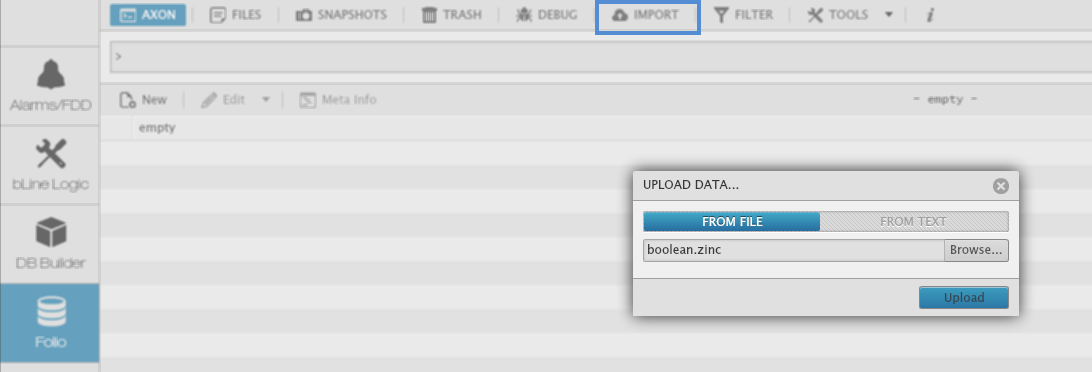
- Import a zinc file through folio.
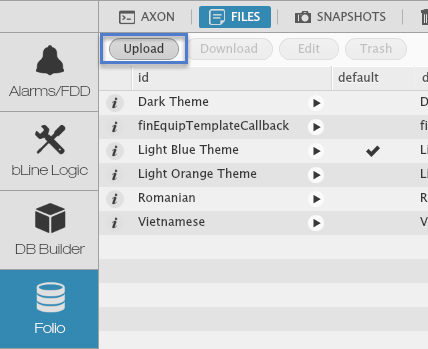
2. Upload the icon image through folio->files.
3. Query 'finMobileMapping' in folio.
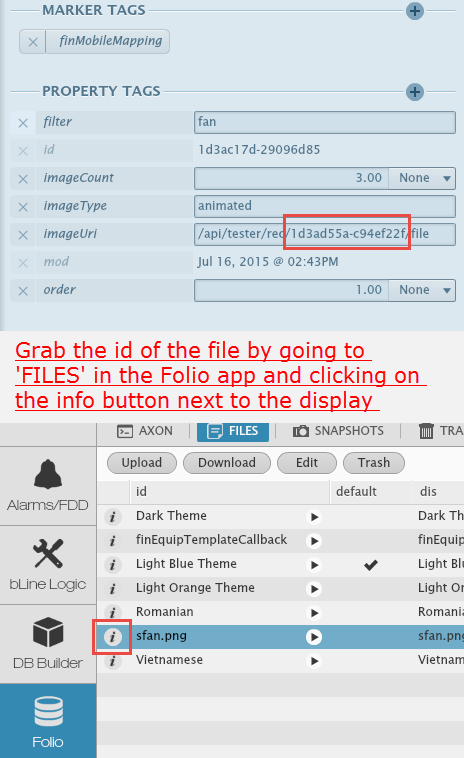
4. Edit the record in finMobileMapping depending what properties tags they have:
- filter: Filter for the point graphic(s) for which you want this icon to show up.
- boolOff (strictly for boolean) : 0 defining the position of the icon being "off."
- boolOn (strictly for boolean) : 1 defining the position of the icon being "on."
- maxCurVal (strictly for numbers): The max value of where the last frame/slice ends. (ie. our dampers, coils, and filters are 5 slices and with max=100 and min=0. When the value of the point reaches 20, it'll display frame 2 and so on)
- minCurVal (strictly for numbers): The min value of where the first frame/slice begins.
- imageType: Choose one from: animated, static, multiple
- animated (booleans): an animation of an icon that will run (i.e..fan).
- multiple (numbers and booleans): means there are at least 2 or more frames/slices being used (i.e coils, dampers, occupied).
- static: One image that will never change (ie. temp).
imageCount: Dependent on how many frames/slices being used for image.
imageCount - Slicing & Animations
If a user is going for a multiple or animation image, then the user will have to set up an imageCount of higher than 1 depending on how many slices are within the image. The imageCount will depend on how many icons are in your image, in other words, how many increments of 80px tall your image is. (I.e... 2 icons will be 80px x 160px...3 icons will be 80px x 240px...10 icons will be 80px x 800px..etc)
For example: If I want to make a damper for a damper point, then I will have to set my imageCount to 5 and my image would be 80px x 400px.
- order: Priority of image to display. We recommend to start order at 100 (low priority) and work you way from there to 0 maybe in increments of 5. Make sure no 2 different icons have the same tags or they will conflict with each other. (i.e.. if 'fan' has iconA but 'fan and discharge' has iconB, they will conflict unless order is specified. You'll need to place a higher order number to the icon that conflicts with another filter and 0 is higher than 100).
- imageUri: Identifier of the location of your image. Since you have your image uploaded in FIN|Stack, you'll want to use this syntax: /api/<project name>/rec/<fileID>/file (see screenshot for example).
Our finMobileMapping Example
If you would like to see our finMobileMapping example that we use for our point icons to help make some sense of the above properties, you can download ours here to use and modify if you like. The only difference with ours is we get our images from our pod.
5. Your icon is now input on points with the 'fan' filter.
finMobileMapping Library
Once you upload those examples, you can duplicate them in folio and create new filters. You can start creating your own list of custom point icon filters all queried with the same tag "finMobileMapping". From there you can download them and save as a template to use for other projects. You'll just need to make sure they all reference the correct image in Files.


