Alarms
- Petrescu, Ioana (FT D EU RO BP)
- Ricky Villa
- Sarah Padilla (Unlicensed)
Alarms App
The Alarms app allows the user to see all the alarms in the project along with all of the alarm information, and the ability to acknowledge them as well.

Accessing the Alarms App
The alarms app can be accessed in a few different ways. See below:
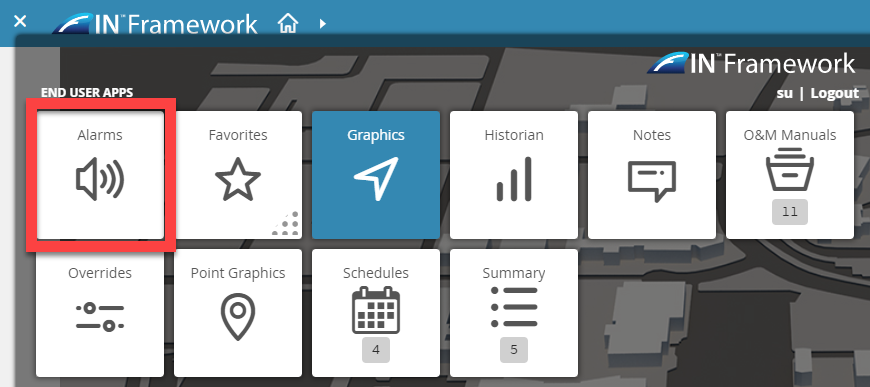
App Selection Menu
The Alarms App can be found in the App Selection Menu under the "End User Apps" section.
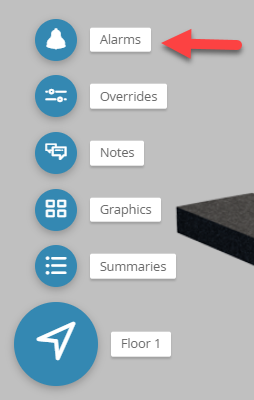
Related Bubbles
The Alarms App can also be accessed via Related Bubbles, ONLY if there are alarms referencing the object that triggered the related bubbles.
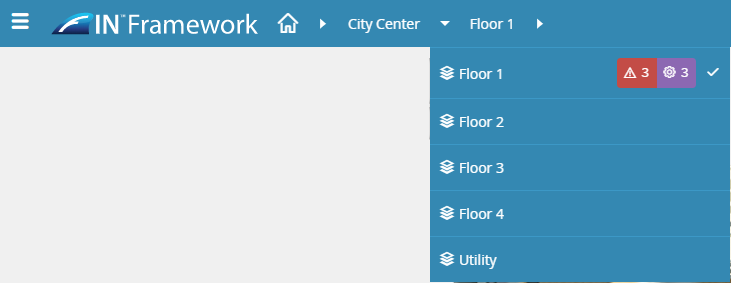
Navigation Header Badges
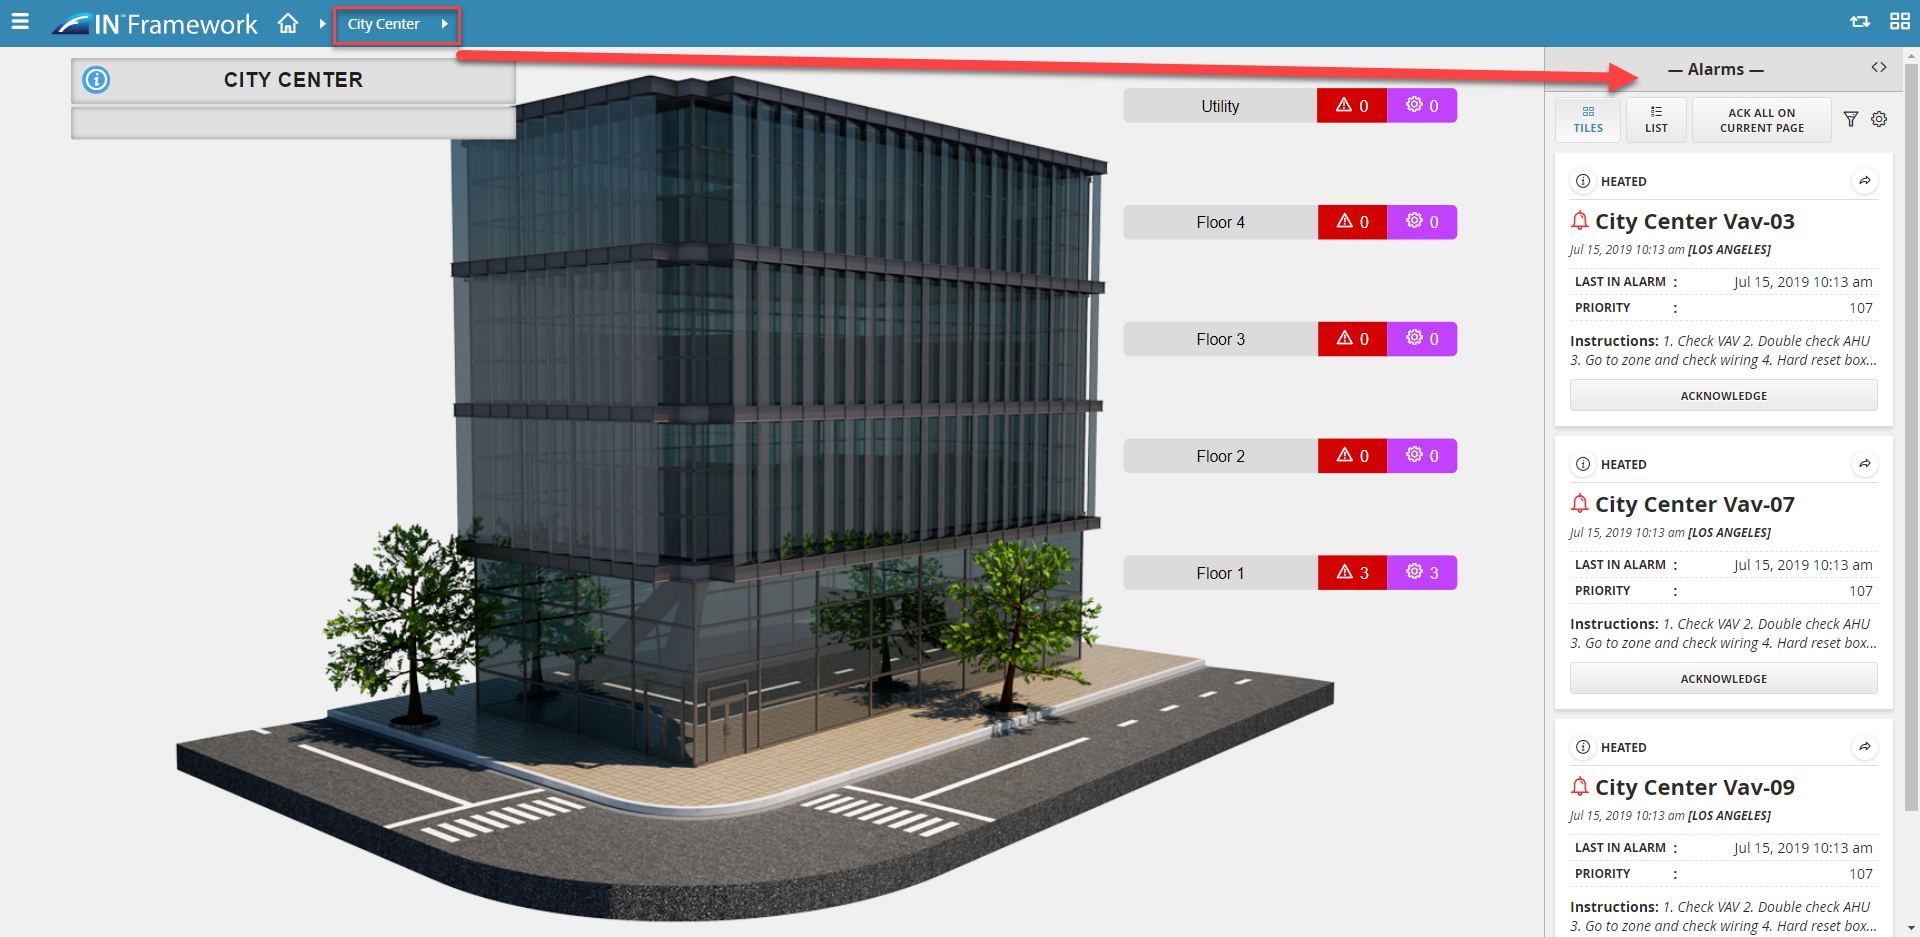
Another way to access the Alarms App is by clicking on the Navigation Header's Alarm badges that appear in "Red" for objects that have an alarm referencing them.
You must click on the "red" Alarm Badge for it to appear in the mini app.
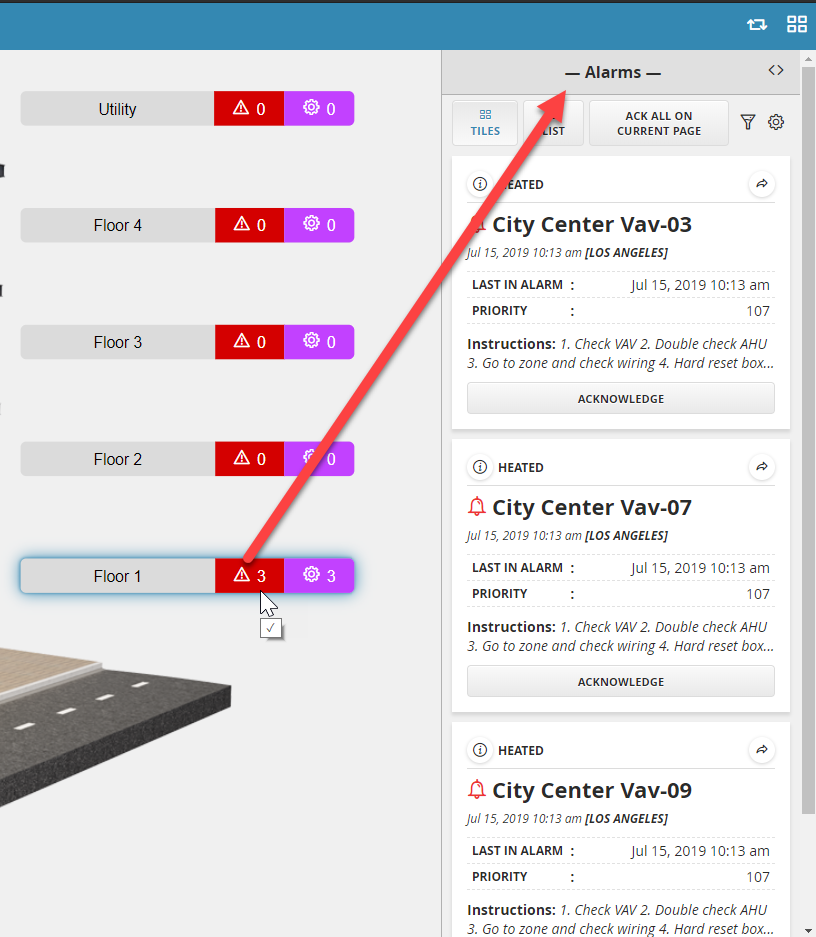
Status Indicator Labels (Graphics)
Similar to how one would access the Alarms app via the Navigation Header badges, users can click on the 'red' Alarm portion of the status indicator component to open the Alarms app.
Using the Alarms App
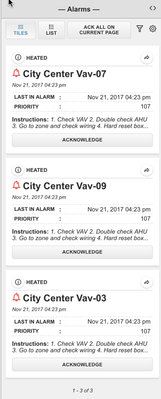
When the Alarms app is selected the user will see a complete list of all the alarms that reference the current context in the Nav header. The first view will be displayed in the Mini App section, to the right side of the screen.
Desktop View (Launch)
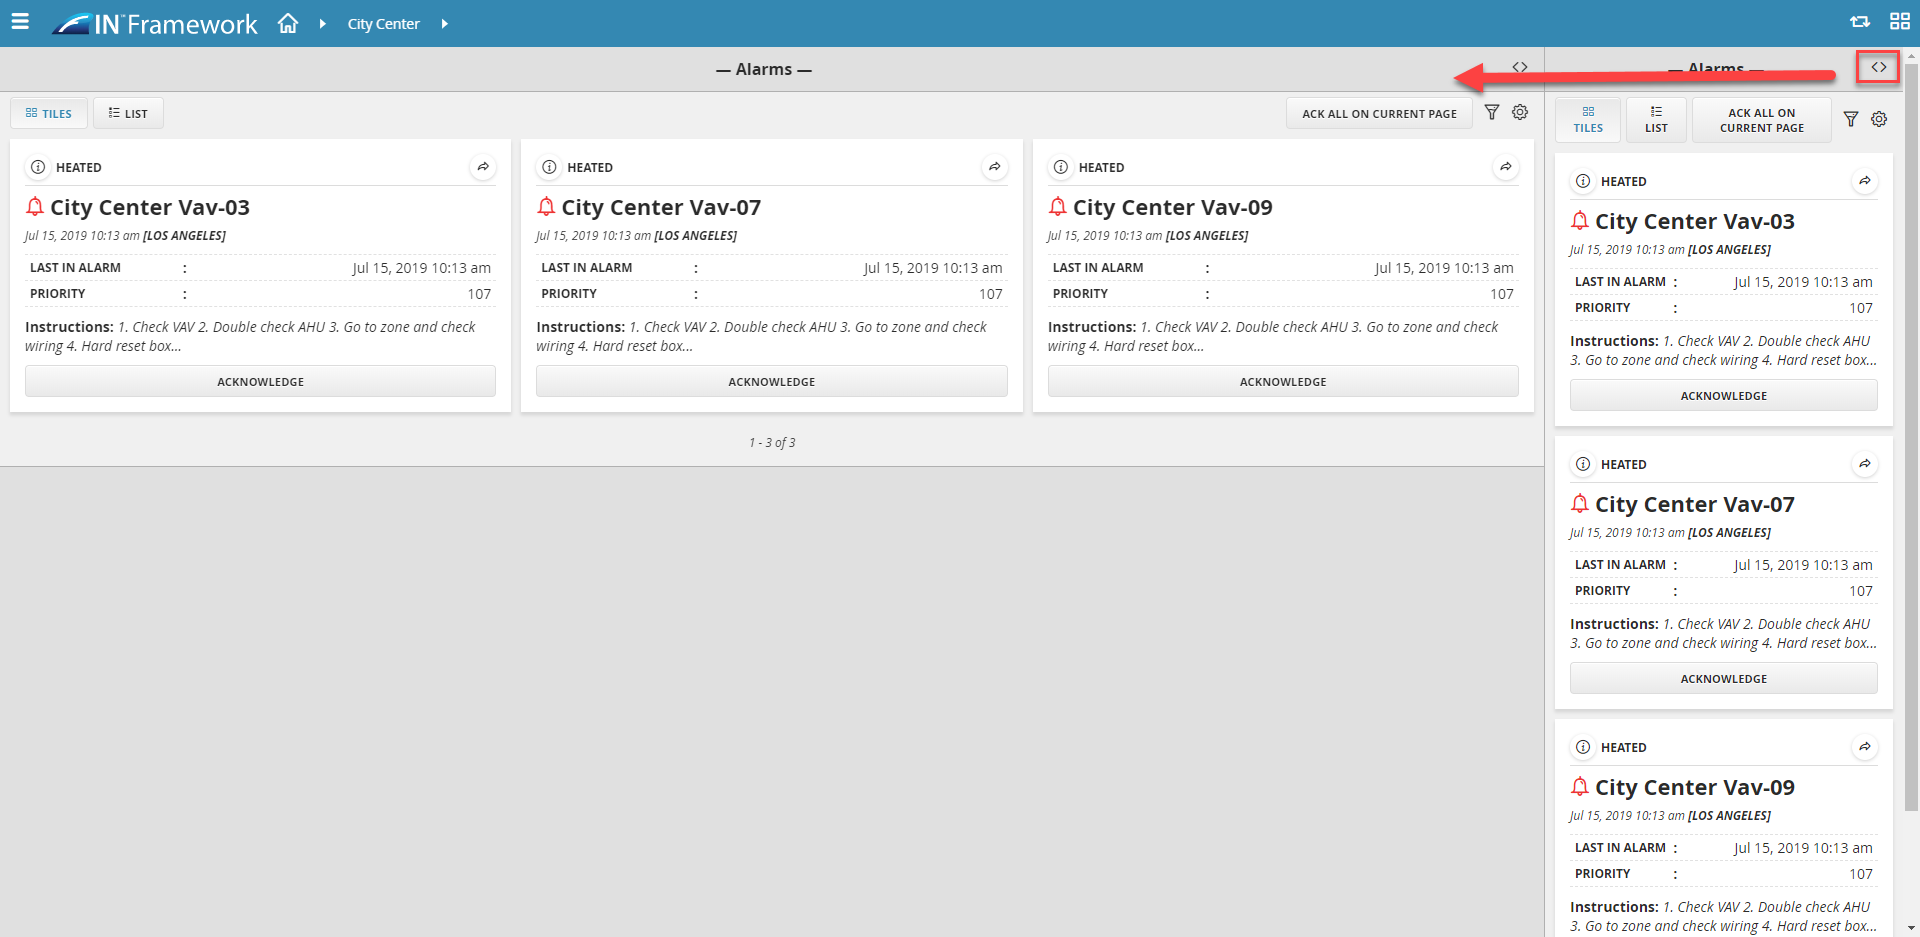
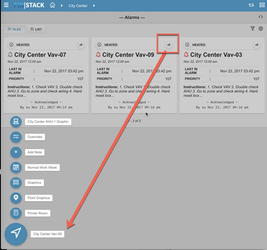
Next, to the name of the app, the user will find a double-sided arrow icon, that (when clicked on) will launch the current alarm mini-app view into the main view of the screen.
This is a desktop only feature as it requires larger screen realistic. The enlarged view contains the same features as the mini-app (features listed below) but just provides more room, and may be a more efficient way to view the alarm info when working with a large number of alarms.
Tile View
The Alarms app offers two different ways for viewing alarm data, Tile View and List View.
By default, the Alarms app opens up in the "Tiles" view.
The Tile view takes the alarm data and places it into a mobile-friendly tile.
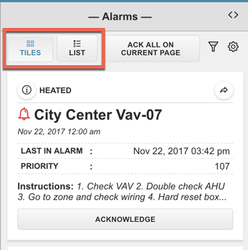
List View
The List view takes the alarm data and lists it out in a horizonal table-like list.
This view works best when on a desktop.
 +
+
Acknowledging
Once an alarm is viewing, the user may want to Acknowledge the alarm.
The alarms app offers two ways of acknowledging your alarms:
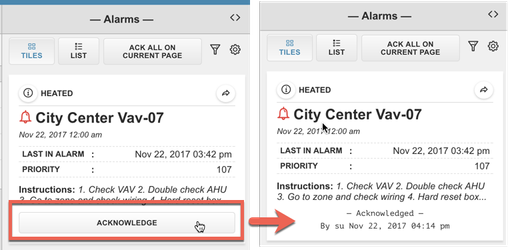
Acknowledge Individual
Users can acknowledge an individual alarm using the Acknowledge button on its tile/row.
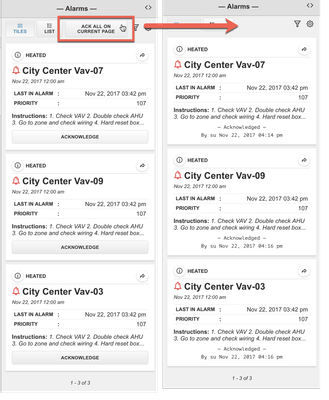
Acknowledge All
Users can also Acknowledge All of their current alarms at once by using the Ack All On Current Page option.
If all Alarms on the current page are already Acknowledged, then this option will not appear.
Once an Alarm is Acknowledged, a timestamp will appear showing which user acknowledged the alarm and what date/time it was acknowledged at.

Alarm Information
Alarm tiles/list view contains lots of information that we deemed useful to the user at a glance. See below for more info on what each piece of info is portraying
Alarm Status Icon
The Alarm "bell" icon indicates whether the alarm is currently in alarm or not.
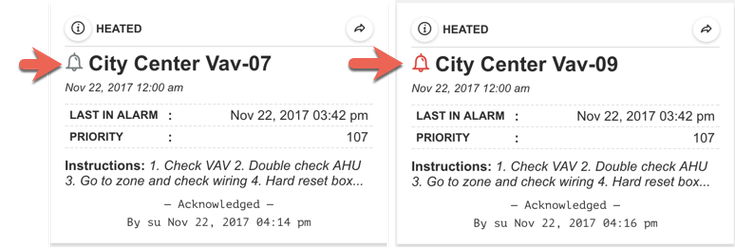
 Red indicates the alarm is still active
 Gray indicates that the alarm is no longer active
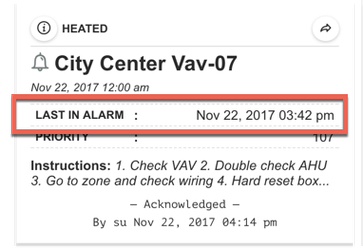
Last In Alarm
Shows the date/time that the Alarm was last active
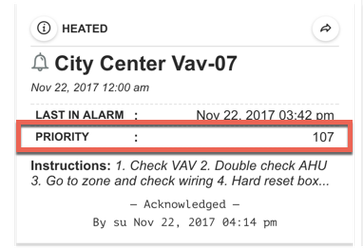
Priority
Priority shows a number value which indicates the specified priority for that specific alarm
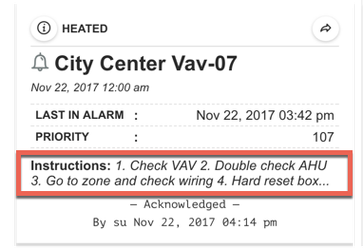
Instructions
Shows instructions indicated for that Alarm
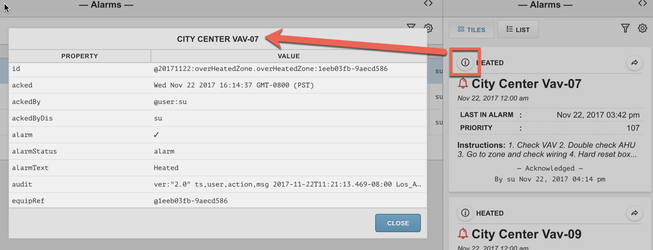
Advanced Information
User can view more advanced information by clicking on the 'i' info button icon:
BACnet Alarms
BACnet alarm icon status are below. The Fault and Offnormal alarm icons can be either red or grey depending if they are currently in alarm or not. The Normal icon will always be grey. - this icon indicates a Fault alarm
 - this icon indicates a Offnormal alarm
 - this icon indicates a Normal alarm
The background color of the alarm card will be light blue to represent the current active state. The other states will be the default white background.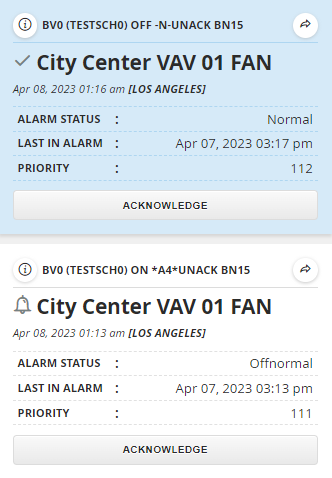
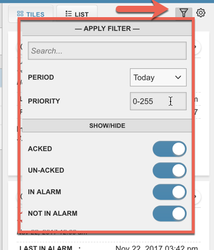
Filter
The filter windows allow you to select options that filter through the current list of alarms by priority, time period.
It also allows you to hide/show Acknowled Alarms / Unacknowledged alarms / Alarms that are in Alarm / and Alarms that are not in alarm.
Settings
The Settings provides the user a few options that include Enabling/Disabling Alarm sound (when an alarm is thrown), Amount of alarms show per page, and how often the alarm data is refreshed.
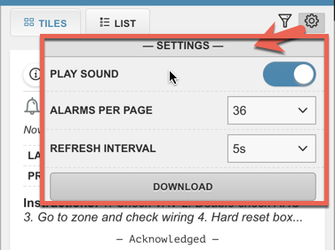
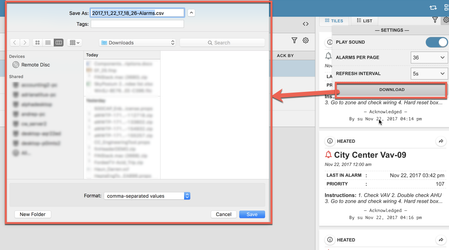
A download option is also available to incase the user wants to download the alarms as a .CSV
Related Bubbles
The "jump arrow" button-icon brings up related bubbles for the selected object.
Alarm email example
Below is an example of an alarm email that is sent out when an alarm is triggered. An email is only sent out if the SMTP settings configured and user has been subscribed to receive alarm emails.

Axon Tips
If you want to change the alarms based on equipment types, you can simply change the filter from equip to equip and chillerPlant or whatever the appropriate filter is for the equipment.