Haystack Write Level vs Write Level
- Petrescu, Ioana (FT D EU RO BP)
- Gerard Huff (Unlicensed)
There are 2 different write levels available in FIN Stack: write level and connector write level ( in our current example we are talking about a Haystack connector, so Haystack write level).
The main differences between the 2 write levels are:
- any writable point will have the write level, but only a point from a Haystack connector will have the Haystack write level
- the write level will show the level where the point will be written inside the FIN Stack database, while the Haystack write level will point to the input level where the point will be written inside the target database
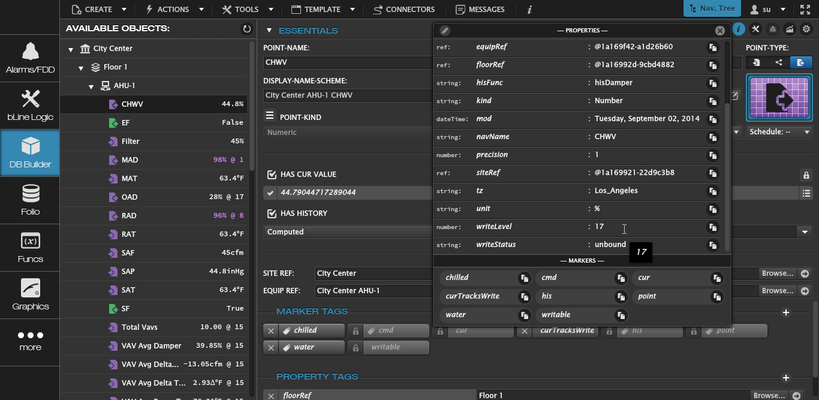
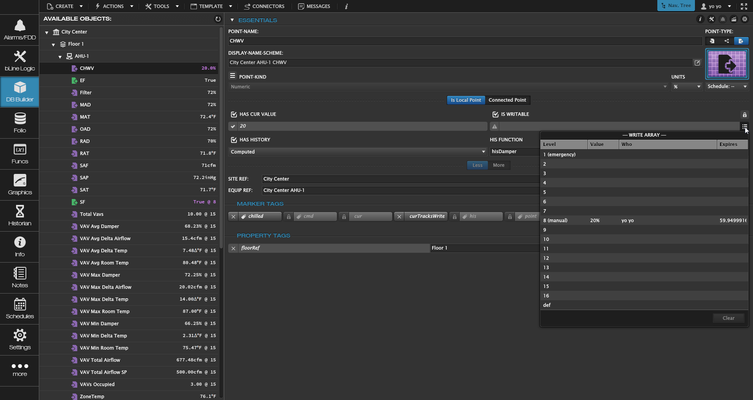
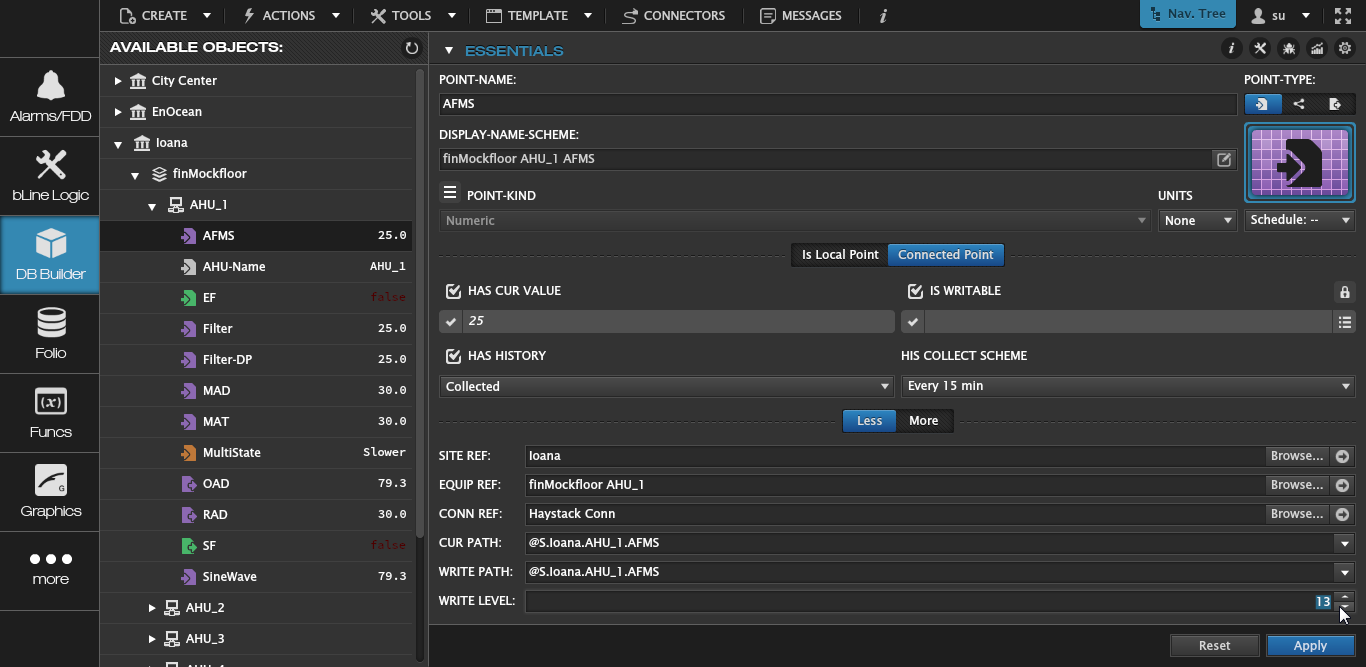
For every point in FIN Stack that is made writable, in the properties sheet the user can find a Write Level. That is the level were the point gets written in the FIN Stack database (by default that is set to 17)
The user can also see the write array, by selecting the small icon next to the Is Writable field. Every time the user invokes any of the actions on the point, the array will display the written value at the proper level (For instance, a manual action is set by default to level 8).
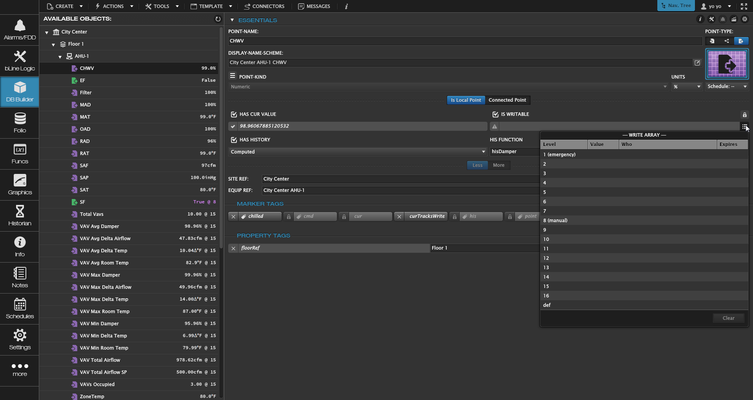
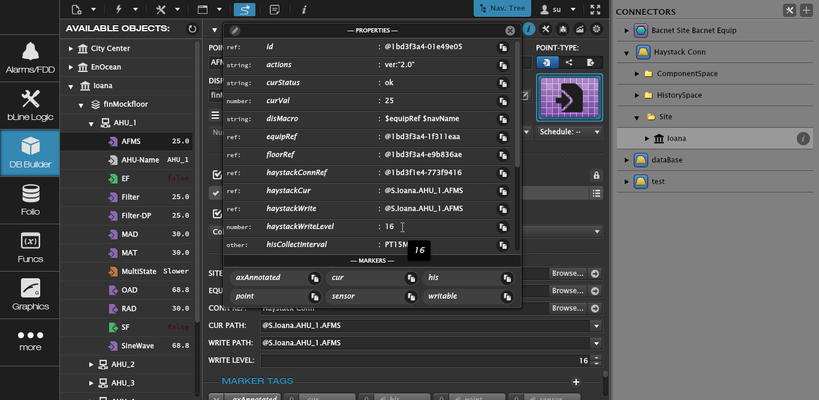
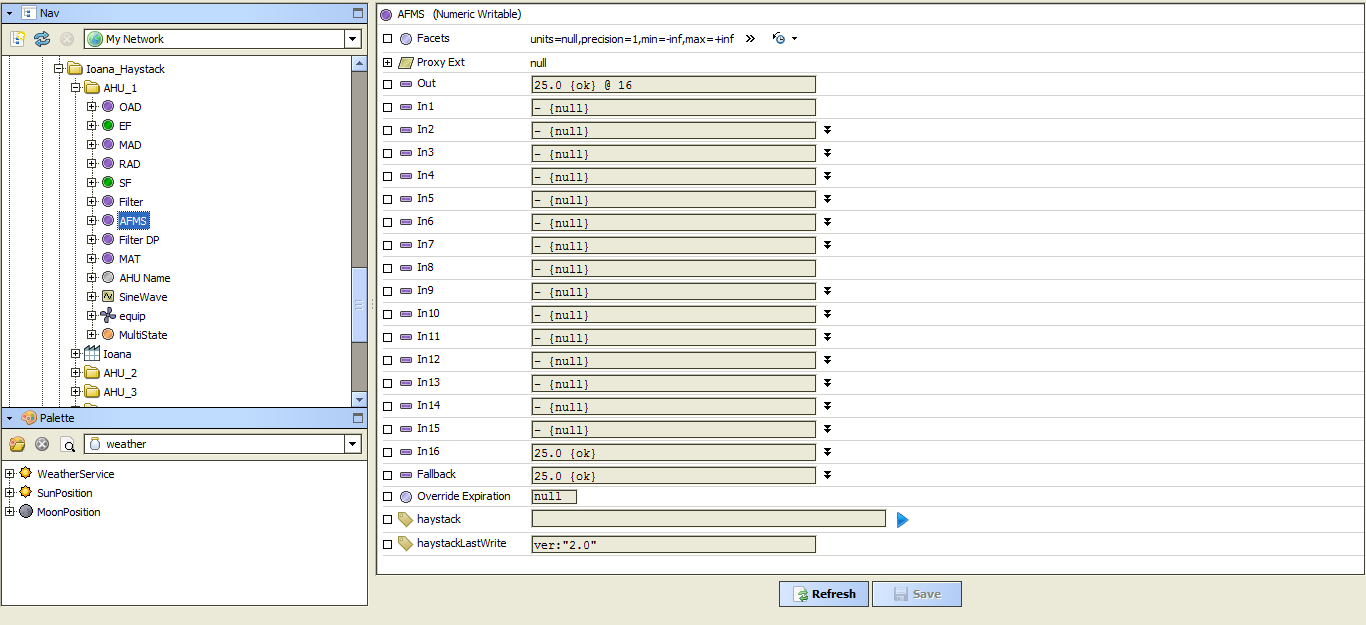
For points that are connected, so they are basically coming from a connector like Haystack, (or more specifically, nHaystack from a Niagara station, in the example below), there is going to be an extra property called HaystackWriteLevel for any writable point. This level represents the level where the point is going to get written into the point on the Niagara server side. This property can be found in the main details window of the point as well.
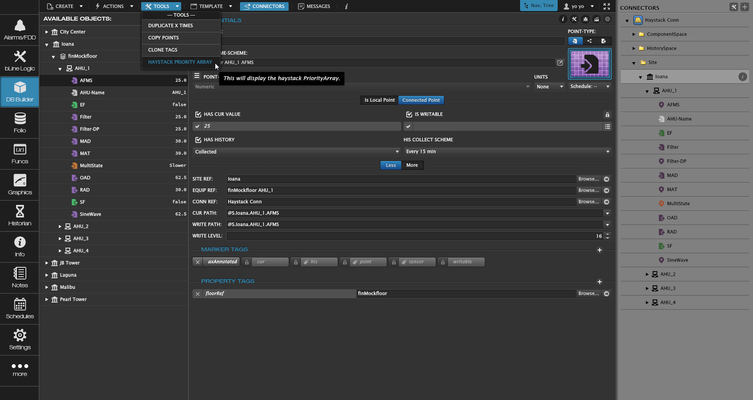
Of course there is a Haystack write array similar to the write array for the FIN Stack. To get this array, the user will select a Haystack writable point and go under the Tools top menu option and select: Haystack Priority Array. This will pop up a new window with the array showing what value has been written at what level and by whom has been written.
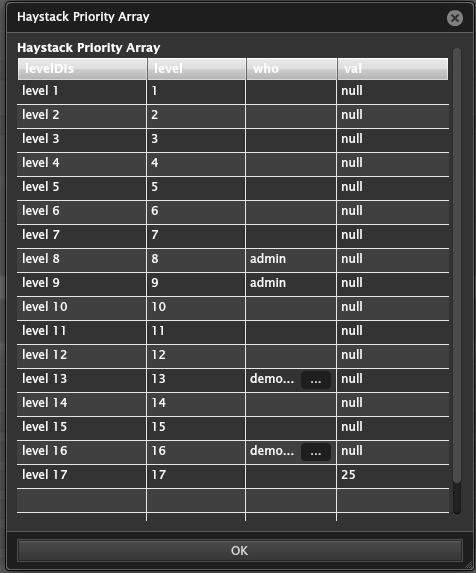
In our example this property is set to level 16. This is the default level that Haystack points are going to get. This also means that if the value is changed in FIN Stack, then we will get the value on input 16 in the corresponding Niagara point.
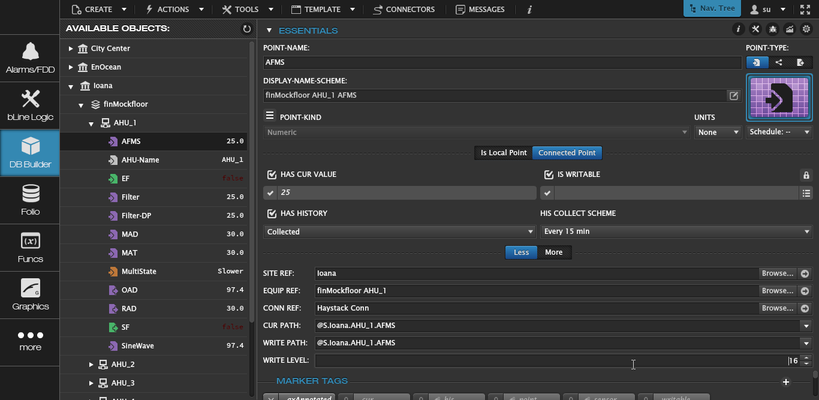
If the user wants to write the point at a different level then 16, the write level value needs to be changed to that value, either by typing in the desired value or by using the small arrows to select the value. Then the apply button at the bottom right corner needs to be selected.
Once the write level has been changed, nothing is going to happen in Niagara side. Only after the user has changed the value of the point in FIN Stack we will see that the new value will get in the new specified input field.

The user can also notice, that once the HaystackWriteLevel has been changed, the WriteLevel has changed automatically. In our current example we changed the HaystackWriteLevel to 13 and the WriteLevel has become 8 (from the original and default value 17)
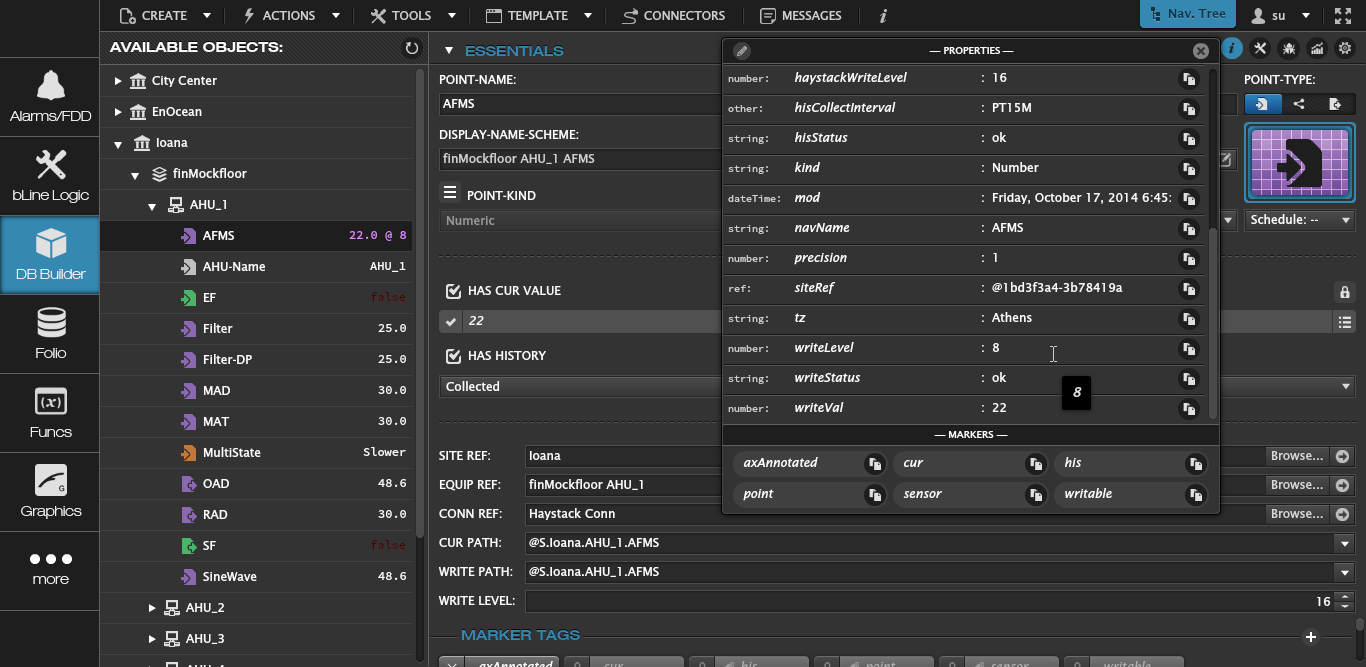
If the HaystackWriteLevel changes can be seen in Niagara, the WriteLevel changes can be seen in FIN Stack, by selecting the small 3 bars icons next to the Is Writable value field.

