| Table of Contents |
|---|
Location
NOTE: Only Super User (su) types of users can manage other users
To use the User application, the Super User will need to have the Host Application open.
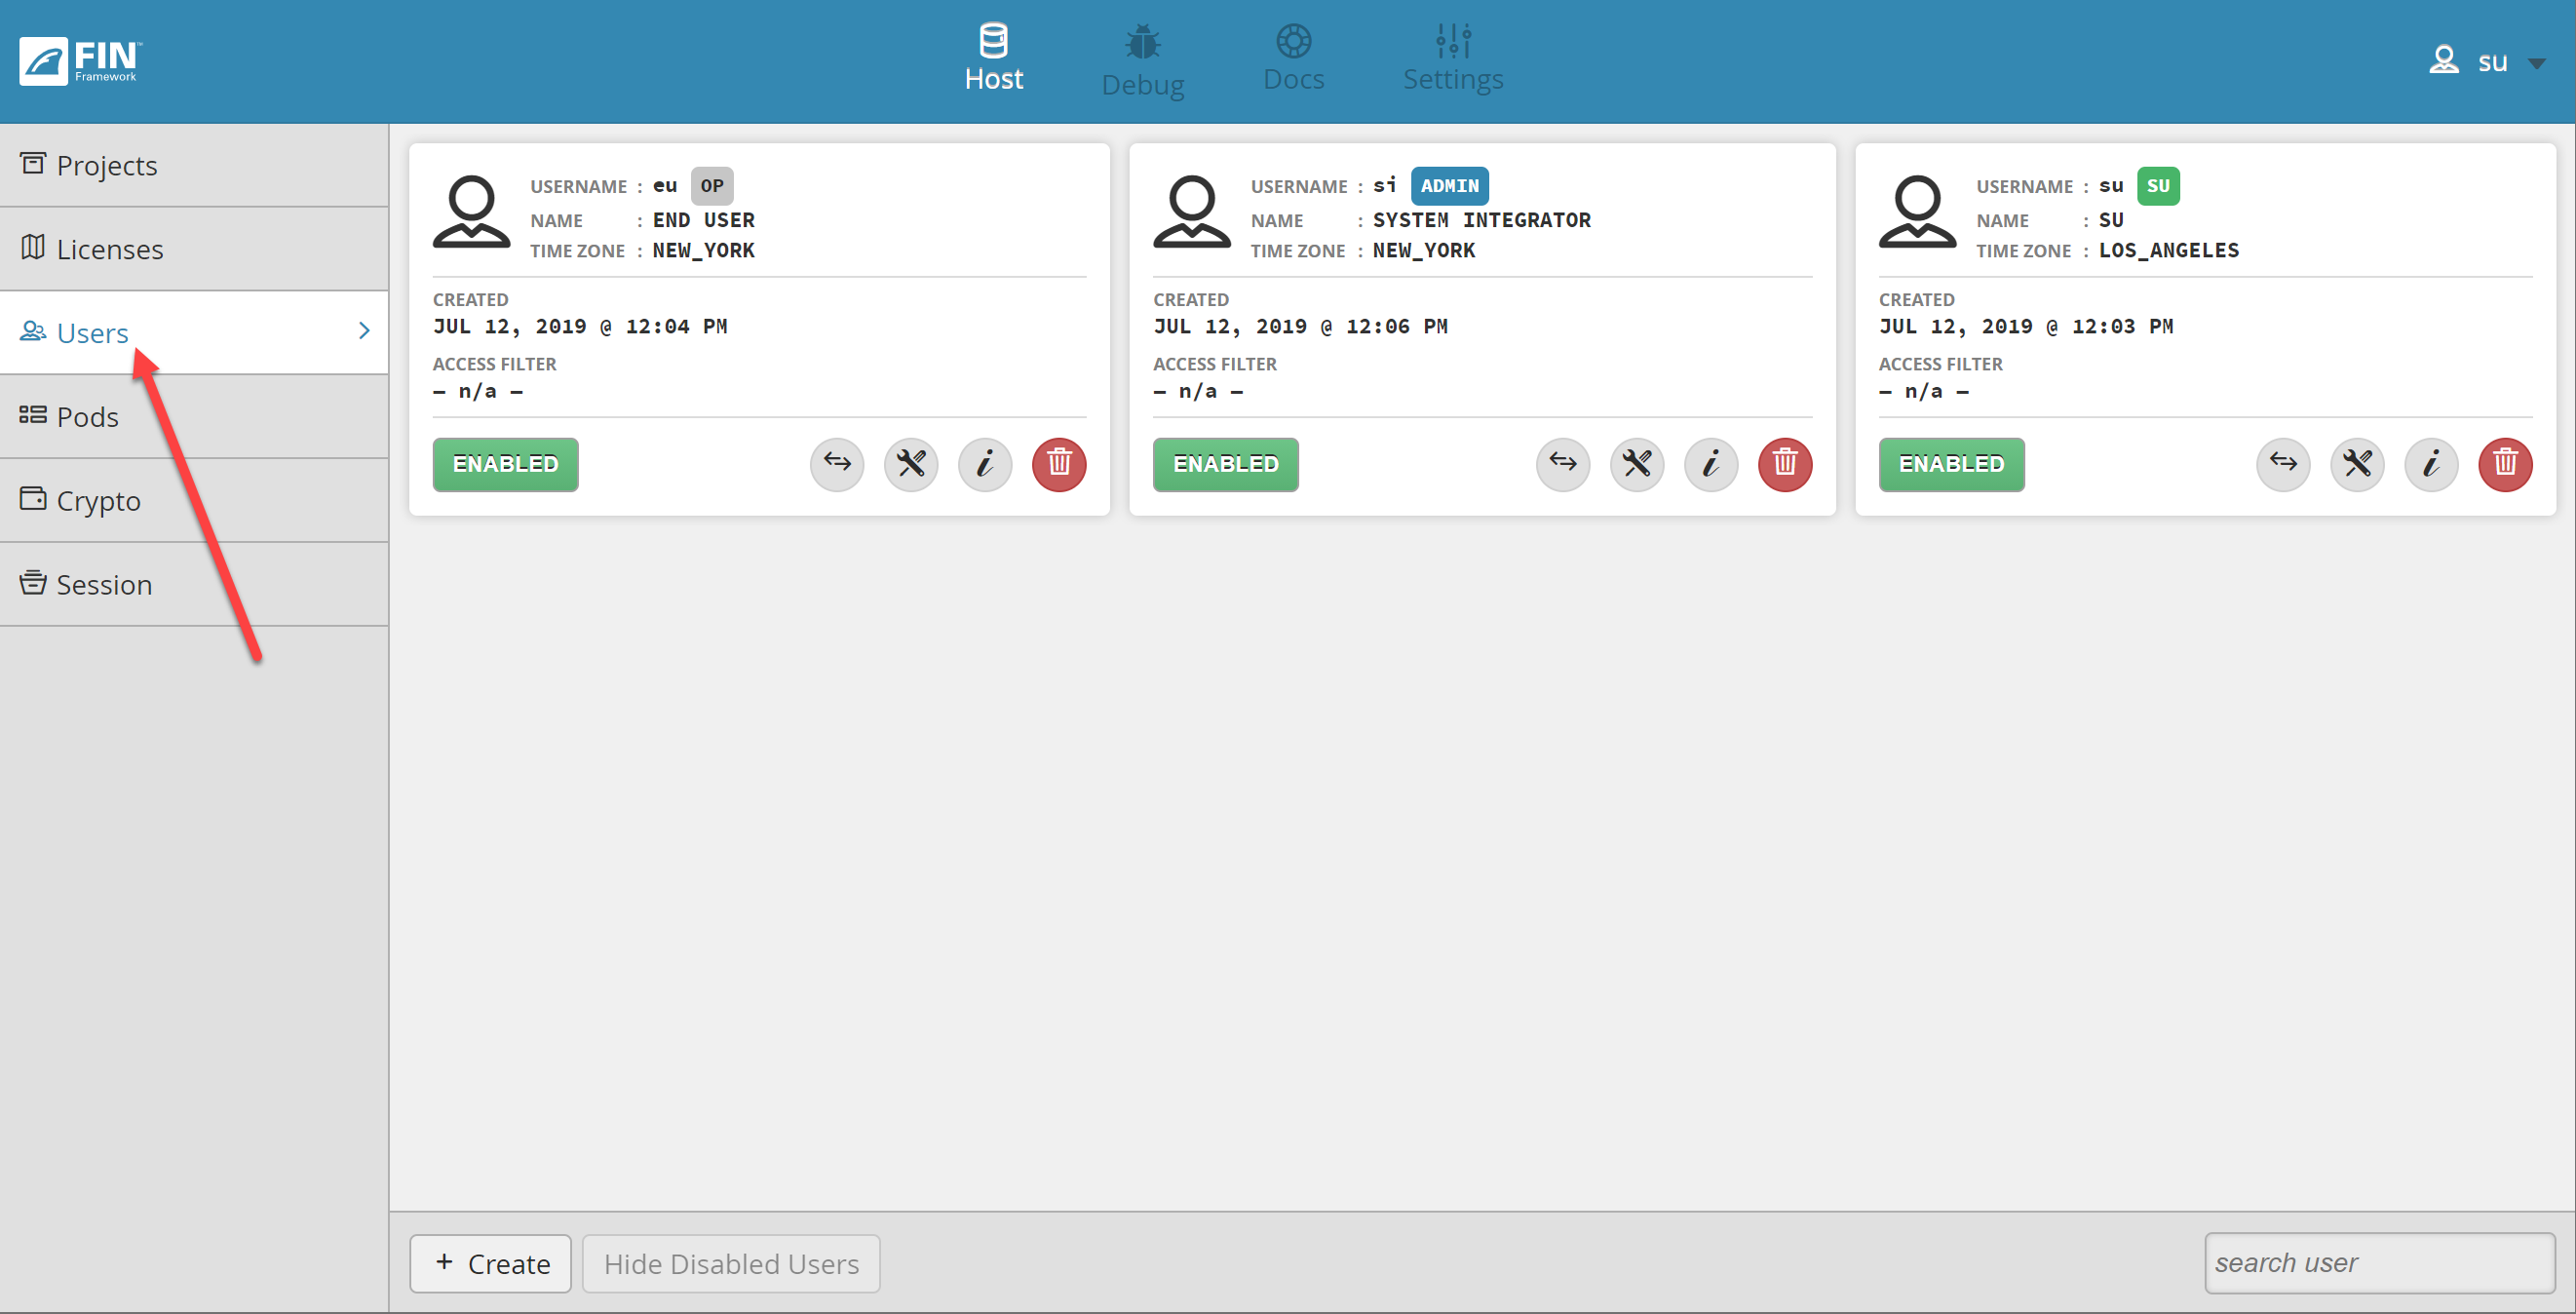
When any Super User logins into FIN, they are directed to the Host Application where they can click on the User selection in the left-hand column.
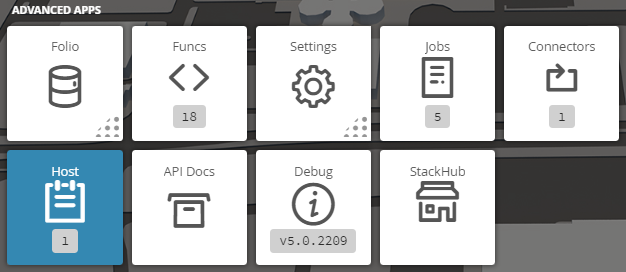
Additionally, Super Users (su type) can also open the Host Application under the Advanced Apps (not available to Admin and Operator)
Create a New User
The Create New User menu is that part of the Users app, that allows a Super User to create new users.
1. The Super User will need to open the
Host application
2. Navigate to the
Users section located on the left-hand side
3. On the bottom, there is a button called
Create
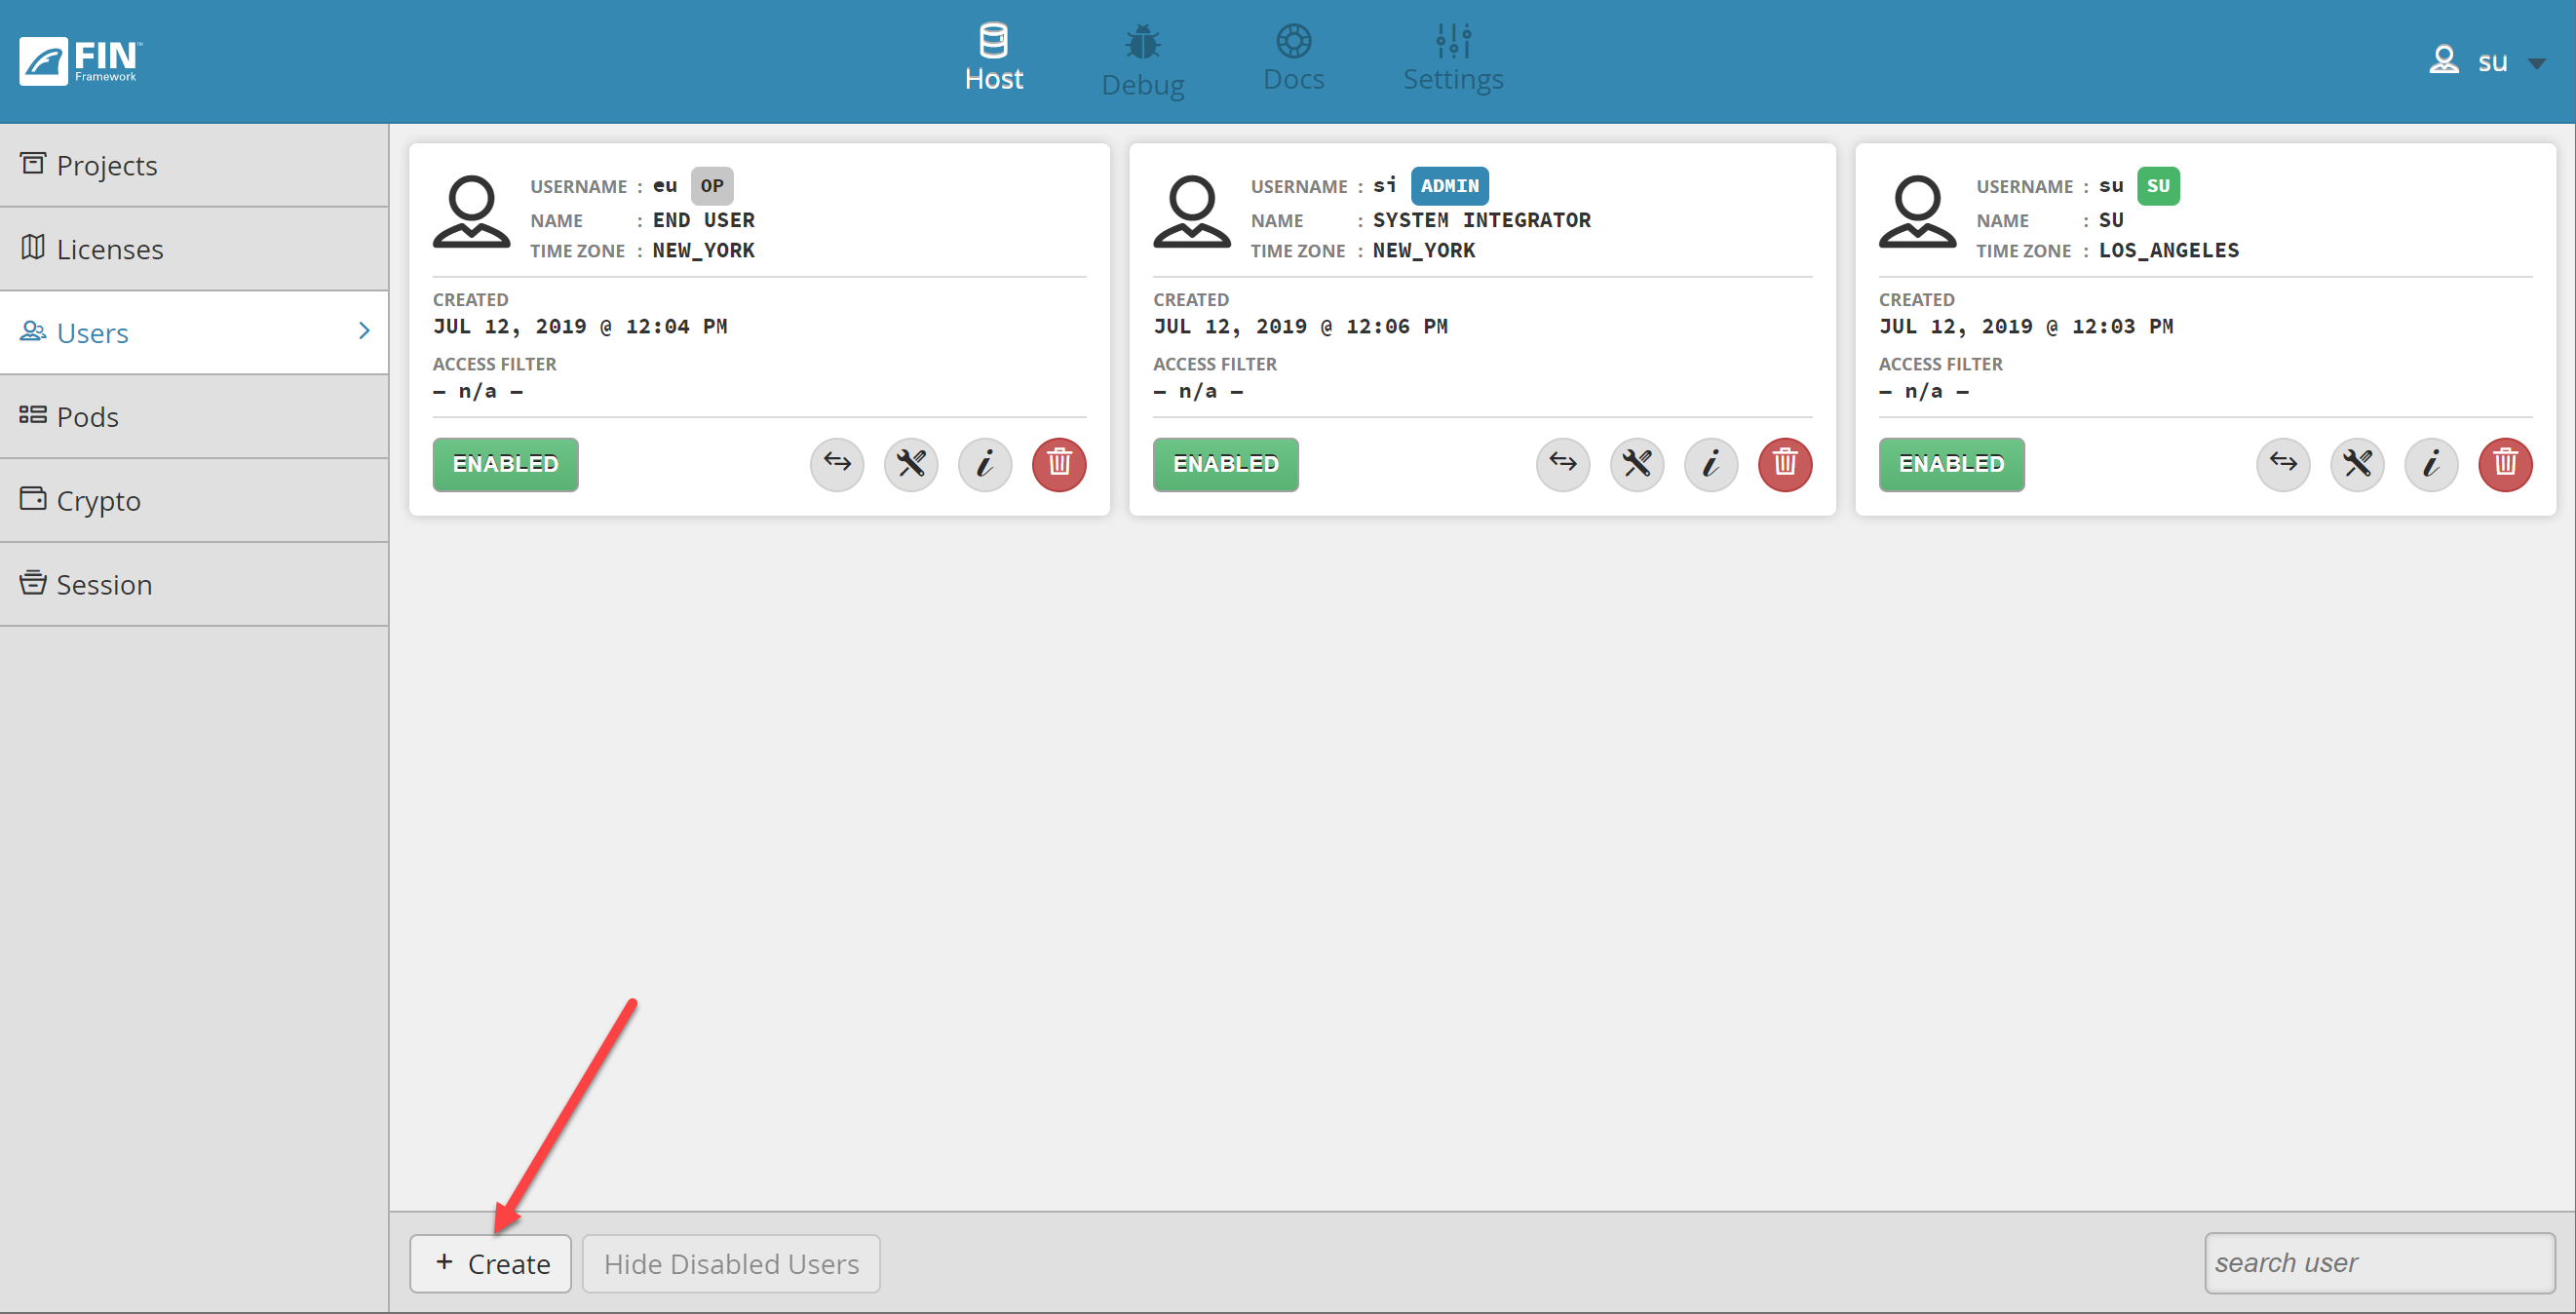
4. Once selected, the
NEW USER pop-up will display.
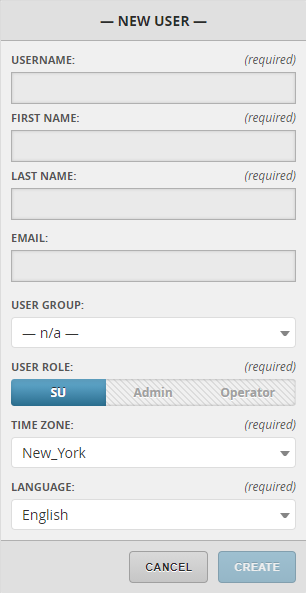
The Super User can customize the new user by filling in/selecting the:
Username: The actual username that will be used to log in
First Name: First name of the new user
Last Name: Last name of the new user
Email: The Email address of the new user
User Group: This dropdown is optional, a user can get assigned to a group
For more information can be found here: https://finproducts.atlassian.net/wiki/pages/resumedraft.action?draftId=3740074066 Users Groups
User Role: With this selection, the user can be made a Super User (SU), an Admin, or an Operator
| Info |
|---|
|
Time Zone: Used to select a Time Zone from the droplist, for the selected user
Language: The user can have the UI in the selected language
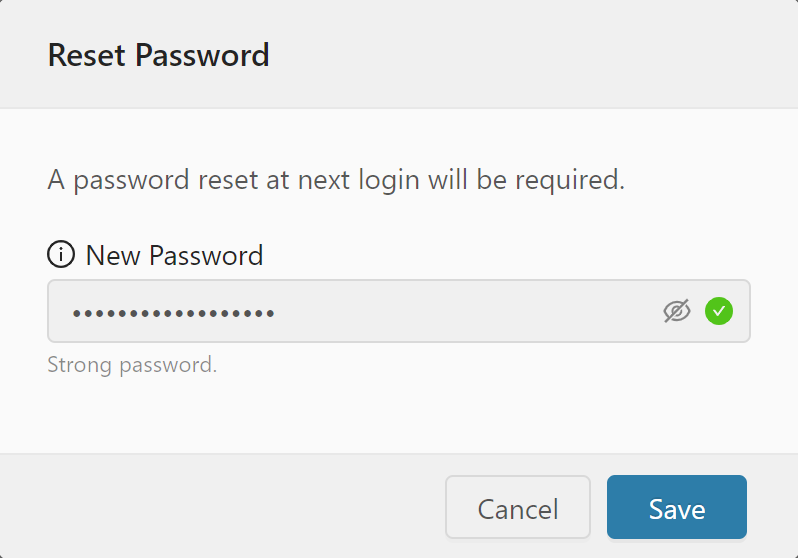
5. When the new user has been created, the last step will be a Reset Password prompt. Here the Super User creating the new user can leave the suggested password alone or replace it with another. The Super User should give this temporary password to the new user to login to the FIN Framework.
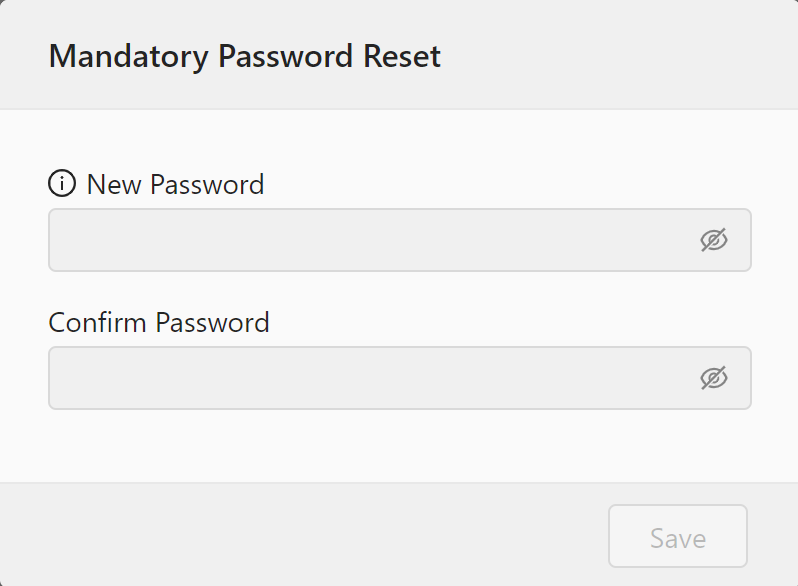
The first time the new user successfully logs in to FIN, they will be directed to a prompt where they have to create their own new unique password.
Edit User
The Edit User menu is broken down into 3 sections
Essentials:
Access Permission: If the new user should only have access to a specific section, here we will set the restrictions.
Custom Properties:
Location
The SU can edit a user in two locations:
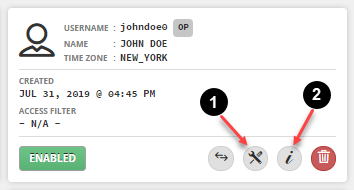
Here the user can edit the user essentials, application permissions, and custom properties
This will display the property editor which will let the SU do two of the following:
Edit or Add or Remove
Marker Tags
Property Tags
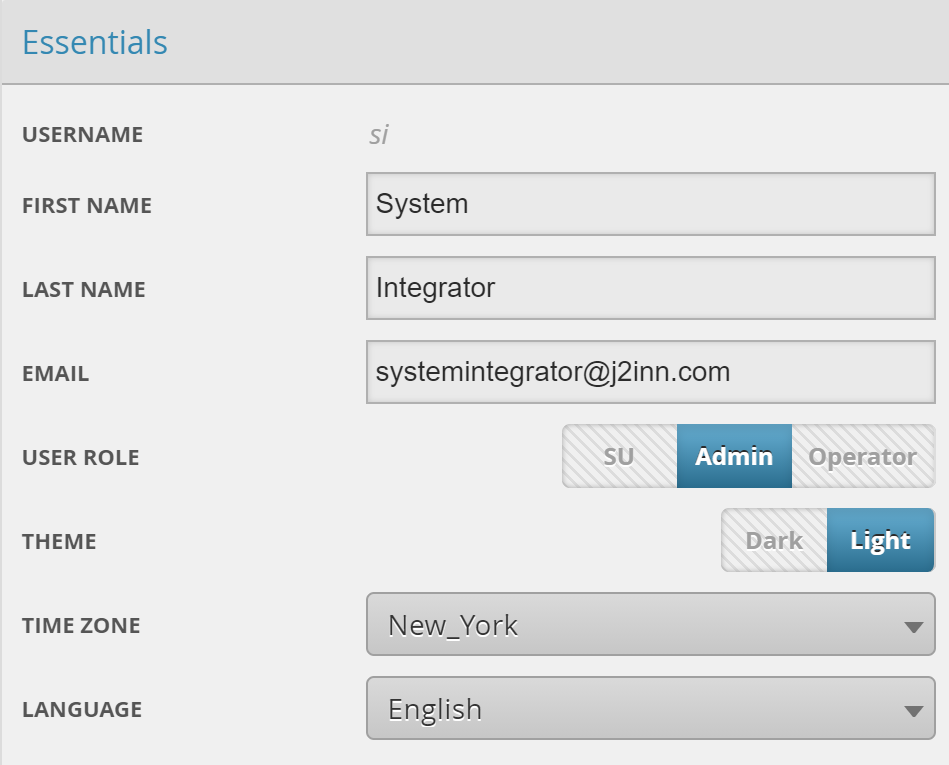
Essentials
The su can change the essentials information of the user's and customize the FIN from a light theme to a dark theme.
Access Permissions
The SU can change the permissions of the edited user.
Each access has a folio filter string that defines what a specific user will have access to and visibility too.
| Info |
|---|
Note |
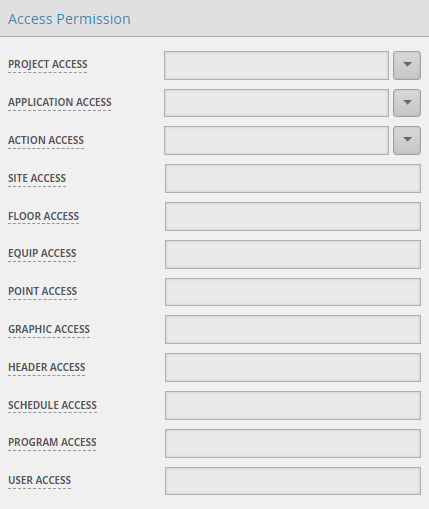
These following accesses, if the user selects on the down arrow key it will direct them to a new pop-up window
Project Access: A filter that is applied to a user that determines which projects that user will have access to
Application Access: A filter applied to the user that determines which applications the user will have access to
Action Access: A filter applied to the user that determines which actions the user will have access to.
Typically, a lower Action Access value means less access to actions within the database
Action Access Categories must be pre-defined on the points in order for the action access filter to apply
Site Access: A folio filter string that defined which site(s) the specific user will have access and visibility. The site tag itself is implied.
Example:
Limit access to a specific site using its specific id:
site and id == 1a2b3v4d5e6f7gLimit access to sites tagged with 'mySite' assuming user tagged particular sites with 'myUsersSites': site and myUsersSite
Floor Access: A folio filter string that defines which floor(s) a specific user will have access and visibility. The floor tag itself is implied.
Example:
Limit access to the specific floor using its specific id:
floor and id == 1a2b3v4d5e6f7gLimit access to floors tagged with 'myFloor' assuming user tagged particular floors with 'myUsersFloors': floor and myUsersFloor
Equip Access: A folio filter string that defines which equipment a specific user will have access and visibility. The equip tag itself is implied.
Example:
Limit access to specific Reheat VAV equipment that are tagged with 'vav and reheat': equip and vav and reheat
Point Access: A folio filter string that defines which point(s) a specific user will have access and visibility. The point tag itself is implied.
Example:
Limit access to a specific category of points that have the 'sp' marker tag on them: point and sp
Graphic Access: A folio filter string that defines which graphic(s) the specific user will have access and visibility. The fin5 tag itself is implied.
Example:
Limit access to a specific result of graphics that are tagged with 'endUserGraphic': fin5 and endUserGraphic
Limit access to the specific graphic:
fin5 and id == 1a2b3v4d5e6f7g
Header Access: This filter is related to the 'custom-header' navigational bar and determines which buttons will be accessibly visible to the user
Setting up your custom header security is a two-part process
Security tags must be set on the custom header's button (through the custom header configuration menu)
The user must be given a Header Access Filter to determine which buttons they can/cannot see
If the custom header button's Security tags do not match the users' Header Access Filter, that button will not show up for that user.
Schedule Access: A folio filter string that defines which schedule(s) the specific user will have access and visibility. The schedule tag itself is implied.
Program Access: A folio string that defines which program(s) the specific user will have access and visibility. The program tag itself is implied
User Access: A folio string that defines which user(s) the specific user will have access and visibility.
Project Access
A filter that is applied to a user that determines which projects that user will have access to.
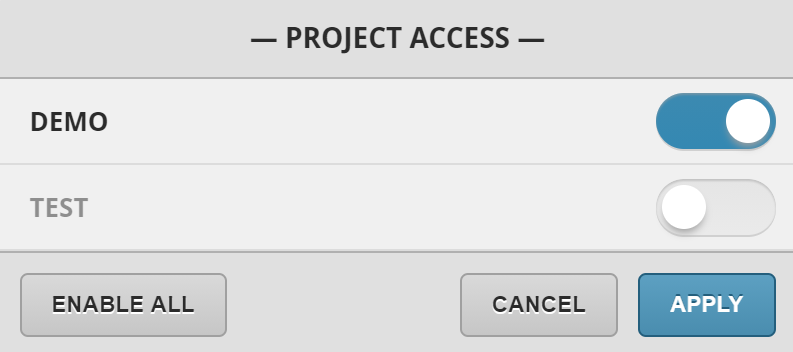
The su can active and deactivate which project a user can see, by selecting on the toggle bar
Blue = Activated; Grey = Deactivated
The su can also select on the Enable All to active all the project
Application Access
A filter applied to the user that determines which applications the user will have access to.
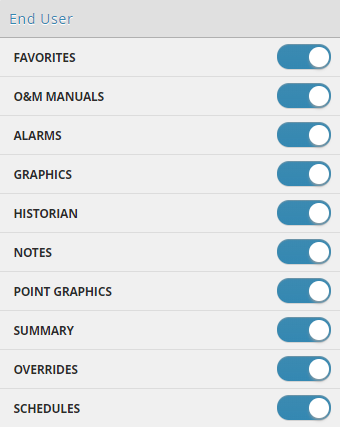

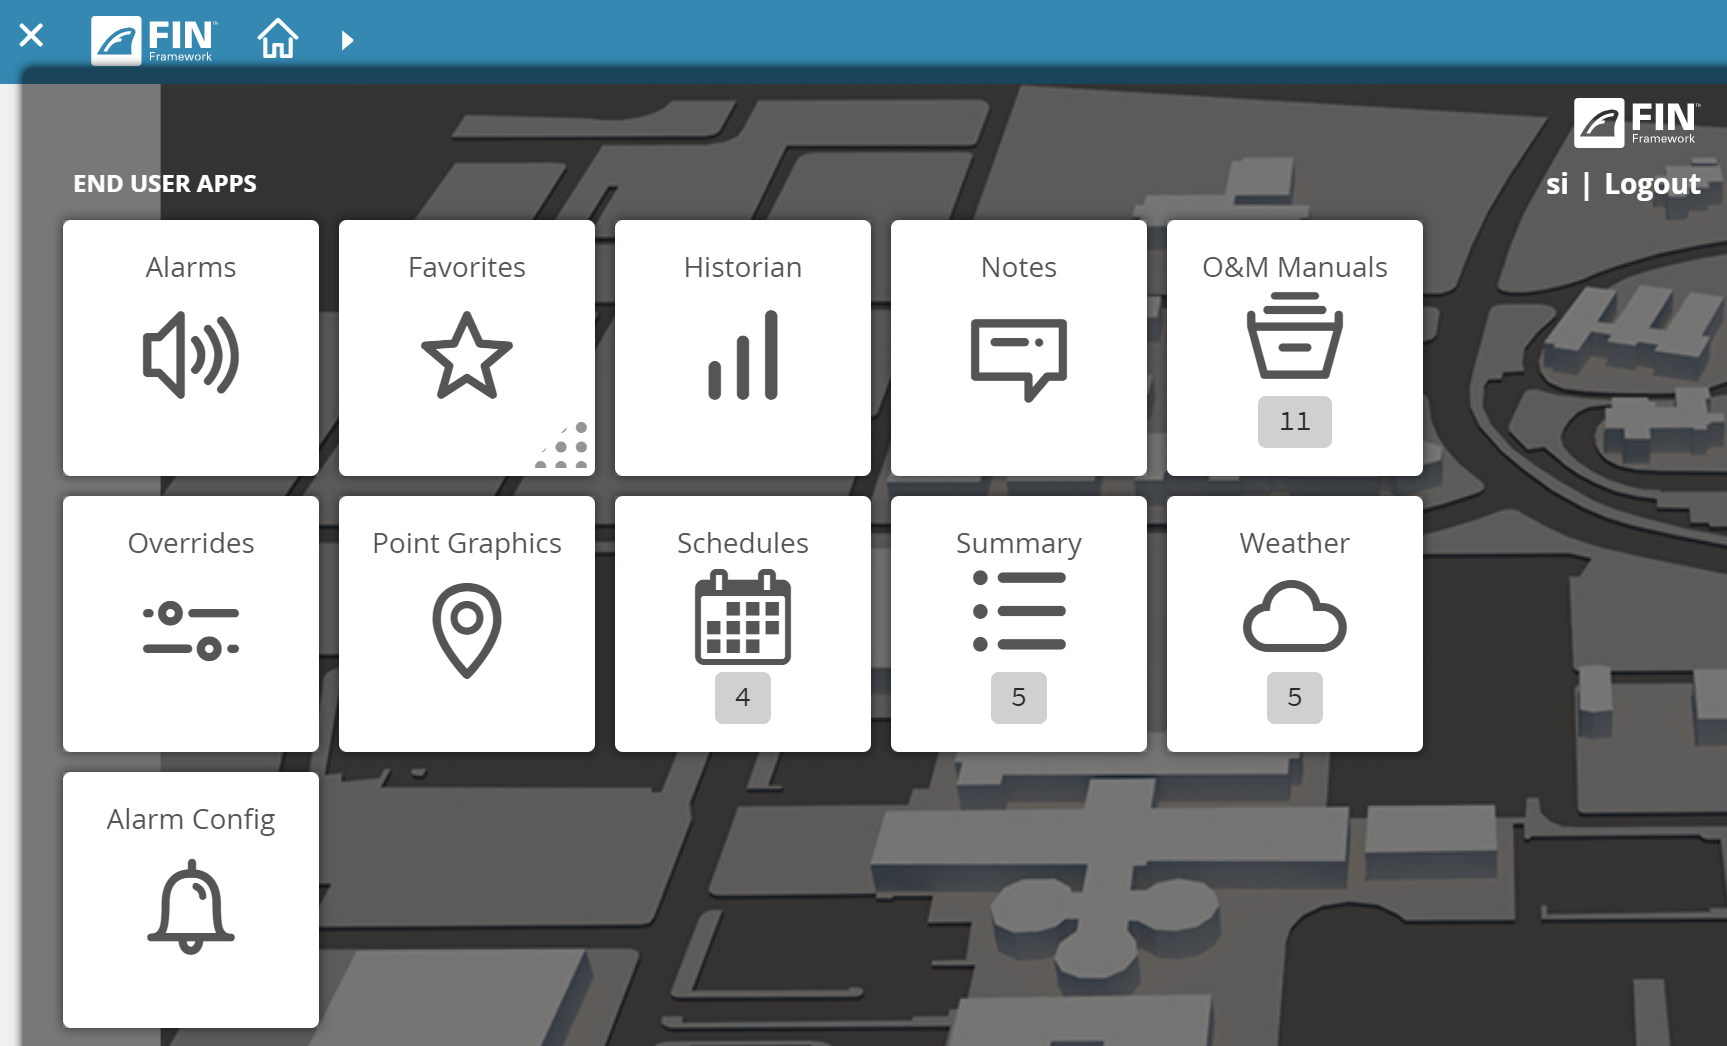
End-User Application
Favorites: Allows the user to easily create a 'bookmark/favorite' of the current browser view within FIN Stack
O&M Manuals: Allows the user to upload useful files or link to a website for a job
Alarms: Allows the user to see all the alarms in the project along with all of the alarm information, and the ability to acknowledge them as well
Graphics: Allows the user to check the graphics created in the Graphics Builder tool
Historian: Allows the users to create and manage charts of selected points trends
Notes: Allows the user to create and view notes within the project
Point Graphics: Displays all the points with their associated image if tagged properly, options to command, view history, and view schedule info if available on that point
Summary: Allows the user to view and export summaries of multiple equip
Overrides: Allows users to see overridden points on a certain object, and also allows them to auto/clear them out
Schedules: Allows the user to create, edit or check out schedules
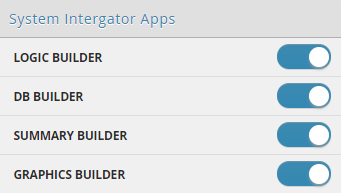

System Integrator Apps
Logic Builder: Is where the user can create or edit logic programs in a simple and straightforward manner
DB Builder: Contains functions, or trees, that allows users to add, delete, and edit project records
Summary Builder: Make it easier for users to create summaries of what they want to see
Graphics Builder: There a number of different features and sections that you can utilize to create your graphics

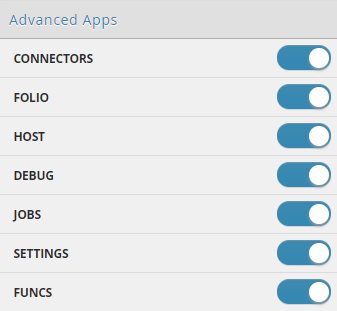
Advanced Apps
Connectors: Allows the user to view and add new connectors in order to be able to bring in their data
Folio: Allows the user to create, edit and get specific information from the Database.
Host: Allows the Super User to get info about the host, the license status, create new projects, check the log, change the password for the superuser as well as uploading a new license to the server
Debug: Allows the user get more info in regards to the installed version of FIN Stack and the hardware on which it is installed
Settings: Allows the user to enable and disable different functionalities of FIN Stack, change the project settings, add or edit a header and change the alarm settings
Funcs: Allows the user to create his own axon functions that can be used inside the folio app afterward

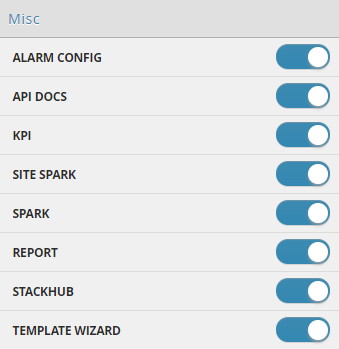
Misc
Alarm Config: Allows the user to mass configure alarms on points
API Docs: J2 Innovations developer documentation for the FIN line of products
KPI
Site Spark
Spark
Report
StackHub: Stackhub allows users to install, update and manage pods.
| Tip |
|---|
Hide Graphic App in App Launcher |
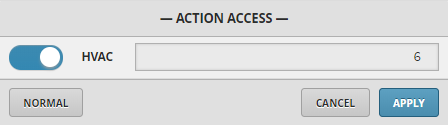
Action Access
A filter applied to the user that determines which actions the user will have access to. Typically, a lower Action Access value means less access to actions within the database.
Action Access Categories must be pre-defined on the points in order for the action access filter to apply.
Normal View
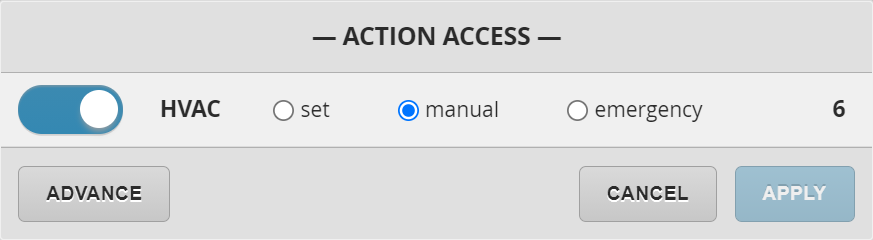
Advanced View
Custom Properties
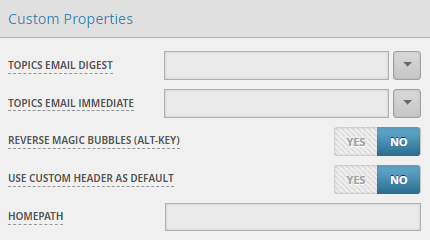
Topics Email Digest: Applied to user records to indicate which topics the user is subscribed to for daily digest email delivery
Topics Email Immediate: Applied to user records to indicate which topics the user is subscribed to for immediate email delivery
Reverse Magic Bubbles: Reverses the default alt-key functionality. (Reverse Magic Bubbles Alt-Key)
It's highly recommended utilizing the great automatic power of the Magic/Related Bubbles however, the user does have the option to have the Magic Bubbles disabled by default.
This means that (with this option enabled) situations where magic bubbles would have appeared, will instead now jump the user straight to the graphic (if one is available) and in turn, if the user holds down the Alt key and clicks on a specific object it will bring up the magic bubbles.
Use Custom Header as Default: Enabling this option will set the custom header as the default header for that specific user.
When this is disabled, the user will automatically see the default navigational header.
Homepath: Sets a default 'homepath' the location which the user will be automatically redirected to upon logging in. This can be the app name if one is available. The user would look at the URL when logging in and look at what is after the # sign. It can also be a path to something specific like a graphic. In the URL after opening a graphic, the user would copy the # and everything after it. Then paste it in the homepath so that when the user logs in, they will be directed to that specific graphic. Having this configured overrides whatever is configured in the topLevel record if available.
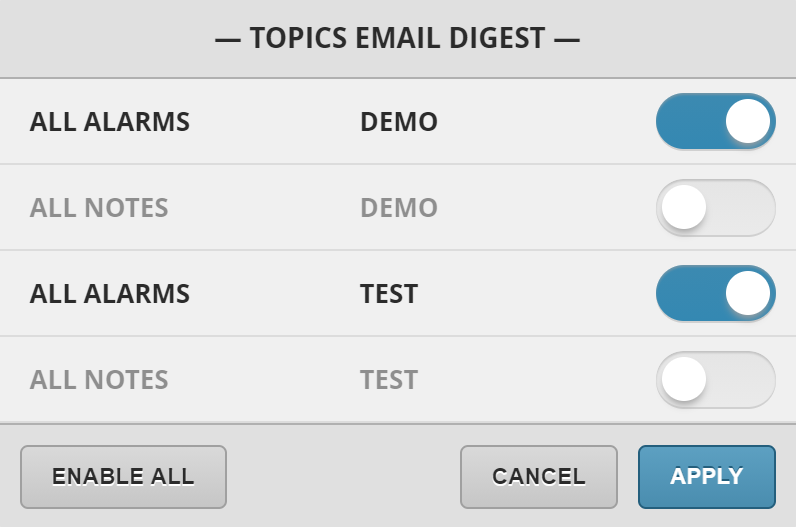
Topics Email Digest
1. When a user selects on the drop-down arrow, this will display a pop-up called
Topics
2. The user can select which topics the user is going to be subscribed for a daily digest email delivery
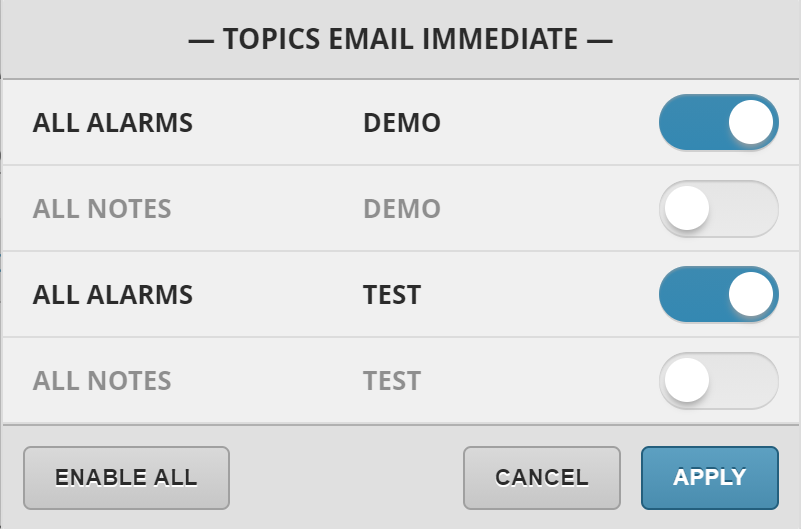
Topics Email Immediate
1. When a user selects on the drop-down arrow, this will display a pop-up called
Topics
2. The user can select which topics the user is going to be subscribed for a immediate email delivery
Homepath
The Homepath property allows the user to configure a specific app or graphic be default when the user logs in to said project. This can be unique per user.
| Info |
|---|
The user will still be directed to the host view upon login unless they're using a url to open a specific project. To have the user login to a specific project, they can learn how to do that in Launch Specific Project doc. |
To set a specific graphic on a user so that they always view that graphic when logging, open said graphic
Then copy the # and everything after it in the URL like below

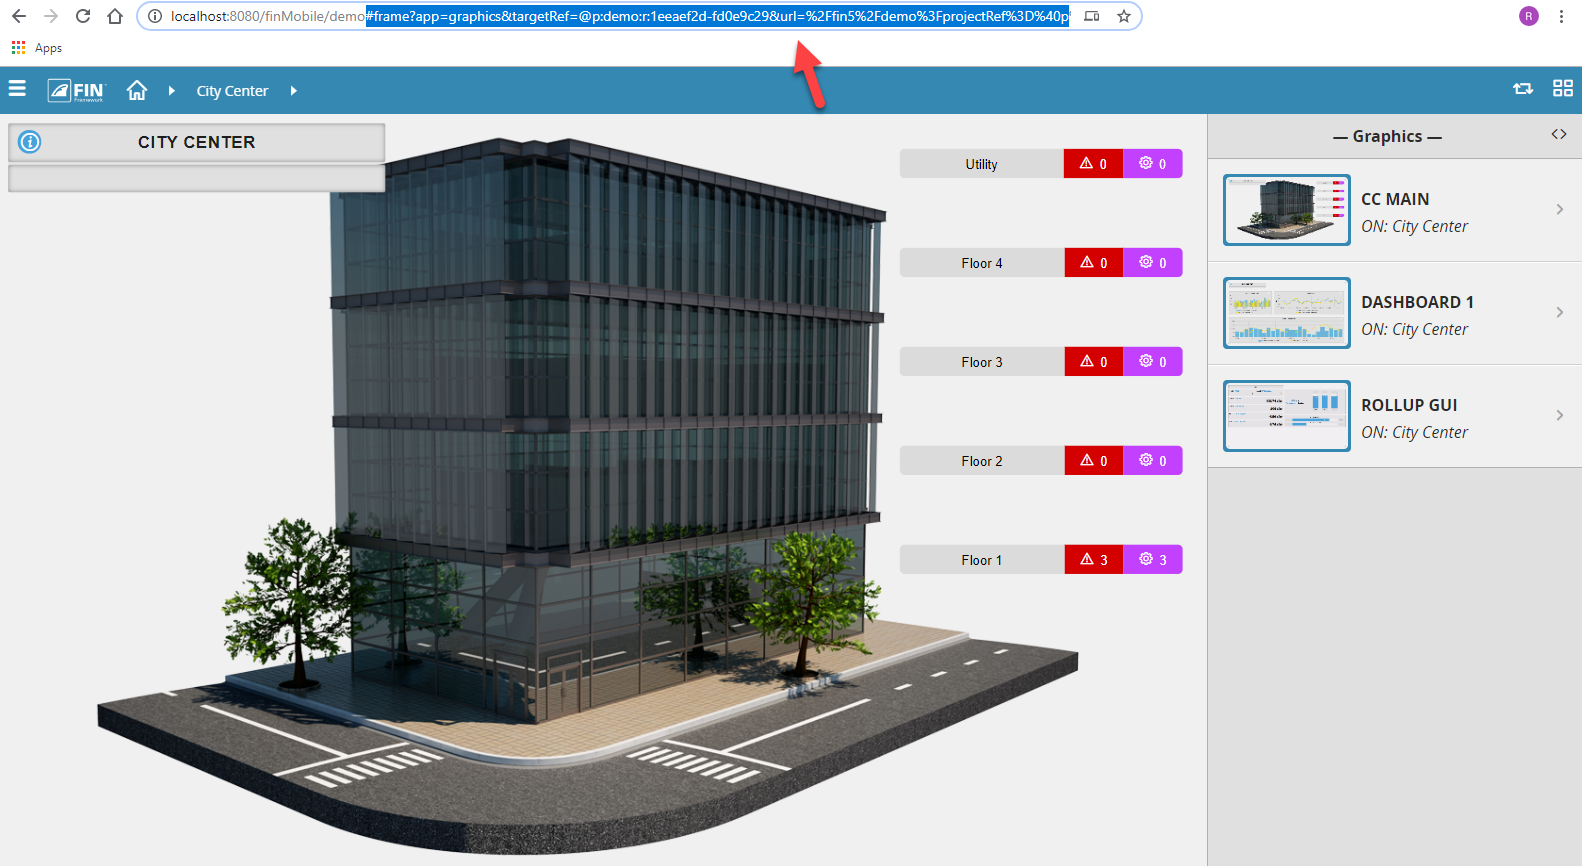
Then paste that in the Homepath. Thats it, now when user logs in to project, they will be directed to that graphic.
App Option
If the user wants to specify a certain, they can open the desired app (only select apps have a unique url for now)
Then copy the # and just the app name after it in the URL like below

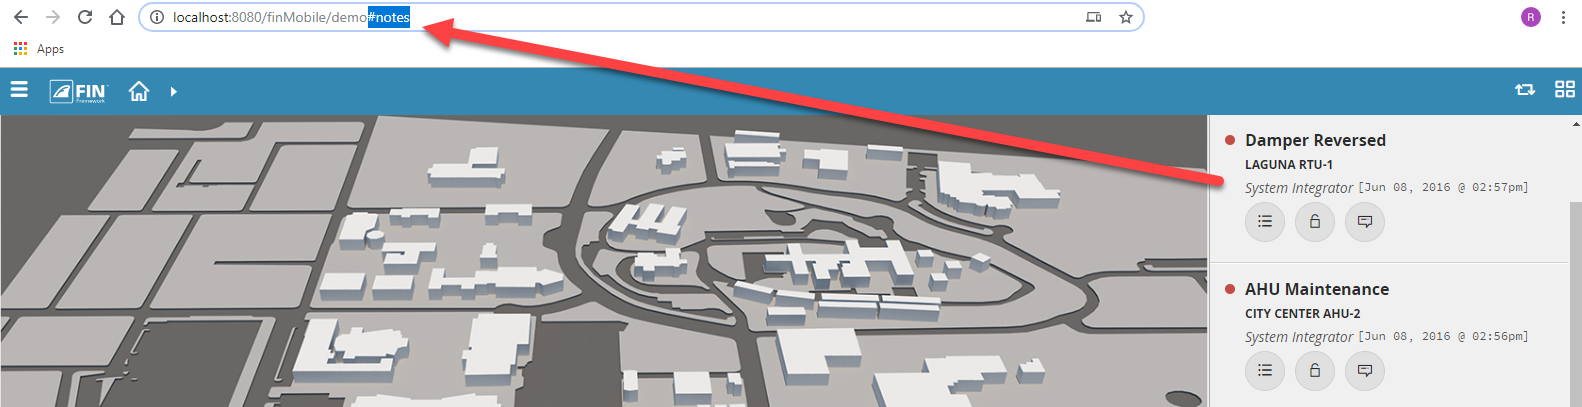
Then paste that in the Homepath. Thats it, now when user logs in to project, they will be directed to that app.