Equip Tree
Equip Tree
Equip Tree Navigation: Main View
Use the Equip Tree to review records within a project.
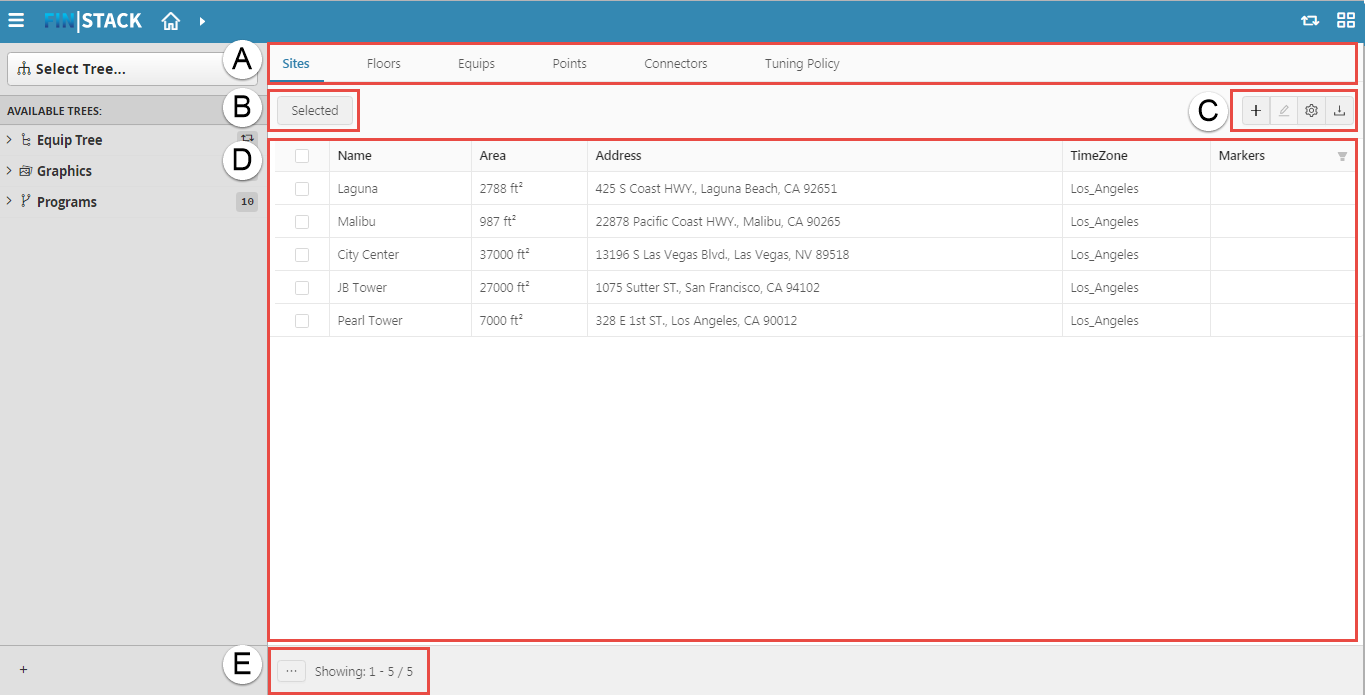
The main Equip Tree view contains the following sections:
A. NAVIGATION TABS: contains tabs to view Sites, Floors, Equips, Points, Connectors, and Tuning Policy data
B. RECORD SELECTION STATUS: shows how many records are selected
C. PAGE TOOLS: includes tools to add records, edit records, view the DB Builder Tools menu, and download records
D. DATA WINDOW: displays list of selected data
E. RECORD COUNT: displays numbers of records found
Navigate to Sites, Floors, Equips, Points, Connectors, and Tuning Policy
To navigate to specific records:
- Select the level to be viewed. Blue text indicates the active level; text for inactive levels is gray.
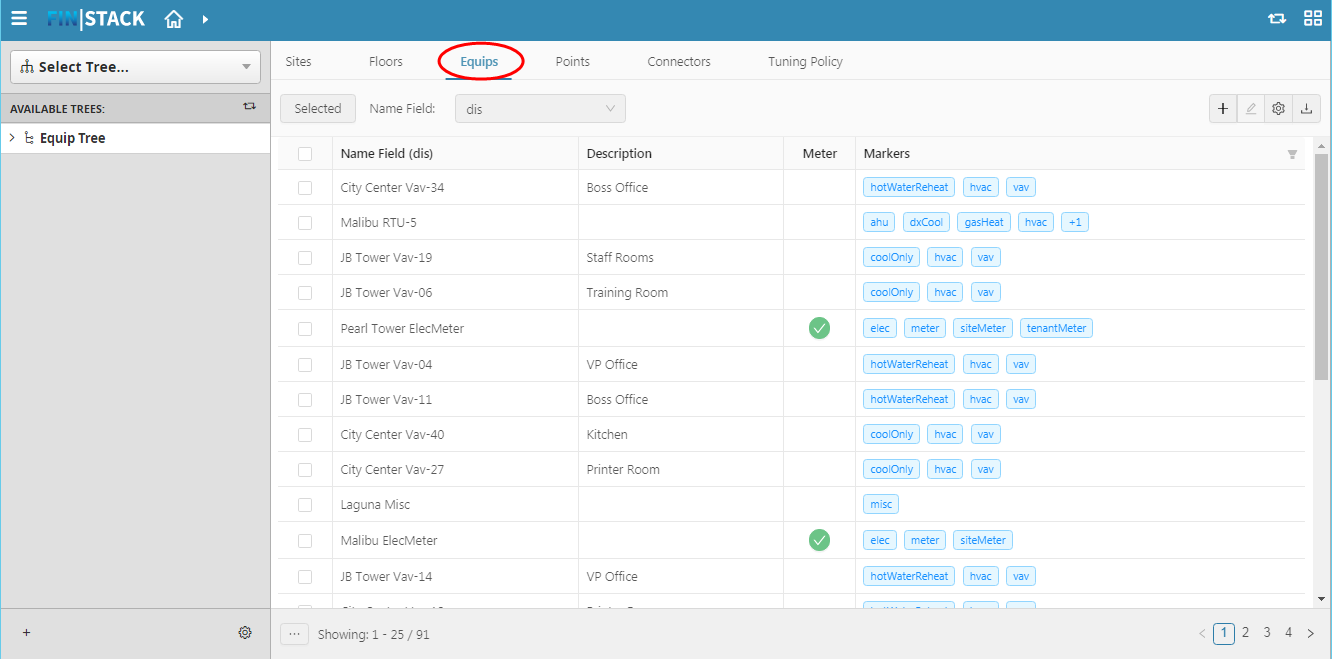
A list with the items in the level is displayed in the data window.
Select Records
To select records:
- Select each record to view.
The number next to the Selected button indicates the number of selected records.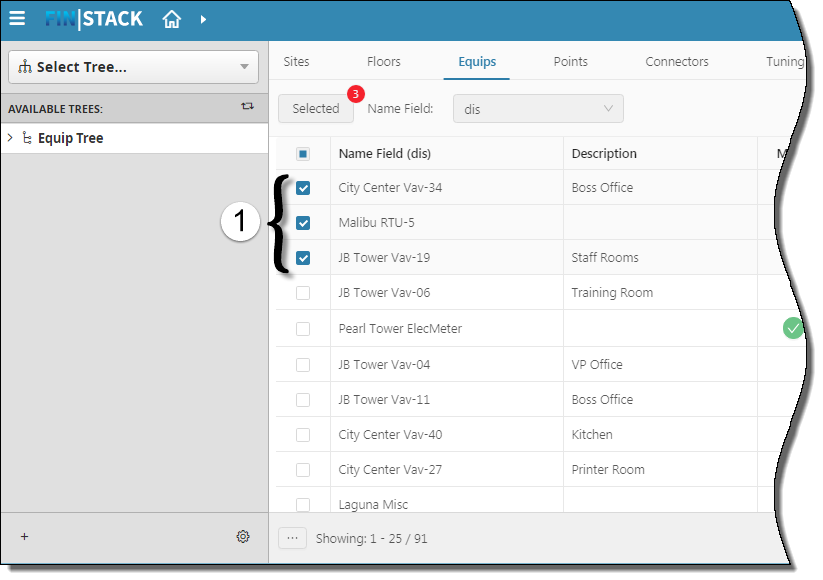
To choose all records, select the check box at the top of the column.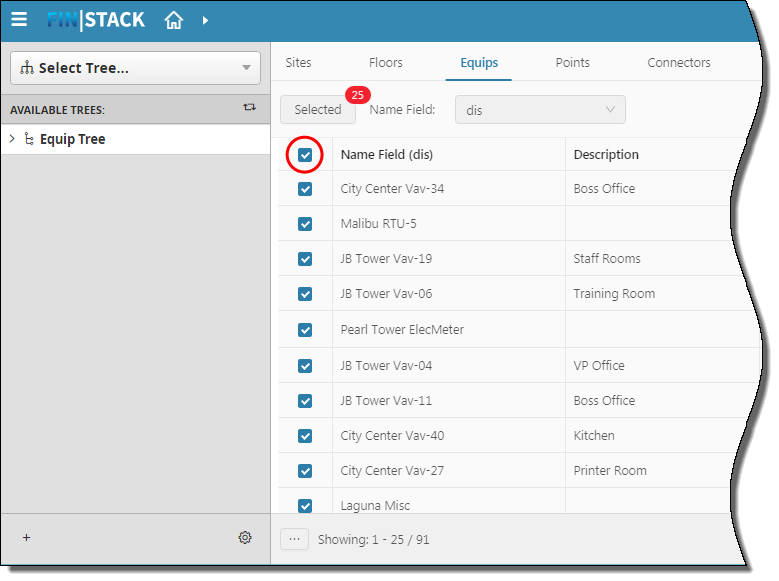
- Press the Selected button.
The Selected button turns blue and only the selected records display.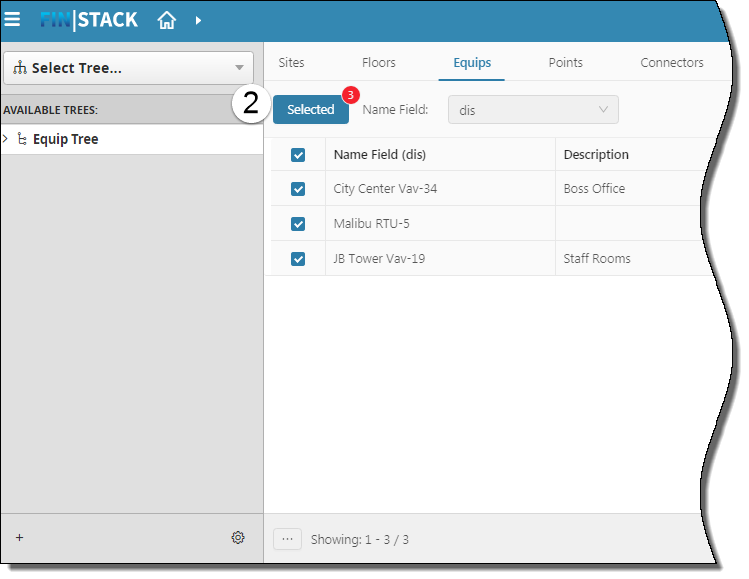
Add a Record
To add a record:
- Select the level to be edited. Blue text indicates the active level; the text for inactive levels is gray.
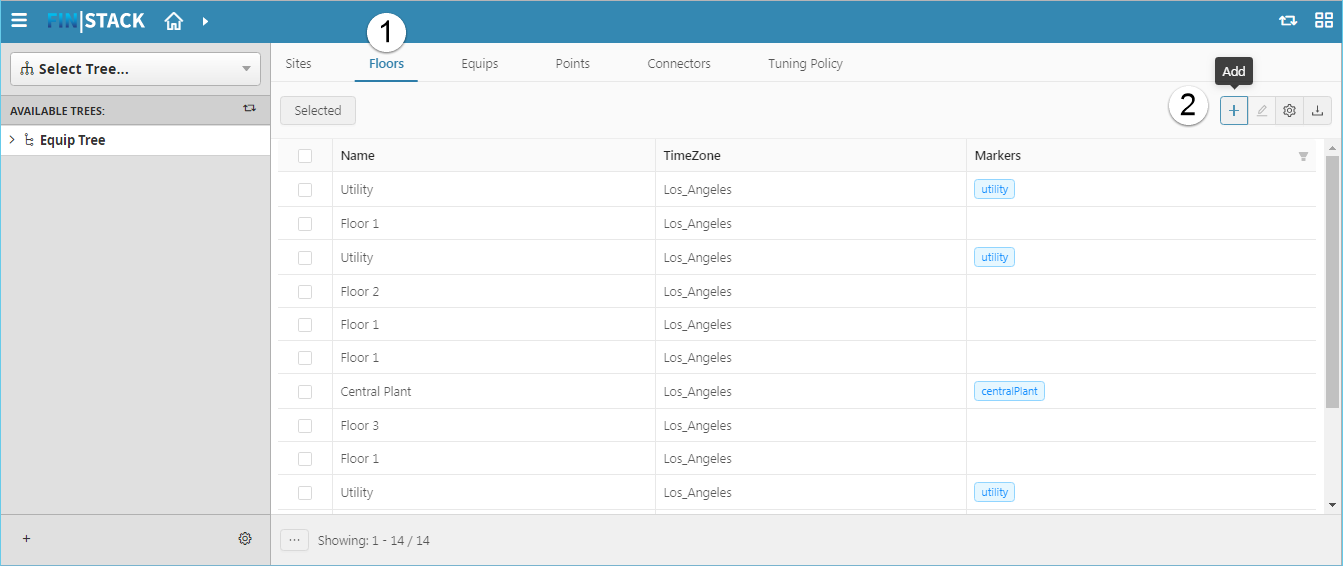
- Select the Add button (+).
The Property Editor is displayed.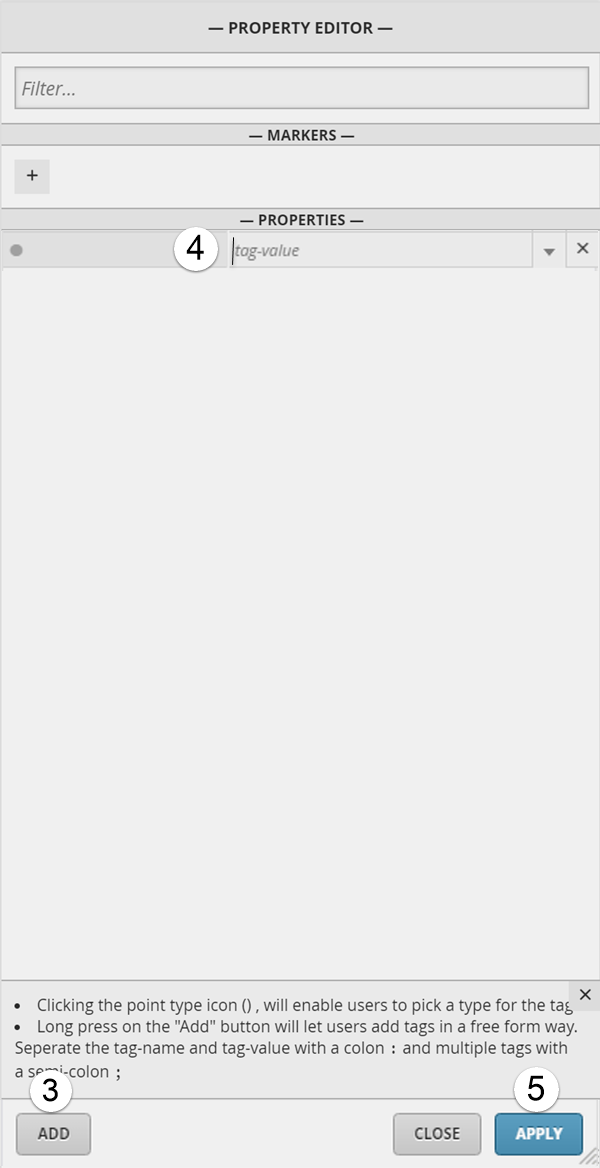
- Select ADD to add property fields to the record.
- To enter information into a field, place the cursor in the related text box and begin typing.
Once a record is changed, the APPLY button is displayed in the row of buttons. - Select APPLY to create the record.
Edit a Record
To edit a record:
- Select the level to be edited. Blue text indicates the active level; the text for inactive levels is gray.
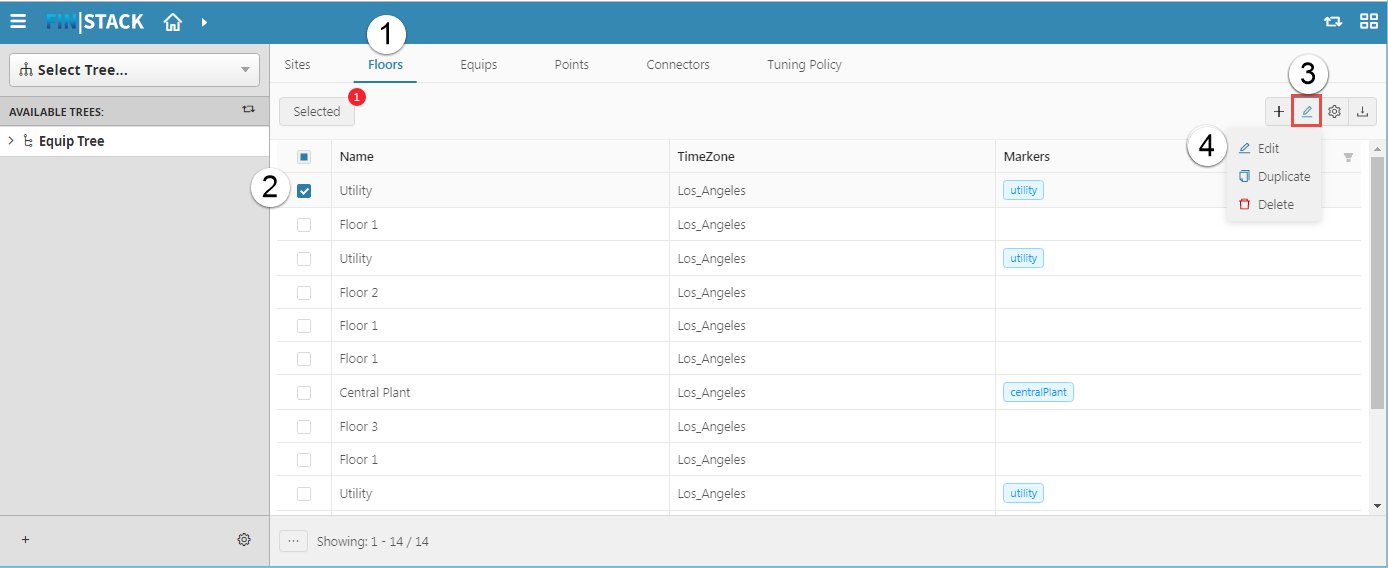
- Select the record to edit.
- Select the Edit button.
- Choose the Edit option.
The PROPERTY EDITOR is displayed.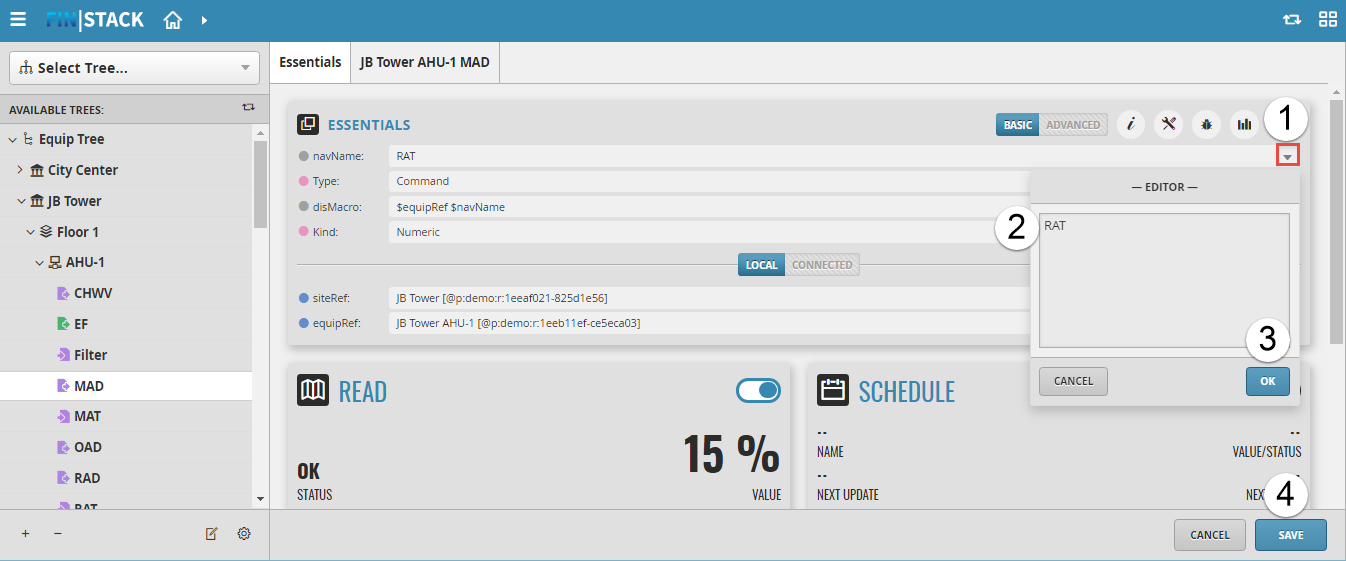
- To add a field to the existing record, select ADD.
- To modify a field, place the cursor in the related text box and begin typing.
Once a record is changed, the modified field is updated and the APPLY button is displayed in the row of buttons.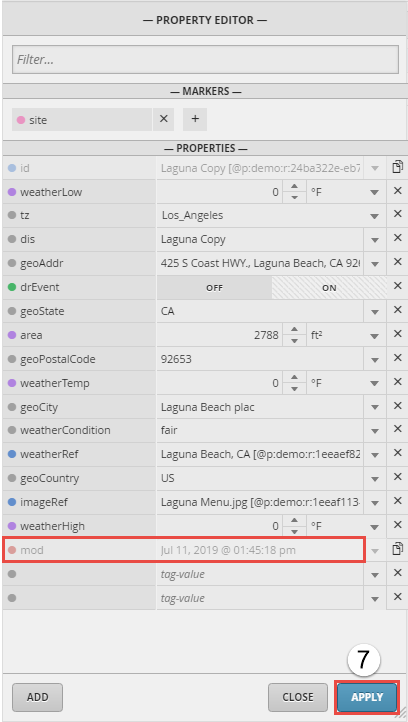
- To apply the changes to the record, select APPLY.
Duplicate a Record
To duplicate a record:
- Select the level to be edited. Blue text indicates the active level; the text for inactive levels is gray.

- Select the record to be duplicated.
- Select the Edit button.
- Choose the Duplicate option.
The new record is displayed with a duplicate name followed by the word 'Copy'. For example, the duplicate of 'Utility' would display as 'Utility Copy'.
Delete a Record
To delete a record:
- Select the level to be edited. Blue text indicates the active level; the text for inactive levels is gray.
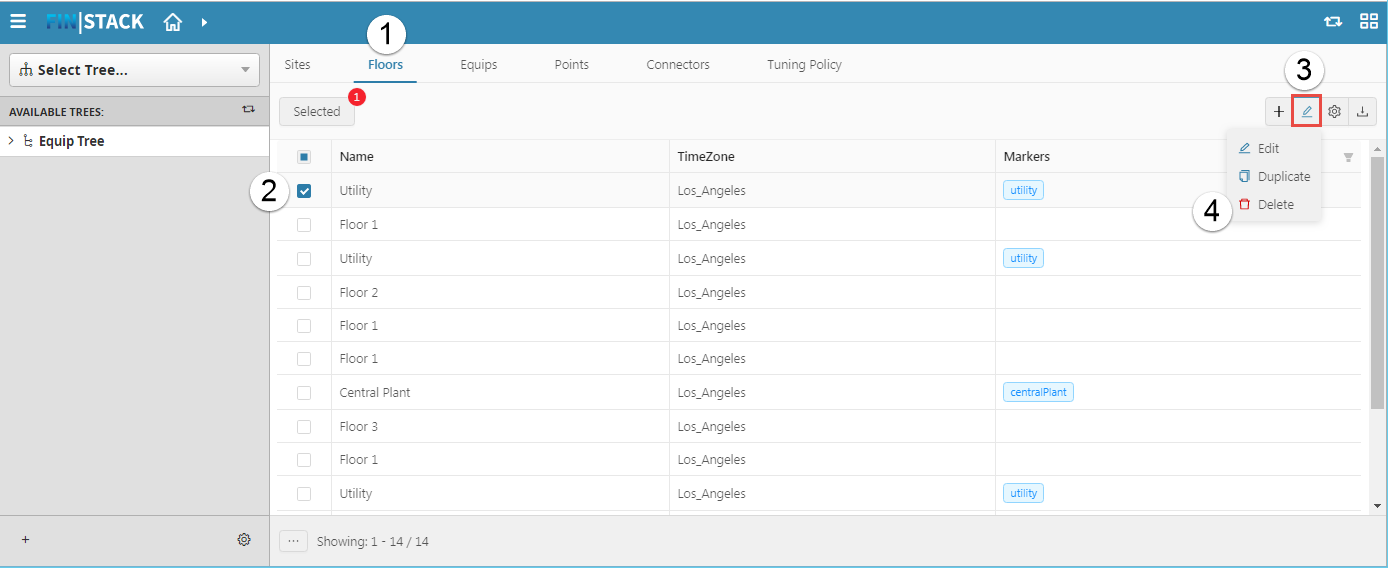
- Select the record to be deleted.
- Select the Edit button.
- Choose the Delete option.
The Confirm Action window is displayed.
- To permanently delete the record, select OK.
Display Tools
To display Tools:
- Select the level to be edited. Blue text indicates the active level; the text for inactive levels is gray.

- Select the record to be edited.
- Select the Tools button.
A context-sensitive list of tools is displayed. For detailed information about the available tools go to DB Builder Tools.
Download a Record
To download a record for use offline:
- Select the level to be edited. Blue text indicates the active level; the text for inactive levels is gray.
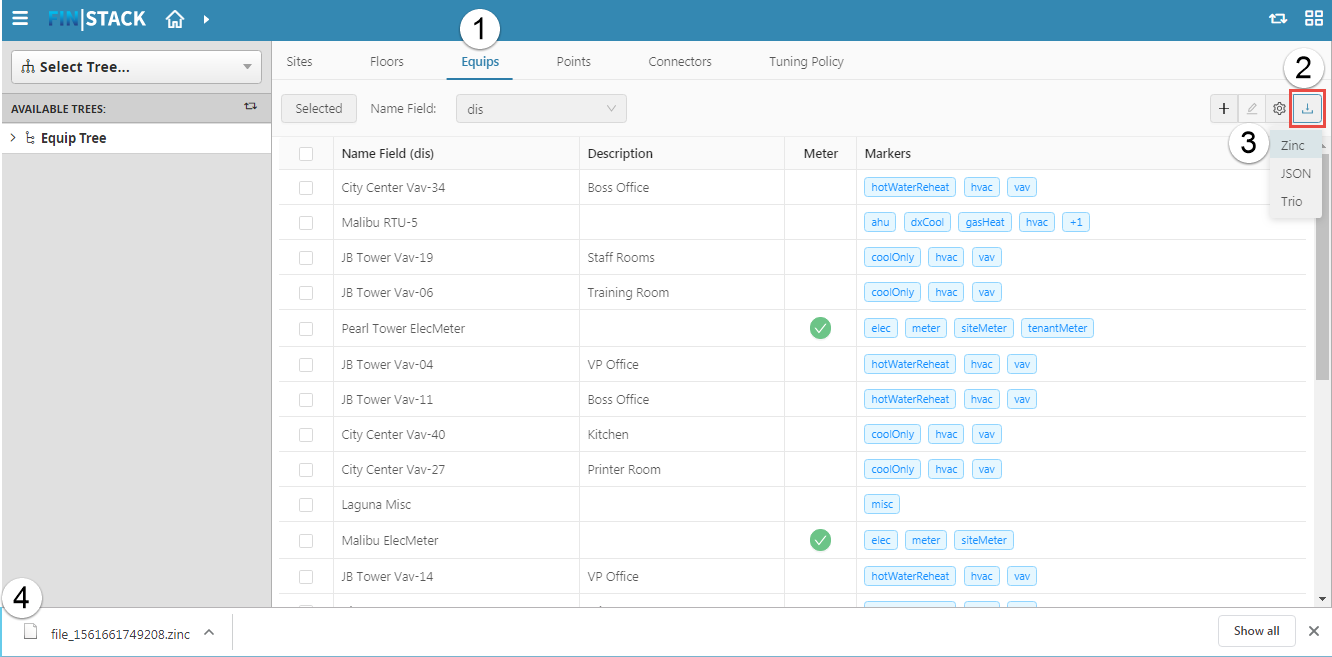
- Select the Download button.
A file format menu is displayed. - Select a file format from the menu.
- The file is downloaded to your computer's Download folder.
Filter Data
Use the Filter to sort records by components. To filter data:
- Select the level to be viewed. Blue text indicates the active level; the text for inactive levels is gray.
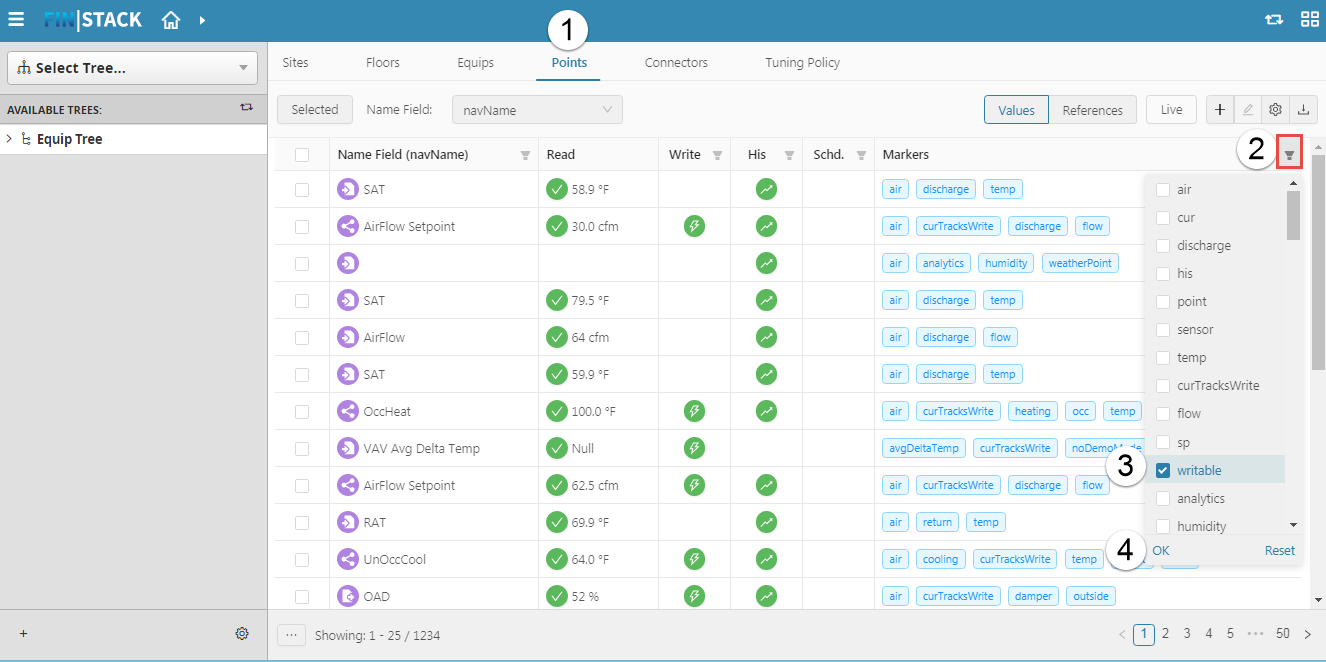
- Select the Filter button.
A drop-down list of filterable components is displayed. - Select the check boxes of the filters to be used.
In the example, the points will be filtered by writable points. - Select OK.
The following example sorts data with the Write filter. The Filter button is blue, indicating that a filter is in use.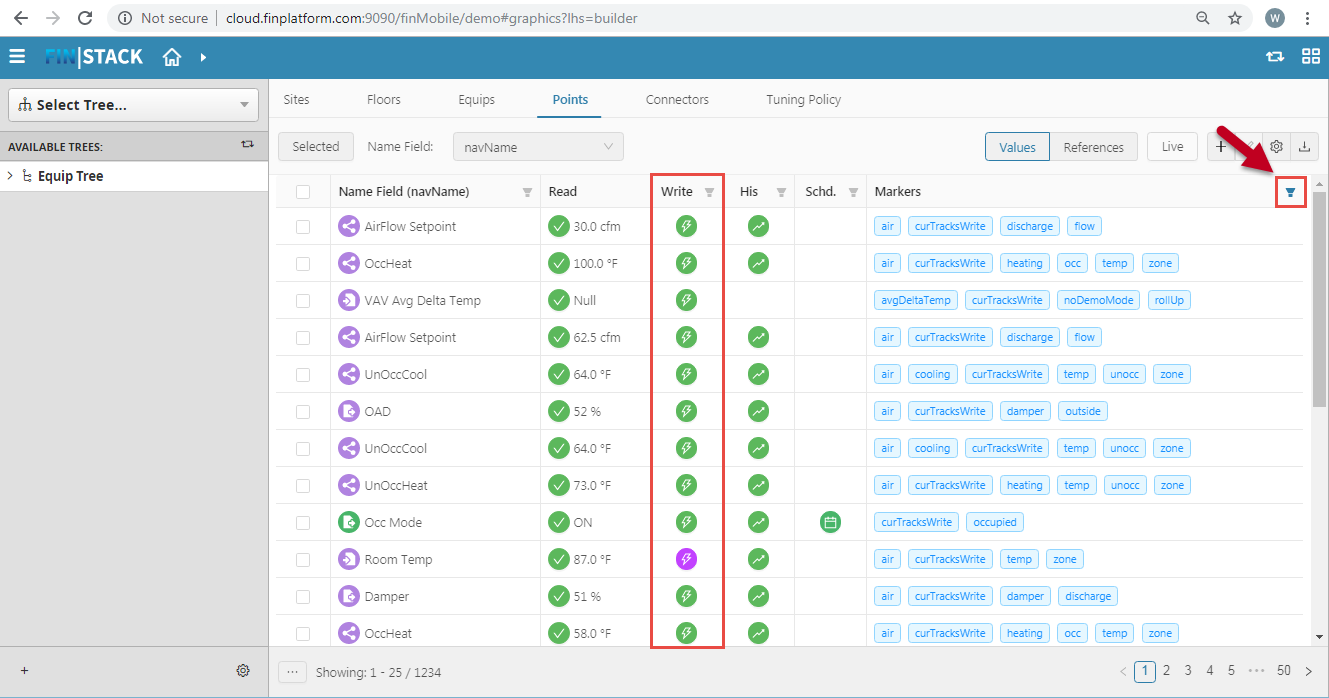
Adjust Number of Records Per Page
To adjust the number of records that display on each page:
- Select the level to be viewed. Blue text indicates the active level; the text for inactive levels is gray.
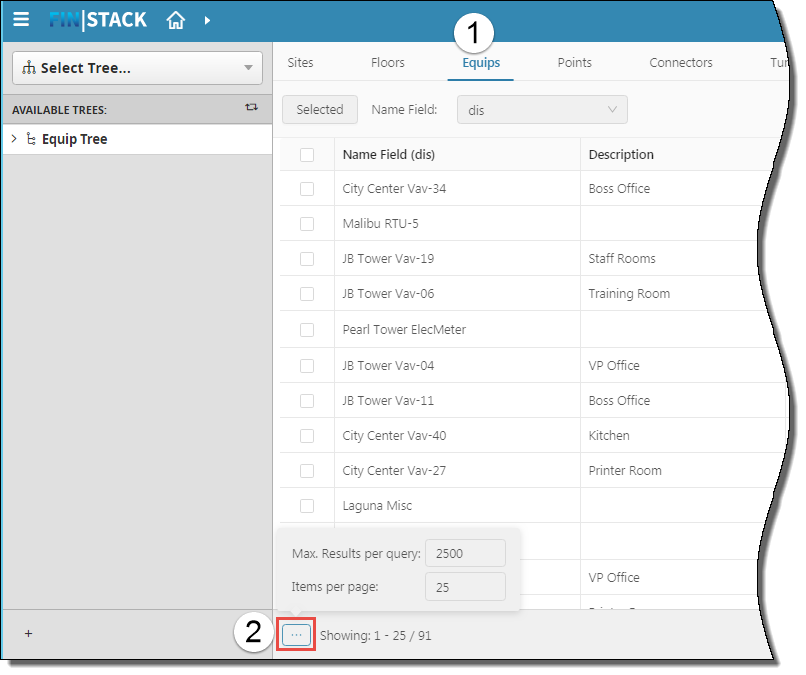
- Select the More (...) button at the bottom of the page.
A window opens, indicating the number of records listed on each page and the number of maximum results for each query. - Use the up and down arrows to adjust the numbers or type the number in the text box.
The data window adjusts dynamically.
Equip Tree Navigation: Available Trees View
You can drill down to Equip Tree components contained in each site. The default navigation hierarchy is Site > Floor > Equip > Point.
To drill down to a component:
- Open the Equip Tree drop-down menu to see the sites associated with your project.
City Center, JB Tower, Laguna, Malibu, and Pearl Tower are all sites shown in this example.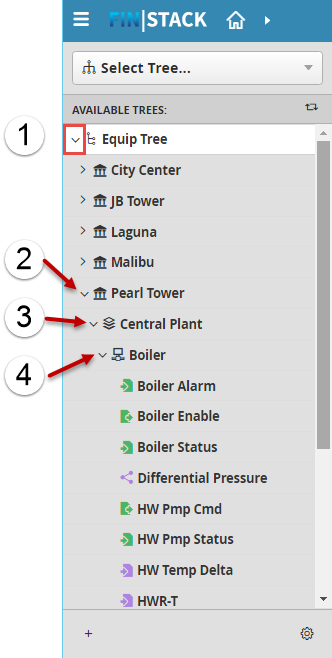
- Open the drop-down menu for the Site level (for example, Pearl Tower).
The floors for that site are displayed. - Open the drop-down menu for the Floor level (for example, Central Plant).
The equipment (Equip) for the selected floor is displayed. - Open the drop-down menu for the Equip level (for example, Boiler).
The Points for the selected equipment are displayed.
When you select a Site, Equip, or Point, two tabs display:
- Essentials
- A context-specific label built from the Site, Equip, and Point (for example, the Site level is City Center, however the Equip level is labeled City Center AHU-3 CHWV). This contains the grid view of the item.
Floor data displays only in the grid view.
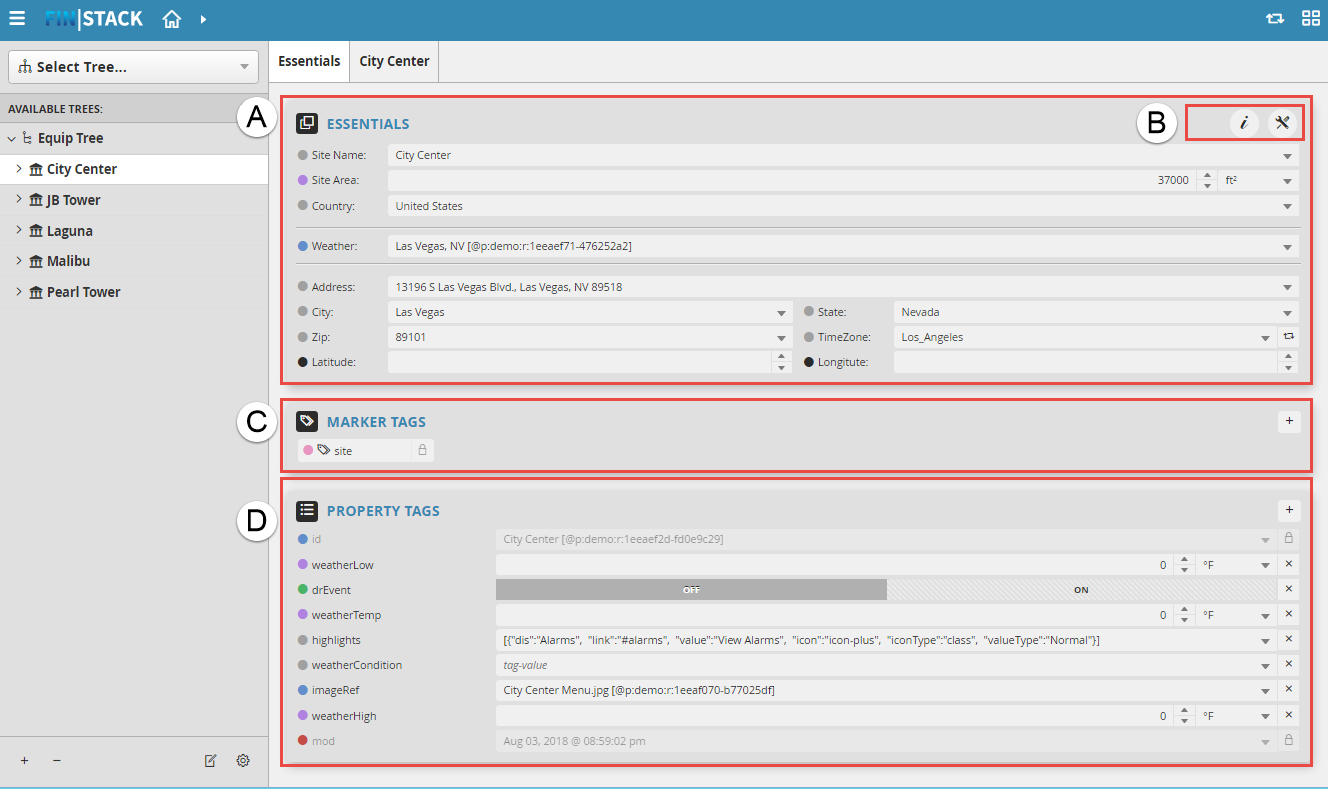
Essentials Tab
Site Essentials and Equip Essentials
When a Site or an Equip is selected in the Available Trees menu, the Essentials tab contains the following sections:
A. ESSENTIALS: includes the Site or Equip Name, location, and weather tag
B. PAGE TOOLS: links to the Property Editor and the DB Builder Tools menu
C. MARKER TAGS: shows marker tags
D. PROPERTY TAGS: shows point property tags
Point Essentials
When a Point is selected in the Available Trees menu, the Essentials tab contains more information than a Site or Equip Essentials tab. The Point Essentials tab contains the following sections:
A. ESSENTIALS: includes navName, type of point, point kind, if the point is local or connected, and other details
B. PAGE TOOLS: includes basic and advanced tools
C. READ: provides read data
D. WRITE: provides write data
E. SCHEDULE: provides schedule data
F. HISTORY: provides a graphical preview of the point's history
G. MARKER TAGS: shows marker tags
H. PROPERTY TAGS: shows point property tags
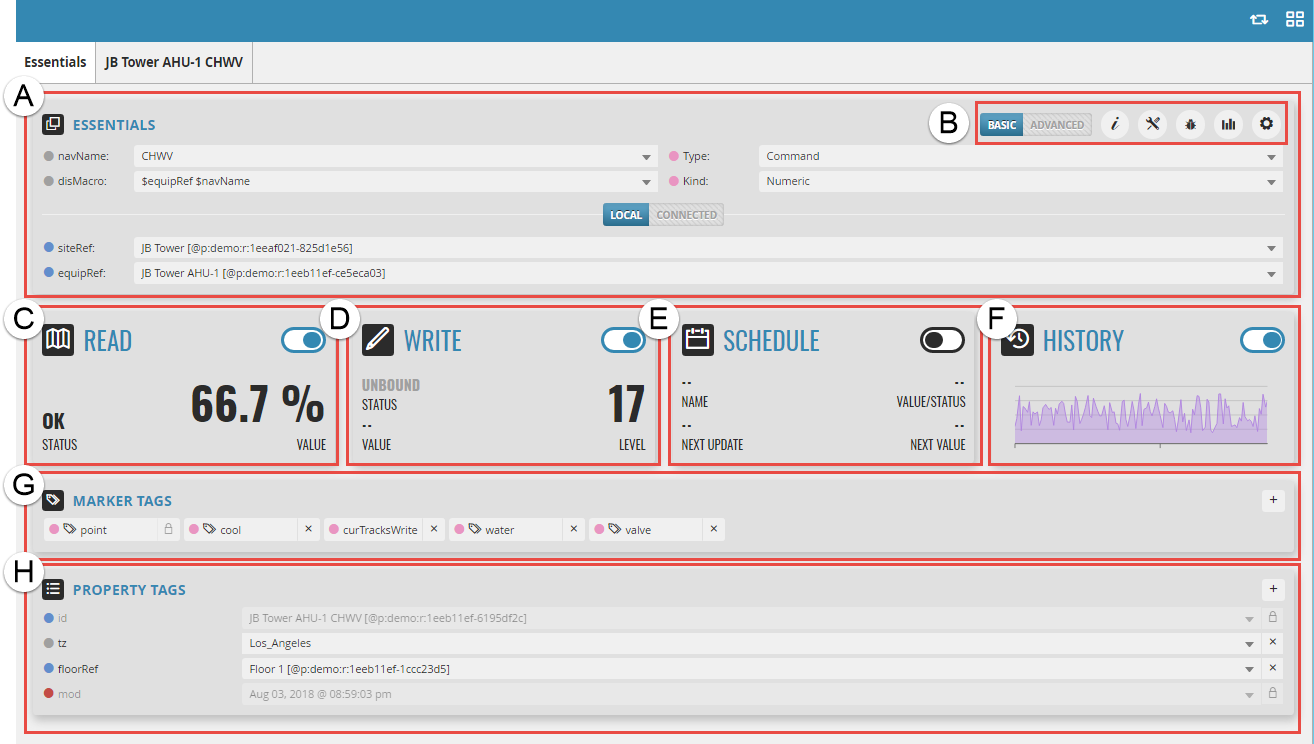
To review detailed information about Point Essentials fields, go to the Point Property Sheet.
In the Essentials tabs, you can:
- Add tags
- Delete tags
- Edit fields
Add Tags
To add tags:
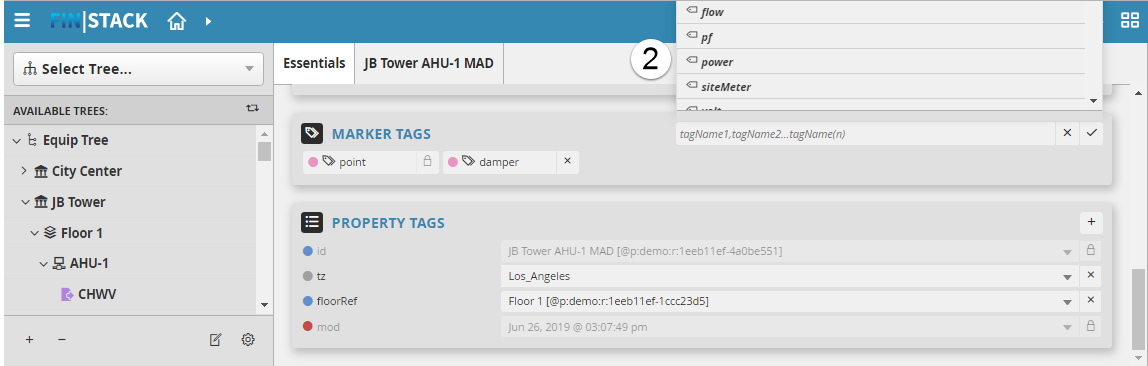
- Select the tag field's Add (+) button.
A list of the project's existing tags is displayed.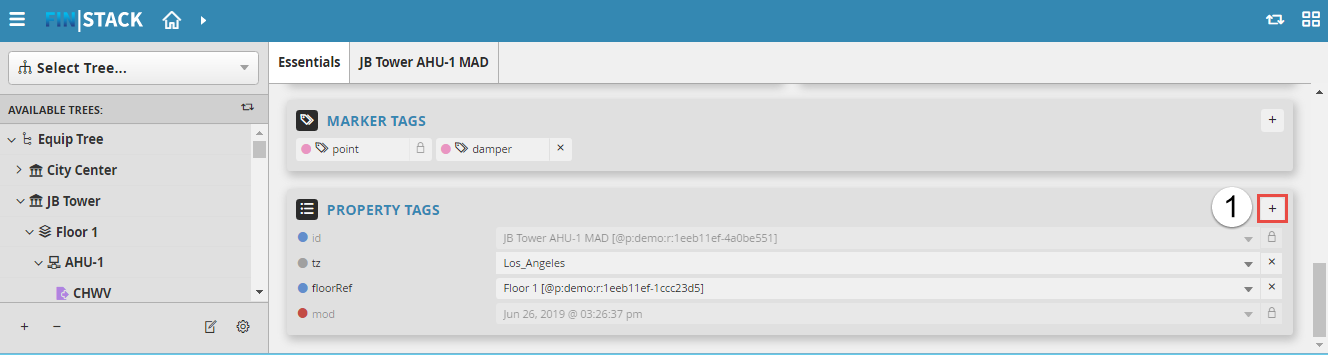
- Choose a tag from the list. If the tag is not contained in the list, continue to the next step.
- Type a tag name into the text box field.
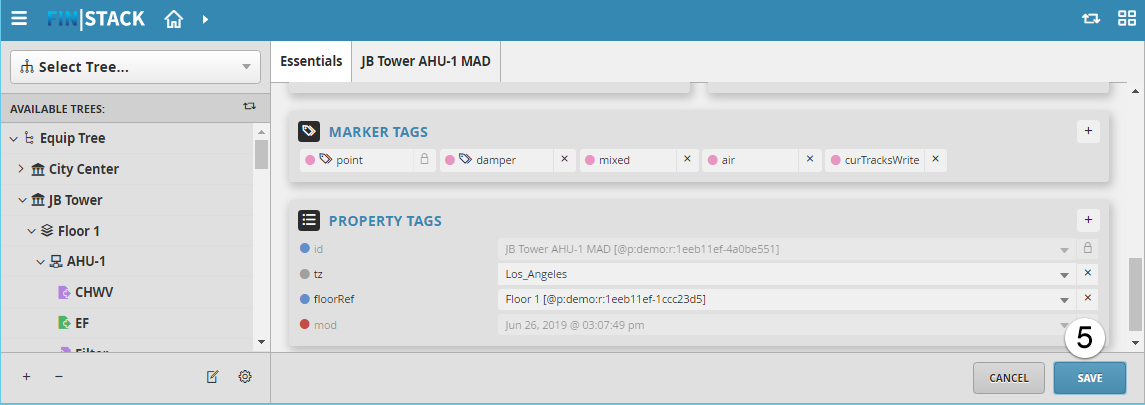
To add multiple tags into one field, type the tag names, separated by commas without a space. In the example below, the tags mixed, air, and curTracksWrite are entered as "mixed,air,curTracksWrite".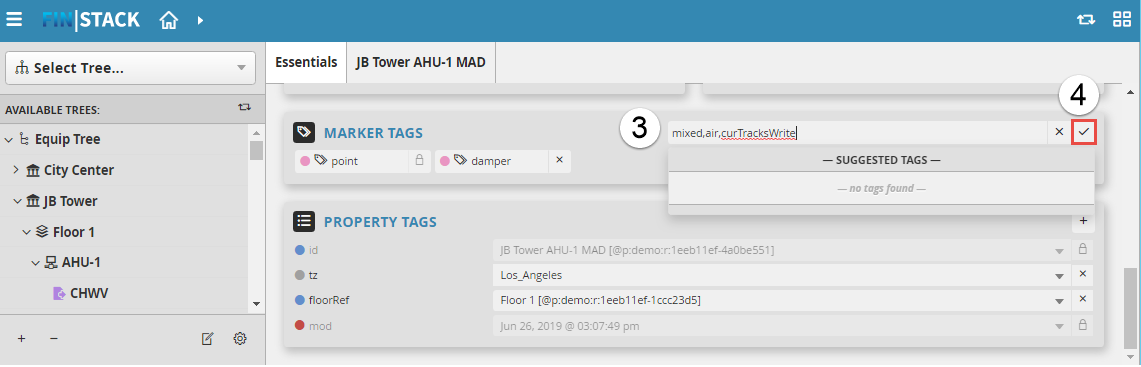
- Select OK.
- Select SAVE.
Delete Tags
To delete tags:
- Select the X to the right of each tag name to delete.
The X turns red, showing that the tag is selected for deletion. In the example below, the tags mixed, air, and curTracksWrite are selected for deletion.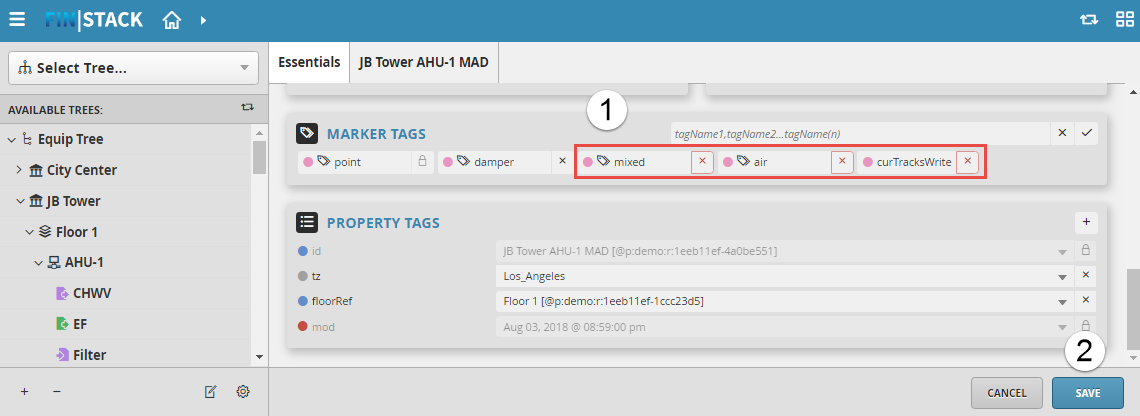
- Select SAVE.
Edit Fields
To edit fields,
- Select the drop-down arrow for the field to be edited.
The text EDITOR is displayed.
If the field requires an entry of specific units, a SELECT UNITS menu is displayed.
See the example below.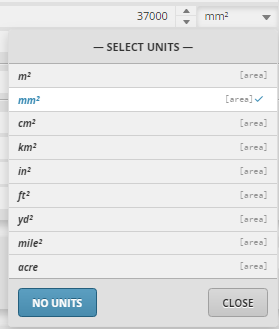
- Enter the desired text or select the desired units.
- Select OK.
- Select SAVE.
Collect or Suspend Collection of Read, Write, Schedule, or History Data (Point Essentials only)
To start and stop collection of read, write, schedule, or history data:
- Choose the point's read, write, schedule or history property section. In the example below, READ status will be modified for the JB Tower Vav-01 AirFlow point.

- Select the toggle switch to start or to stop data collection. A blue toggle switch indicates that status data is being collected; a black toggle indicates that status data is not being collected.
- Select SAVE.
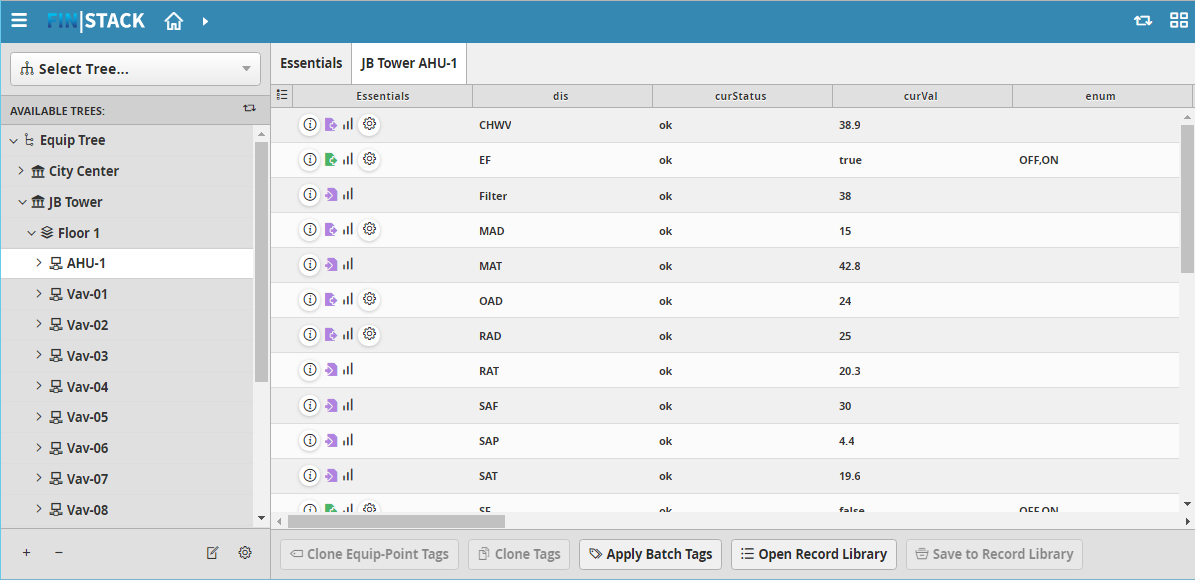
Grid View
The grid view provides an alternate way for users to view, examine, and edit data. The name of the grid tab contains a context-specific label built from the Site, Equip, and Point. (In the example below, the Site level is City Center, however the Equip level is labeled City Center AHU-1).
The tools displayed will vary depending on the object selected.
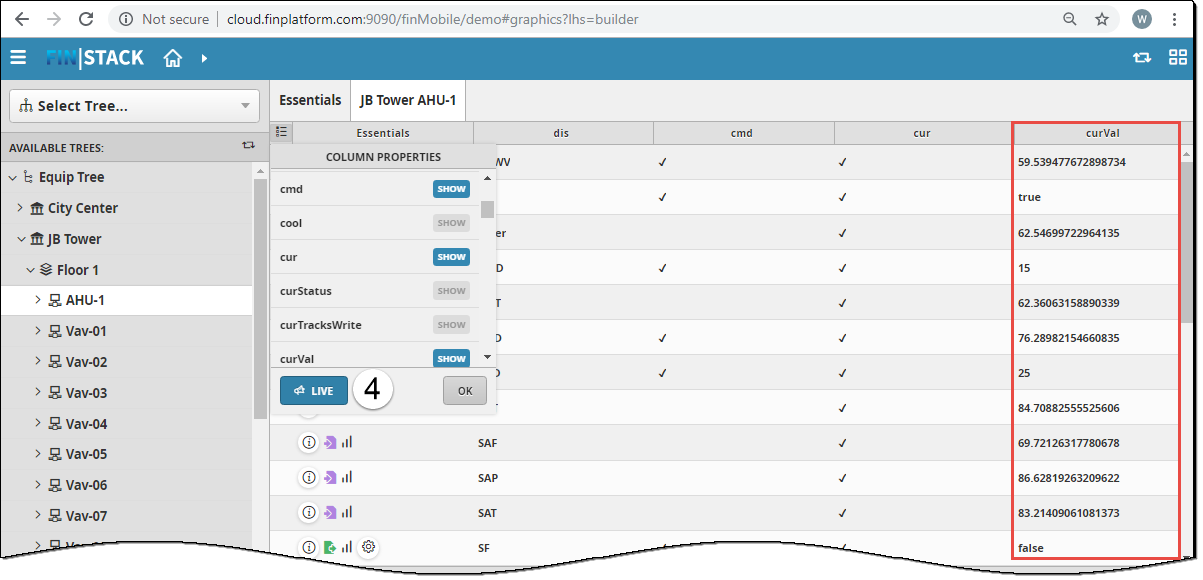
Change Column Properties in the Grid View
To choose the columns that display in the grid view:
- Select the Grid Settings button.
The COLUMN PROPERTIES menu will be displayed.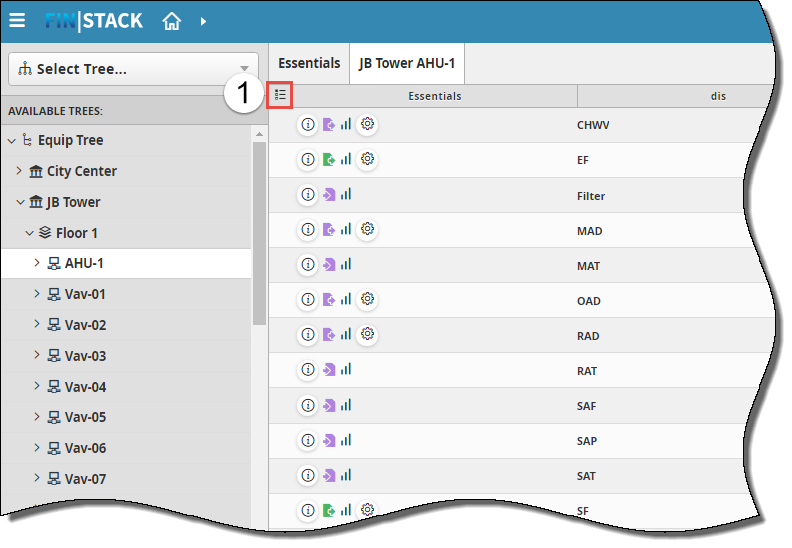
- Select SHOW to display or hide the column. When blue SHOW button indicates that the column will be displayed; a black SHOW button indicates that the column is hidden.
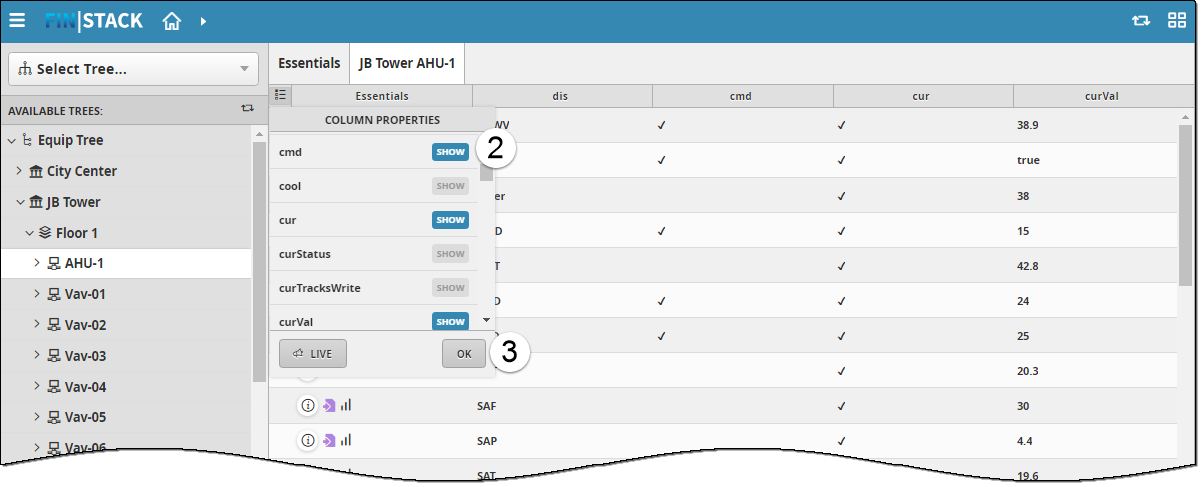
- Select OK.
The column view will be updated to show the selected columns. - To monitor values in real time, select the LIVE button. When LIVE is blue, the live view will be displayed. In the example below, the current value column (curVal) changes each second, showing the point's fluctuating current values.