Schedules Tree
- Ricky Villa
- Kimberly Cruz (Unlicensed)
Schedules Tree
The Schedules tree allows you to quickly view existing schedules and any points linked to them. Although you can create and edit schedule information in the Schedule tree, a schedule’s weekly and holiday events must be edited in the Schedules app.
View List of Schedules in the Project
- To view a list of all schedules used in the project, select Schedules from the Available Trees menu.
A list of schedules is displayed.
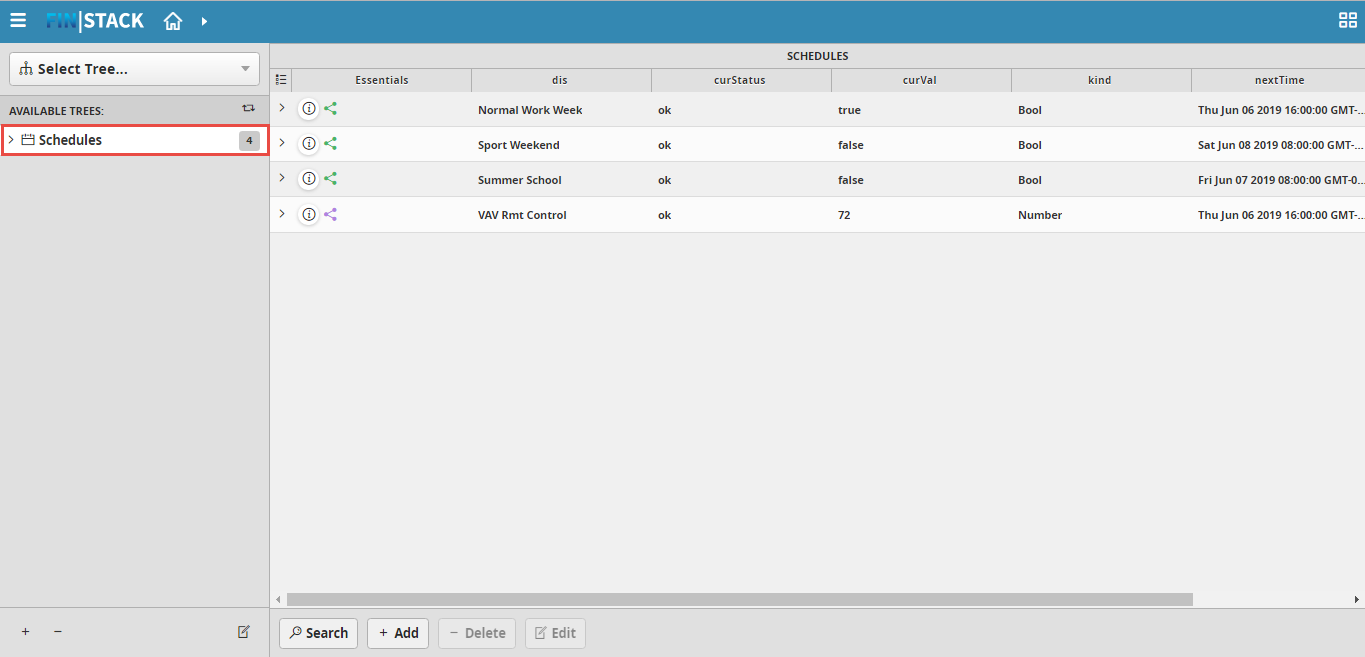
The number on next to Schedules indicates the number of schedules in the project. For example, the project in the screenshot contains four (4) schedules.
View Points Assigned to a Schedule
To view points assigned to a specific schedule:
- Select Schedules from the Available Trees menu.
A list of schedules is displayed. - Open the schedule's drop-down menu.
Individual points of the schedule are displayed as tiles.
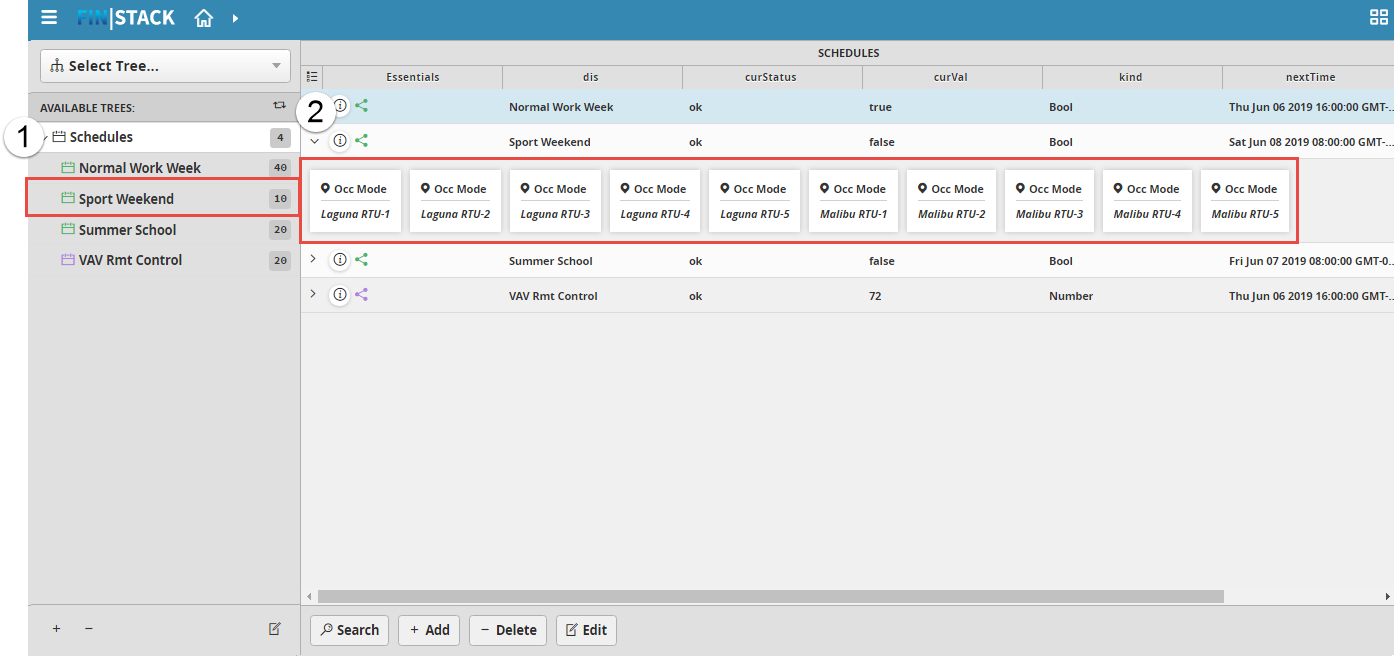
The number next to the schedule name indicates the number of points in the schedule. This is the same number of tiles for the schedule. For example, the project in the screenshot (Sport Weekend) contains ten (10) schedules, and the associated ten tiles are displayed under the Sports Weekend schedule in the SCHEDULES section.
Reassign Points Between Schedules
To assign points from one schedule to a different schedule:
- Select Schedules from the Available Trees menu.
A list of schedules is displayed on the main page.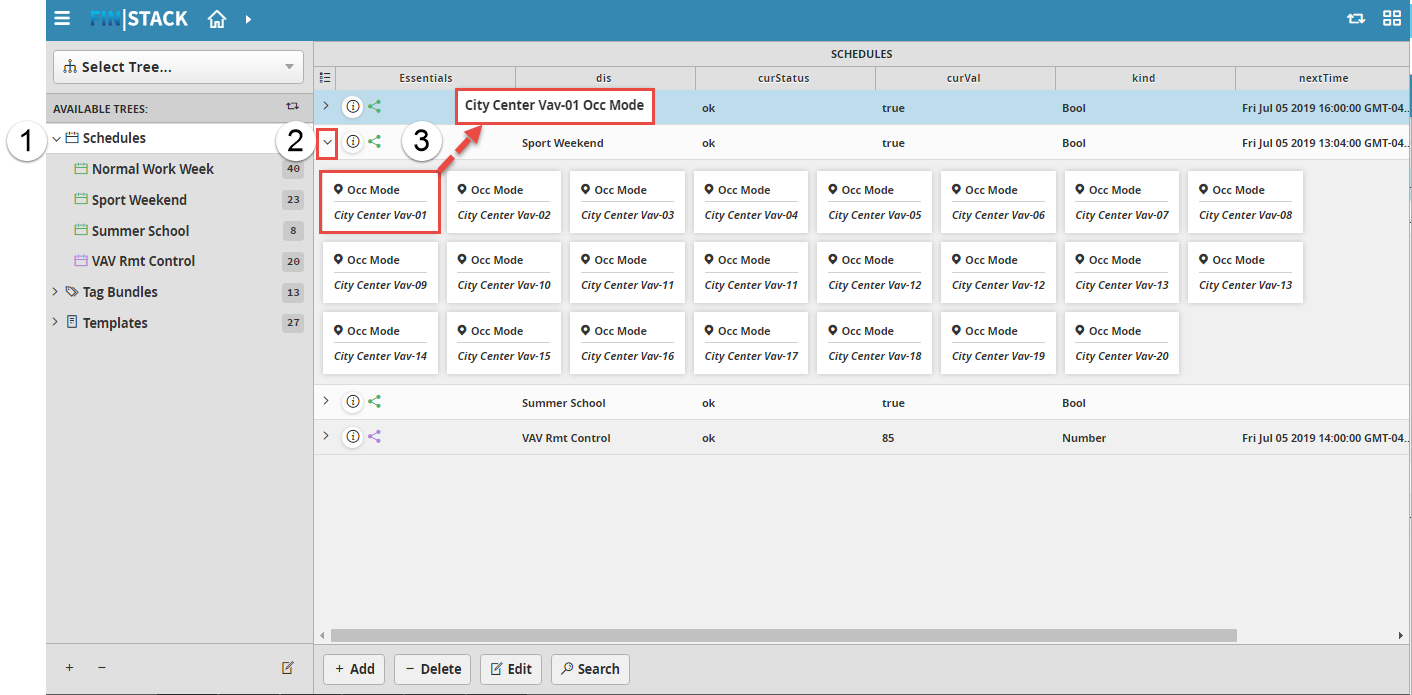
- Open the schedule's drop-down menu.
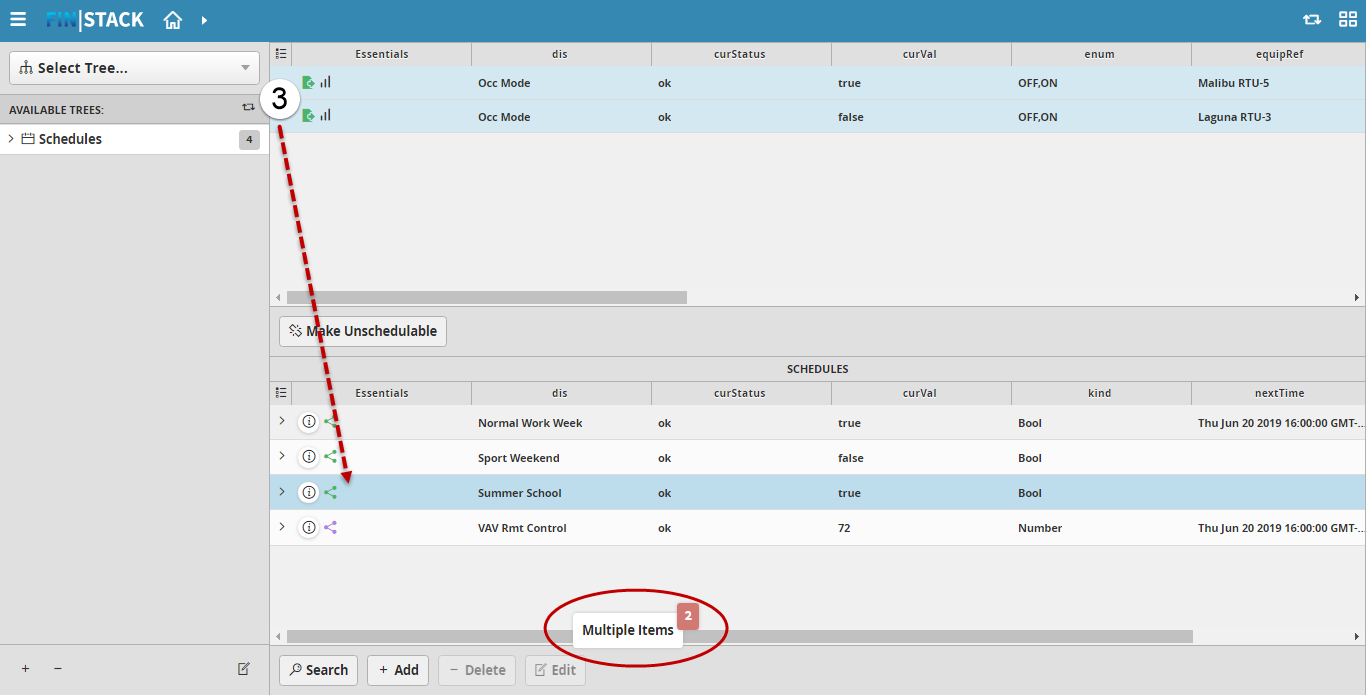
Individual points of the schedule are displayed as tiles. - Select and drag a tile to the Schedule heading within the main window.
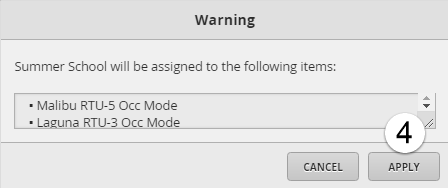
The schedule's heading turns from light to medium blue. Release the mouse, placing the tile in the new schedule. - A warning window pops up, confirming the placement of the point in the new schedule.
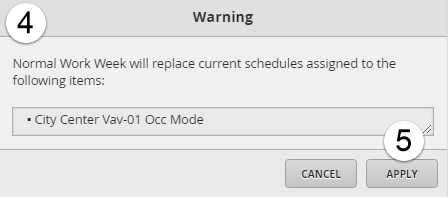
- Select APPLY.
The point is now assigned to the new schedule.
Create a New Schedule
To create a schedule:
- Select Schedules from the Available Trees menu.
A list of schedules is displayed.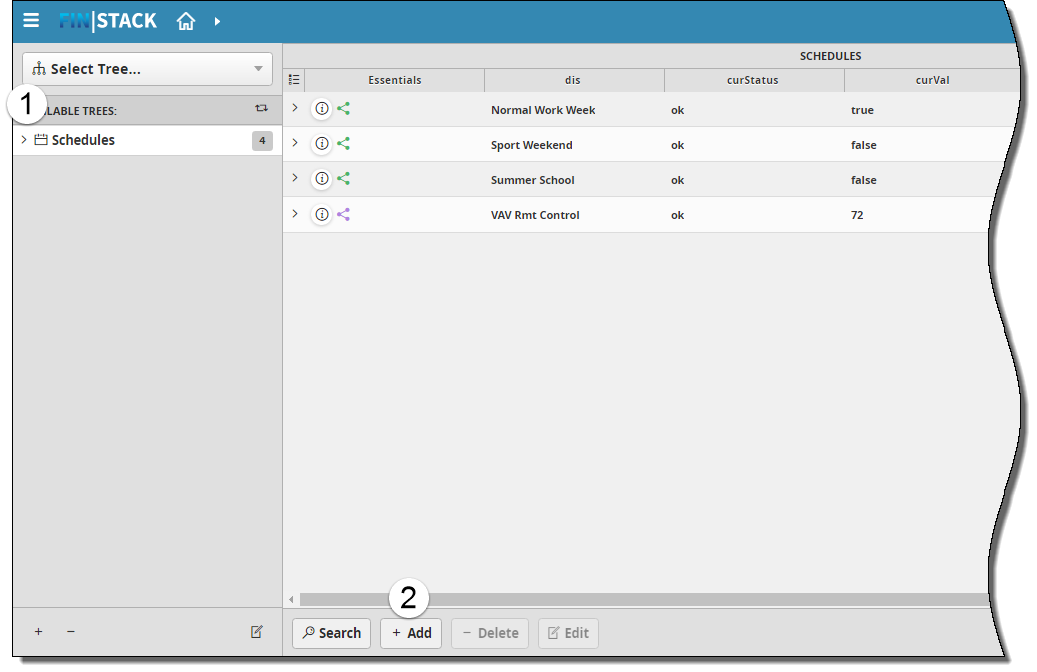
- Select Add.
The Create New Schedule window is displayed.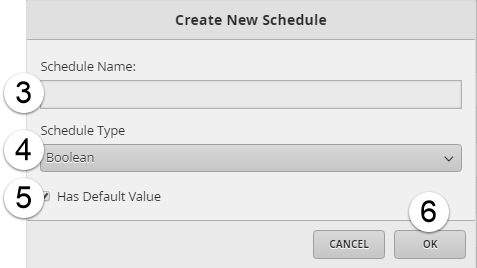
- Enter a Schedule Name.
- Select a Schedule Type from the drop-down menu; choose between Boolean, Number, String, or Enum schedule types.
- Select or clear the Has Default Value checkbox.
- Select OK.
If the Has Default Value checkbox is NOT selected, the new schedule will be created and will appear in your list of Schedules.
If the Has Default Value checkbox is selected, the Has Default Value window will appear.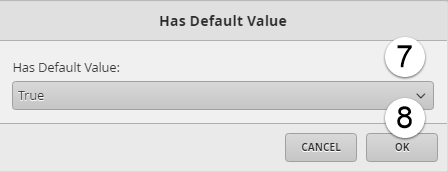
- Select a default value from the Has Default Value drop-down menu.
- Select OK.
Edit Schedule
To create a schedule:
- Select Schedules from the Available Trees menu.
A list of schedules is displayed.
- Select the schedule to be edited.
The schedule heading turns from light to medium blue. - Select Edit.
The Edit Schedule window is displayed.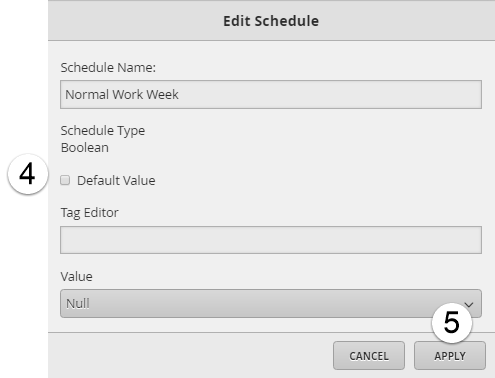
- Modify any combination of the following fields:
-Schedule Name
-Default Value: select to indicate this schedule is the default
-Tag Editor
-Value: select a value from the drop-down menu - Select APPLY.
Delete Schedule
To delete a schedule:
- Select Schedules from the Available Trees menu.
A list of schedules is displayed.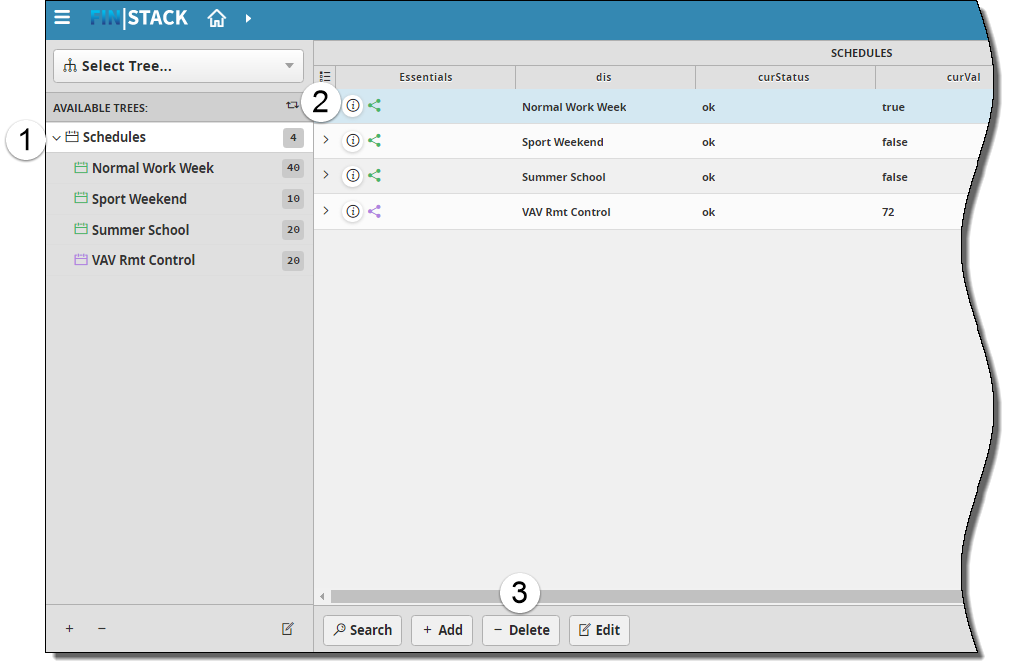
- Select the Schedule to be deleted.
The schedule heading turns from light to medium blue. - Select Delete.
The Delete Schedule window is displayed. When a schedule is deleted, the points assigned to the deleted schedule must be reassigned to an existing schedule.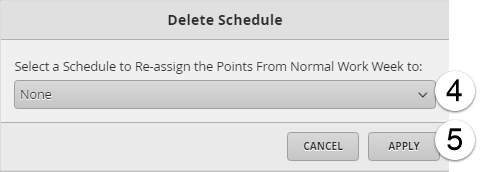
- Use the drop-down menu to select the replacement schedule for the deleted schedule's points.
- Select APPLY.
Find and Assign Unassigned Points
- Select Schedules from the Available Trees menu.
A list of schedules is displayed.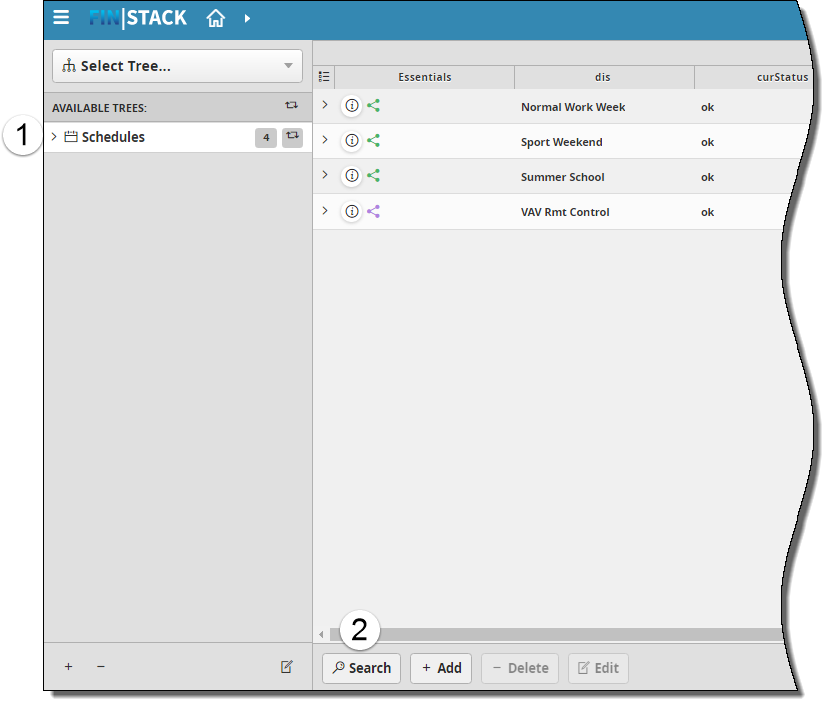
- Select the Search button.
FIN Stack queries the database and returns a list of points that are schedulable but do not have a referenced schedule. These points display in the top section of the main window. - To assign returned points to a schedule, select and drag a tile to the Schedule heading in the bottom section of the main window. A badge appears, confirming the item or number of items that are selected; see an example in the screenshot below.
The schedule heading turns from light blue to medium blue. Release the mouse.
A warning window pops up, confirming the placement of the point in the schedule. - Select APPLY.
The points are removed from the schedulable list and assigned to the indicated schedule.
Unlink a Point from a Schedule
You can use the Unlink from Schedule button to unlink points from a schedule, after which the points' status will be schedulable.
- Open the Schedules drop-down from the Available Trees menu.
A list of schedules is displayed.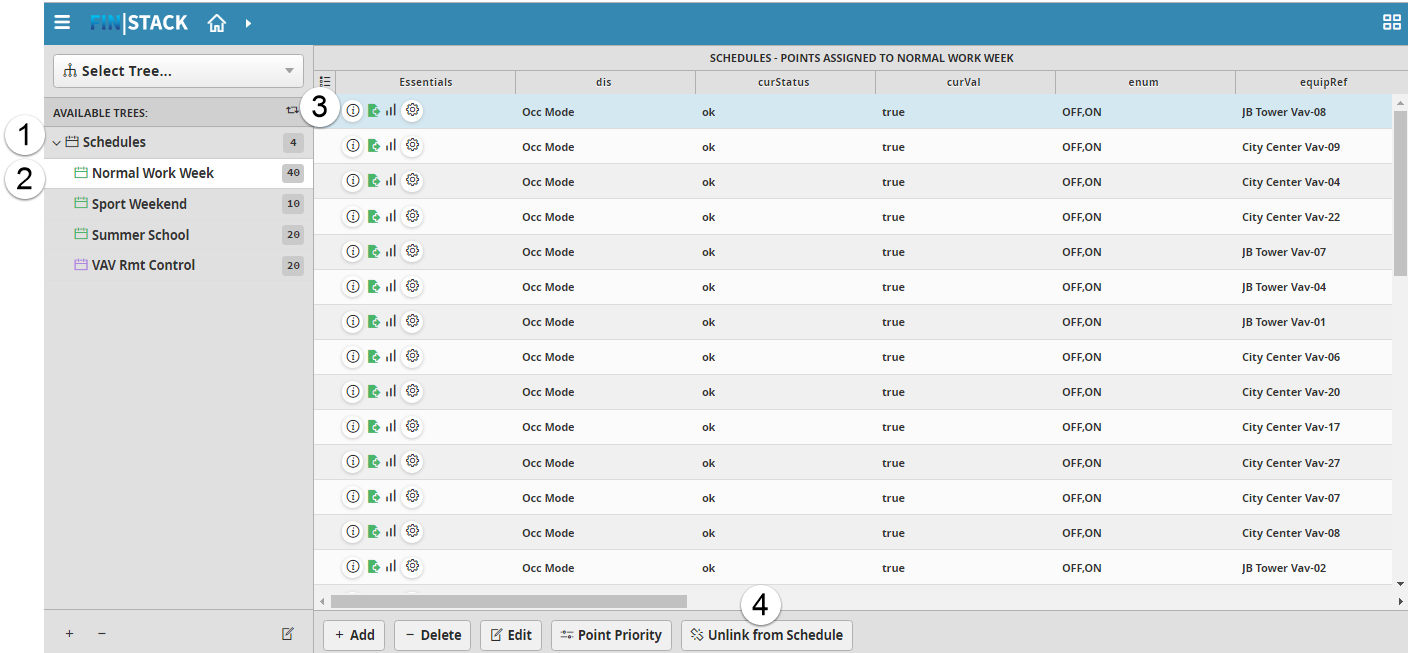
- Select a schedule.
A list of points associated with the schedule is displayed. - Select the point to unlink or unassign from the schedule.
- Select the Unlink from Schedule button.
The button turns gray, indicating that the point has been unlinked from the schedule.
Change the Priority of the Schedule
You can change the point priority in the Schedules tree instead of changing the information in Point Essentials or the Property Editor.
- Open the Schedules drop-down from the Available Trees menu.
A list of schedules is displayed.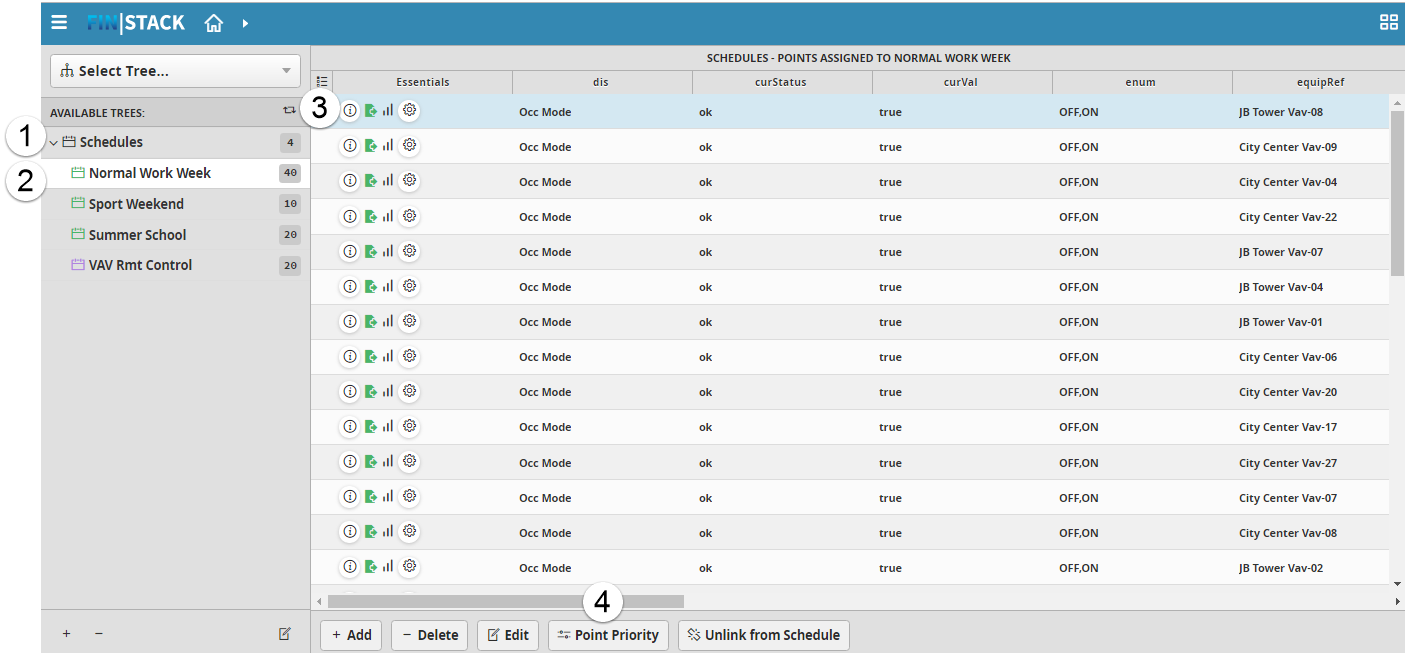
- Select a schedule.
A list of points associated with the schedule is displayed. - Select the point to change.
- Select the Schedule Point Priority button.
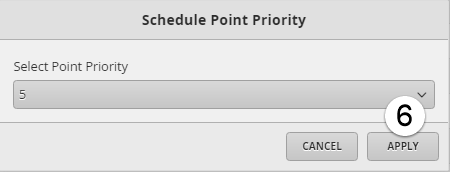
The Schedule Point Priority window appears. - Select a new point priority from the Select Point Priority drop-down menu.
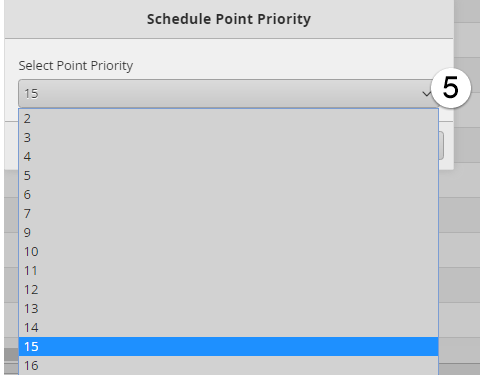
- Select APPLY to assign the new point priority.