Thermostat (Simple)
- Sarah Padilla (Unlicensed)
Owned by Sarah Padilla (Unlicensed)
Last updated: Jun 14, 2017
Description
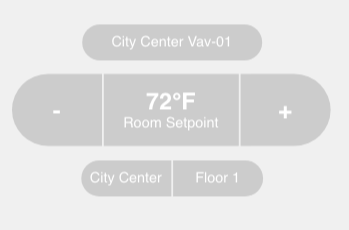
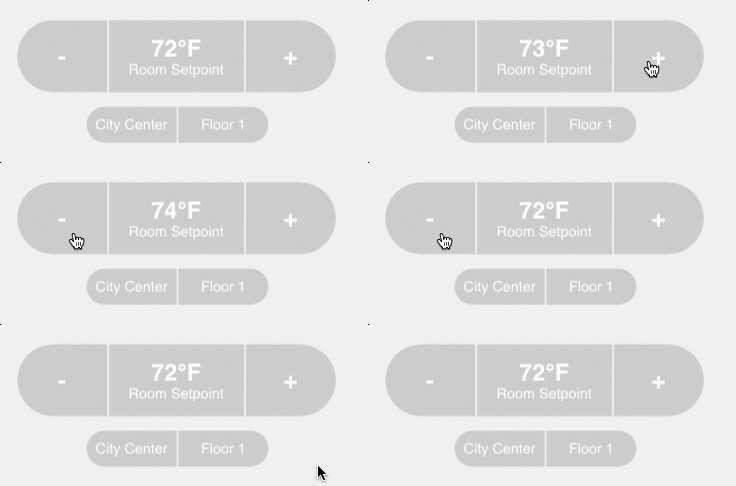
This model will show and can change the set point of a vav. It also shows the site, floor, and equip. Must be placed on an equip.
Completed Model (Basic)
Download: SetPoint.zip
Video
Example:
Ractive Code
Template
<div class="fin fHt vertical s-width">
    {{#mySetPoint}}
	<div class=" fin horizontal center middle">
    <div class="small-button-top fin vertical middle center">{{equipRefDis}}</div>
    </div>
    <div class="fin horizontal mlt mlh">
    <div class="s-buttons s-minus fin vertical middle center" on-click="decrement">
        <strong>-</strong>
    </div>
    <div class="s-buttons s-label fin vertical middle center">
        <strong>{{curVal}}{{unit}}</strong><span class="subText fin middle center">{{navName}}</span>
    </div>
    <div class="s-buttons s-plus fin vertical middle center" on-click="increment">
        <strong>+</strong>
    </div>
    </div>
    <br>
    <div class=" fin horizontal center middle">
    <div class="small-button-left fin vertical middle center">{{siteRefDis}}</div>
    <div class="small-button-right fin vertical middle center">{{floorRefDis}}</div>
    </div>
    {{/mySetPoint}}
</div>
Lines 20 and 21 is where the site and floor are displayed. siteRefDis and floorRefDis can be changed to another tag to be displayed, or if not wanted lines 17-21 can be removed to just display the setpoint with the plus and minus buttons. Lines 3-5 show the equipRefDis(line 4) and can be changed or deleted as well
Model
{
    data:
    {
            mySetPoint: null
    }
}
Style
.s-width{
    width:386px;
}
.s-buttons{
    background-color: #ccc;
    color:#fff;
    height:80px;
    font-size: 26px;
}
.s-minus{
    border-radius: 40px 0 0 40px;
    margin-right:2px;
    width:100px;
    cursor: pointer;
}
.s-plus{
    border-radius: 0 40px 40px 0;
    width:100px;
    cursor: pointer;
}
.s-label{
    margin-right:2px;
    width:150px;
}
.subText{
    font-size: 16px;
}
.small-button-left{
    background-color: #ccc;
    color:#fff;
    height:40px;
    width:100px;
    font-size: 16px;
    margin-right:2px;
    border-radius: 40px 0 0 40px;
}
.small-button-right{
    background-color: #ccc;
    color:#fff;
    height:40px;
    width:100px;
    font-size: 16px;
    border-radius: 0 40px 40px 0;
}
.small-button-top{
    background-color: #ccc;
    color:#fff;
    height:40px;
    width:200px;
    font-size: 16px;
    border-radius: 40px;
}
INIT
var self = this.ractive;
this.ractive.fire("obtainData");
var count = 0;

this.ractive.on("increment", function(event){
    var point   = this.get('mySetPoint');
    var val     = parseFloat(point.curVal);
    val += 1;
    if (val >= 84)
    val=84;
    if (val <= 0)
    val=0;
    finstack.eval('readById(' +point.id+ ').pointOverride(' +val+ ')').then(function(data) {
       if (data && data.result) {
           if (data.result.isErrorGrid) {
                console.error("Error occurred while updating value");
                return;
           }
          self.set('mySetPoint.curVal', val);
       }
    }, function(err) {
        console.error("Error occurred while updating...", err);
    });
});

this.ractive.on("decrement", function(event) {
    var point   = this.get('mySetPoint');
    var val     = parseFloat(point.curVal);
    val -= 1;
    if (val >= 84)
    val=84;
    if (val <= 0)
    val=0;
    finstack.eval('readById(' +point.id+ ').pointOverride(' +val+ ')').then(function(data) {
       if (data && data.result) {
           if (data.result.isErrorGrid) {
                console.error("Error occurred while updating value");
                return;
           }
           self.set('mySetPoint.curVal', val);
       }
    }, function(err) {
        console.error("Error occurred while updating...", err);
    });
});
Program
var roomSP = this;
var target = query("targetPoint");
finstack.eval('readAll((navName=="Room Setpoint") and floorRef=='+target.floorRef+' and siteRef=='+target.siteRef+' and equipRef=='+target.pointId+')', function(data){
roomSP.mySetPoint=data.result.toObj()[0];
console.log(roomSP);
});
Important!: Line 3 may need to be changed to match the navName of your setpoint. For example if the Room Setpoint is named RM SP on your machine, you would change (navName=="Room Setpoint") to (navName=="RM SP")
How To Make your Own
- Bring Ractive out from components on the left side menu
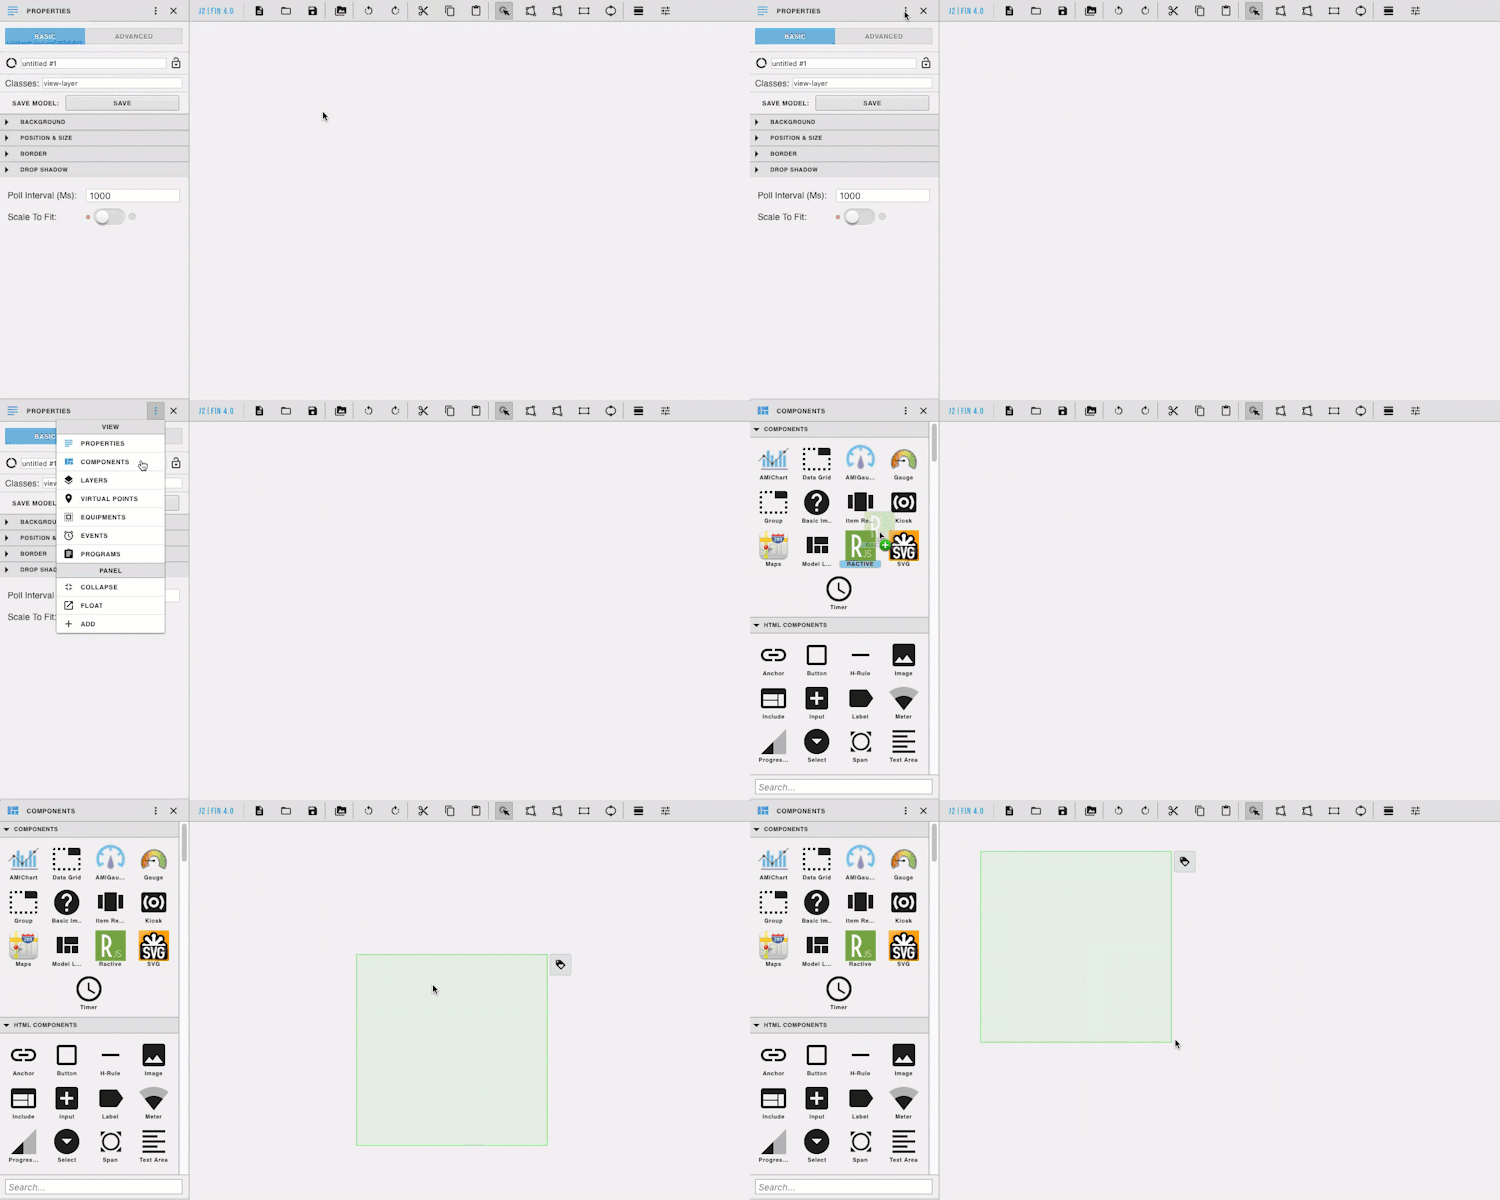
- Then open the ractive editor, and copy and paste from the Ractive Code given above for template, model, style, and init

- Next add a tag on your Ractive component and add a new program
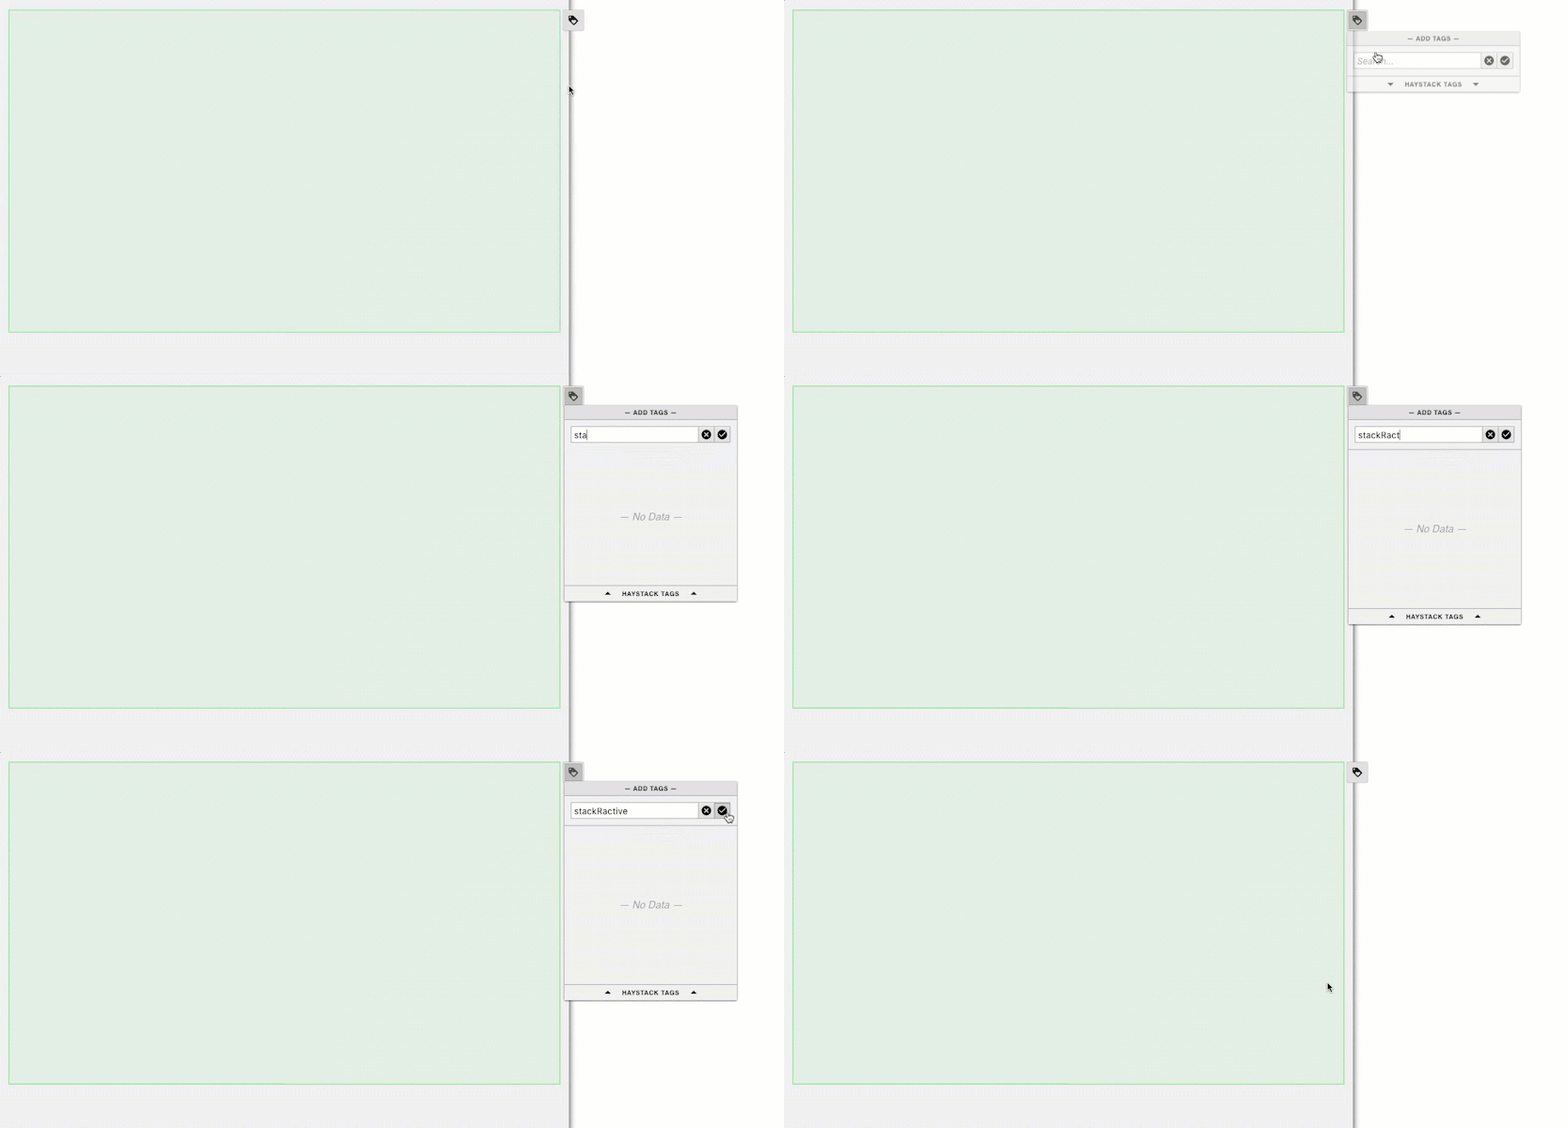
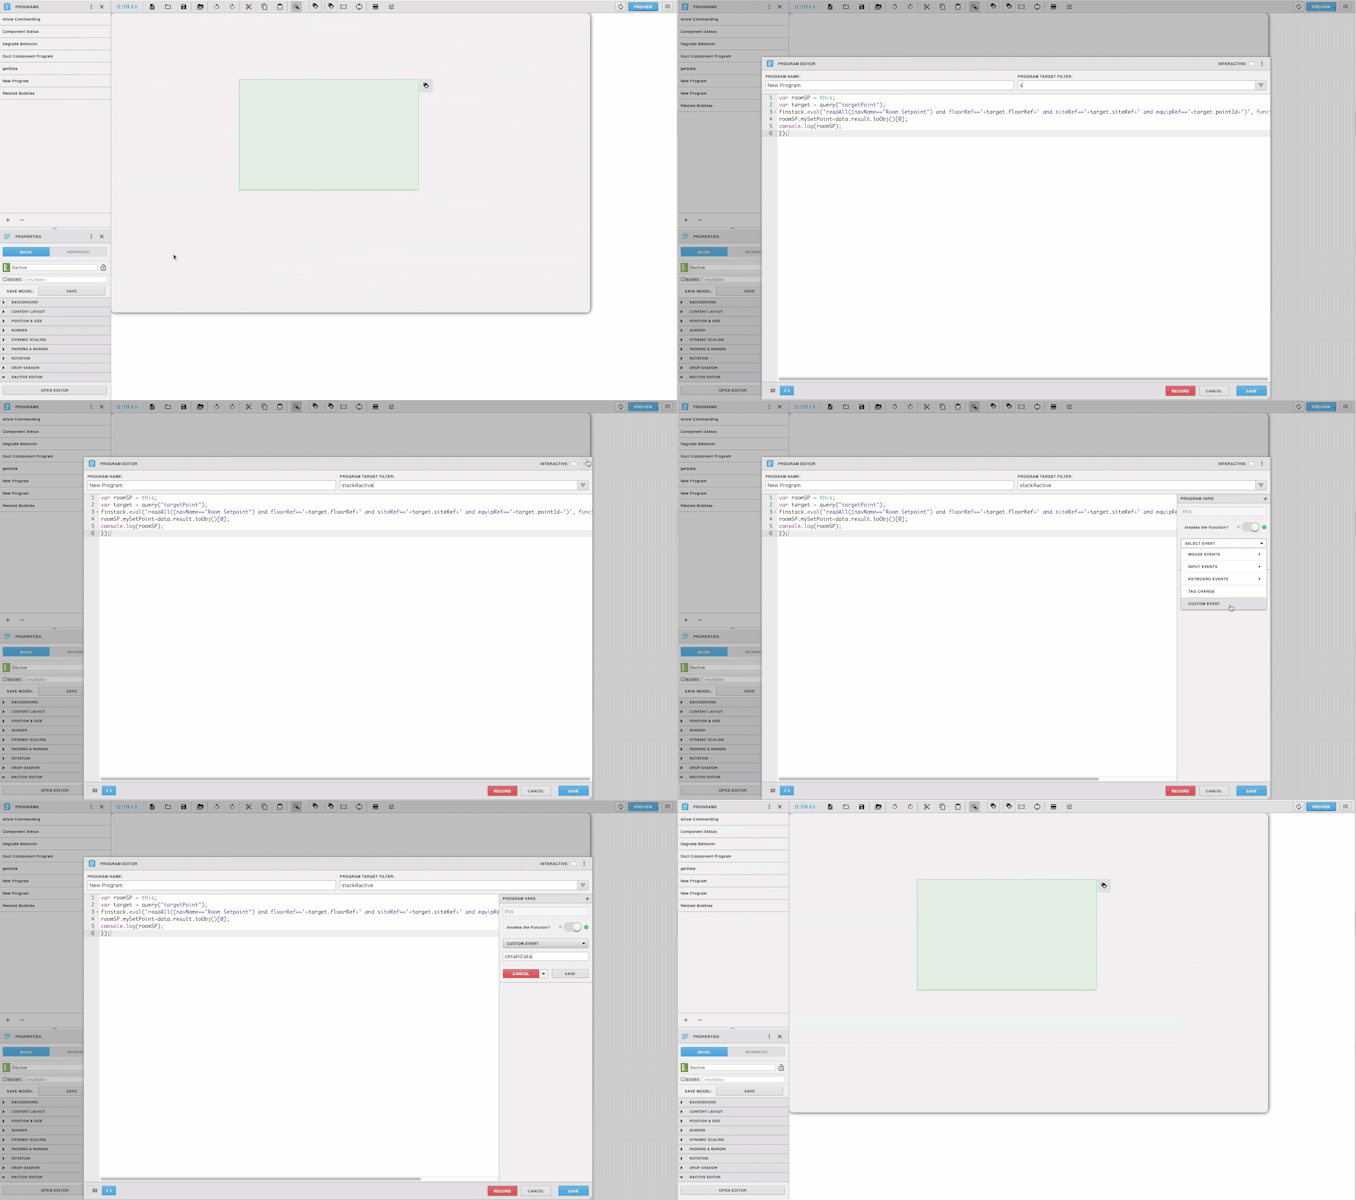
- Copy and paste the above code for program into the main part
- Name your program, and set the program target filter to stackRactive (it must match the tag on the ractive component)
- Top right of program editor, click the three dots, and select variables
- Click the gear that appears as you hover over this
- turn Invokes the Function on and change the dropdown to Custom Event
- Type in obtainData in the line below and click the gray save
Click the blue save for your program
- Save and you're done!
, multiple selections available,