/
Horizontal Drop Down with Magic Bubbles
Horizontal Drop Down with Magic Bubbles
- Sarah Padilla (Unlicensed)
Owned by Sarah Padilla (Unlicensed)

Description
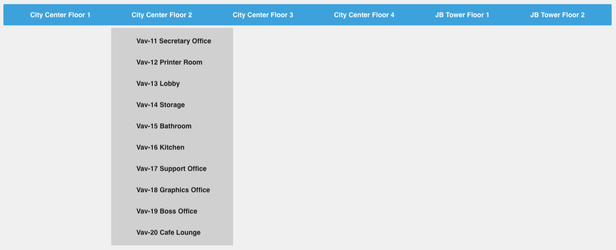
This drop down menu bar will pull up the magic bubbles for whatever point is selected.
Completed Model (Basic)
Download: horizontalDropDownMagicBubbles.zip
Video
Example:
Ractive Code
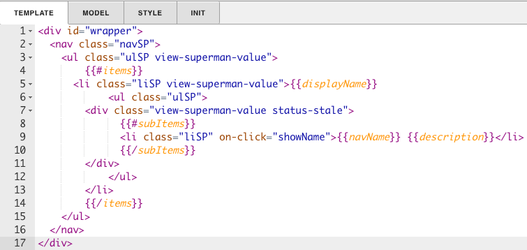
Template
<div id="wrapper">
  <nav class="navSP">
    <ul class="ulSP view-superman-value">
        {{#items}}
      <li class="liSP view-superman-value">{{displayName}}
            <ul class="ulSP">
        <div class="view-superman-value status-stale">
              {{#subItems}}
              <li class="liSP" on-click="showName">{{navName}} {{description}}</li>
              {{/subItems}}
        </div>
            </ul>
        </li>
        {{/items}}
    </ul>
  </nav>
</div>
This sets up the drop down menu
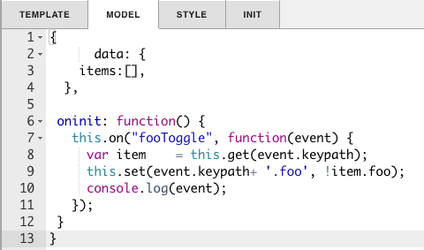
Model
{
      data: {
    items:[],
  },

 oninit: function() {
   this.on("fooToggle", function(event) {
     var item    = this.get(event.keypath);
     this.set(event.keypath+ '.foo', !item.foo);
     console.log(event);
   });
 }
}
This sets up the data and items for the query.
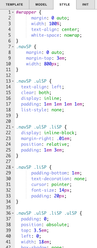
Style
#wrapper {
      margin: 0 auto;
      width: 100%;
      text-align: center;
      white-space: nowrap;
}
.navSP {
    margin: 0 auto;
    margin-top: 3em;
    width: 800px;
}

.navSP .ulSP {
  text-align: left;
  clear: both;
  display: inline;
  padding: 1em 1em 1em 1em;
  list-style: none;
}

.navSP .ulSP .liSP {
  display: inline-block;
  margin-right: .01em;
  position: relative;
  padding: 1em 3em;
}

.navSP .liSP {
      padding-bottom: 1em;
      text-decoration: none;
      cursor: pointer;
      font-size: 14px;
      padding: 20px;
}

.navSP .ulSP .liSP .ulSP {
  padding: 0;
  position: absolute;
  top: 3.5em;
  left: 0;
  width: 18em;
  box-shadow: none;
  display: none;
  opacity: 0;
  visibility: hidden;
}
.navSP .ulSP .liSP .ulSP .liSP {
  display: block;
}
.navSP .ulSP .liSP:hover .ulSP {
  display: block;
  opacity: 1;
  visibility: visible;
}
This is the css to style the list
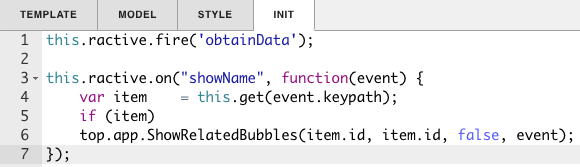
INIT
this.ractive.fire('obtainData');

this.ractive.on("showName", function(event) {
    var item    = this.get(event.keypath);
    if (item)
    top.app.ShowRelatedBubbles(item.id, item.id, false, event);
});
obtainData is what connects the Ractive model to the program. The function selectedPointIndex is for the gears and magicB is for the magic bubbles.
Program
var fooTarget = query('query');
this.items = fooTarget.curVal.toObj();
This is your program, It sets the query equal to your ractive component
How To Make your Own
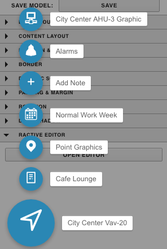
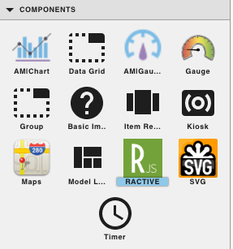
- Bring Ractive out from components on the left side menu, and click on it to have the green outline
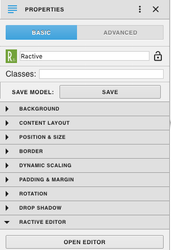
- Under properties open the ractive editor, and copy and paste from the Ractive Code given above for template, model, style, and init
- After copying and pasting, should look like the screenshots below
- After saving go to programs and add a new program
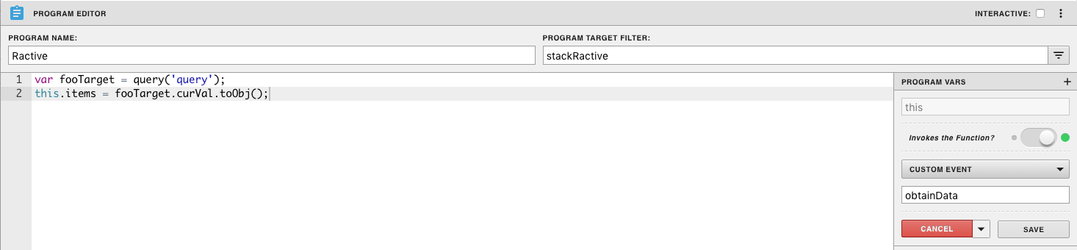
- Name your program, and set the program target filter to stackRactive
- Top right of program editor, click the three dots, and select variables
- Click the gear that appears as you hover over this
- turn Invokes the Function on and change the dropdown to Custom Event
- Type in obtainData in the line below and save
- Copy and paste the above code for program into the main part and save
- Next add a virtual point:
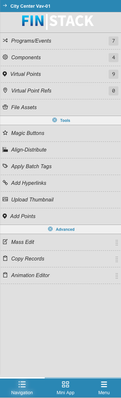
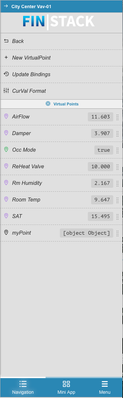
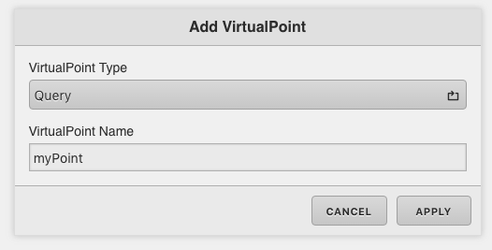

- on the right menu click virtual points
- + New virtual point
- change virtualPoint Type to be set to Query (you can name the VirtualPoint Name whatever you want)
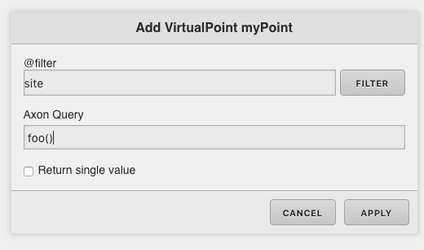
- Put the desired query in the Axon Query, for this example it is running on the program foo()
- Save and you're done!
, multiple selections available,
Related content
Ractive List Points
Ractive List Points
More like this
Floor Table
Floor Table
More like this
Overview
Overview
More like this
Overview Table with Scroll and Magic Bubbles
Overview Table with Scroll and Magic Bubbles
More like this
Ractive Query - Drag and Drop Virtual Point
Ractive Query - Drag and Drop Virtual Point
Read with this
Vertical Drop Down with Magic Bubbles
Vertical Drop Down with Magic Bubbles
More like this