Equip Table

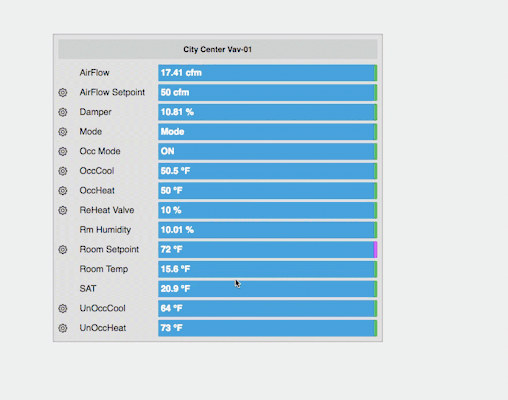
This table will show all the points on the equip.  It must be saved on an equip, and is dynamic to change based on which equip it is placed on.  It has actions available, will pull up magic bubbles, and will show if a point is overwritten.

Download Model: equipTable.zip

Code

Template

<div class="view-container">
    {{#myPoints.0}}
    <div class="view-superman-value status-stale s-msb s-vertical s-middle s-center s-height">{{equipRefDis}}</div>
    {{/myPoints}}
    <div class="s-scroll"> 
    {{#myPoints}}
    <div class="fin s-horizontal right s-mst s-bar s-fWd">
        <div class="{{#if actions}}icon-gear s-click{{/if}} s-mnr width1 s-vertical s-middle" on-click="actions"></div>
        <div class="width2 s-vertical s-middle" on-click="magicB">{{navName}}</div>
        <div class="fin s-horizontal right width3">
        <div class="s-value s-fWd s-psl s-vertical s-middle" on-click="magicB">{{curVal}}</div>
        <div class="{{#if write1 || write8}}s-purple{{else}}s-green{{/if}}"></div>
        </div>
    </div>
    {{/myPoints}}
    </div>
</div>

Model

{
    data:
    {
        myPoints:[]
    }
}


Style

.s-green{
    width:6px;
    background-color: #5cb85c;
    border-radius: 0 2px 2px 0;
}
.s-purple{
    width:6px;
    background-color: #c659fa;
    border-radius: 0 2px 2px 0;
}
.s-value{
    background-color: #47a3da;
    border-radius: 2px 0 0 2px;
    color: white;
    font-weight: bold;
}
.s-value:hover{
    background-color: #4bafeb;
    cursor: pointer;
}
.s-height{
    height:35px;
}
.s-bar{
    font-size: 16px;
    height: 30px;
}
.width1{
    width: 5%;
}
.width2{
    width: 25%;
}
.width3{
    width: 70%;
}
.s-click{
    cursor: pointer;
}
.s-click:hover{
    color: #8c8f91;
}
.s-scroll{
    overflow: auto;
	-webkit-overflow-scrolling: touch;
}
.s-fHt{
    height: 100%;
}
.s-fWd{
    width: 100%;
}
.s-horizontal{
    display: flex;
    flex-direction: row;
}
.s-middle{
    justify-content: center;
}
.s-vertical{
    display: flex;
    flex-direction: column;
}
.s-center{
    align-items: center;
}
.s-psl{
    padding-left: 5px;
}
.s-mnr{
    margin-right: 10px;
}
.s-mst{
    margin-top: 5px;
}
.s-msb{
    margin-bottom: 5px;
}


Init

this.ractive.fire("obtainData");
this.ractive.on("actions", function(event) {
    var item    = this.get(event.keypath);
      var mainWin = window.parent;
     try {
        mainWin.app.ShowActionsFor (item.pointId);
        } catch (err) {console.error(err)}
});
  
this.ractive.on("magicB", function(event) {
    var item    = this.get(event.keypath);
    if (item)
    top.app.ShowRelatedBubbles(item.pointId, item.pointId, true, event);
});


Program

var template = this;
var target = query('targetPoint');
    finstack.eval('readAll(point and equipRef=='+target.pointId+').sort("navName")').then(function(data) {
    var myPoints      = [];
    var realPoints  = data.result.toObj();
    console.log("realPoints", realPoints);
    realPoints.forEach(function(p,index) {
        myPoints.push({
            curVal       : GetPrettyValue(p),
            navName      : p.navName,
            pointId      : p.id,
            equipRefDis  : p.equipRefDis,
            actions      : p.actions || null,
            write1       : p.write1 || null,
            write8       : p.write8 || null
        });
    });
    template.ractive.set({'myPoints':myPoints});
    console.log("myPoints", myPoints);
});


Create Your Own

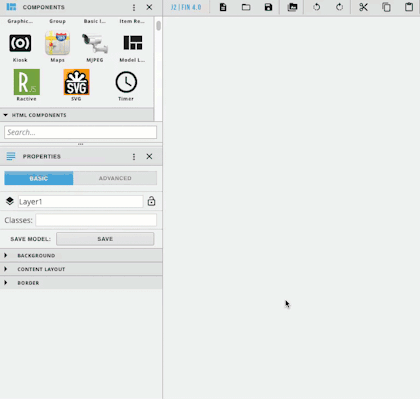
  • Drag out Ractive from the Components menu
  • With Ractive selected go to the properties menu and open the Ractive editor
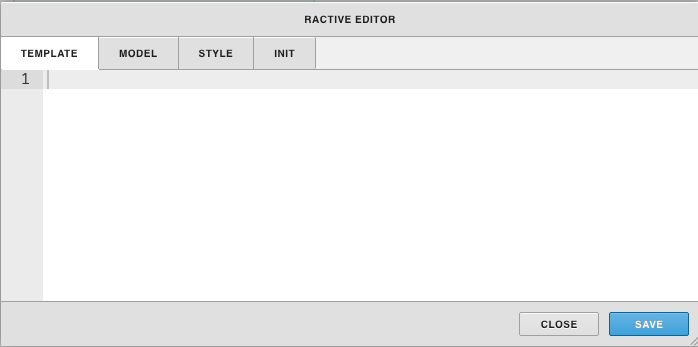
  • Copy and paste the corresponding code in each tab of the Ractive editor
  • After copying and pasting the code into the template, model, style, and init, click the blue save button

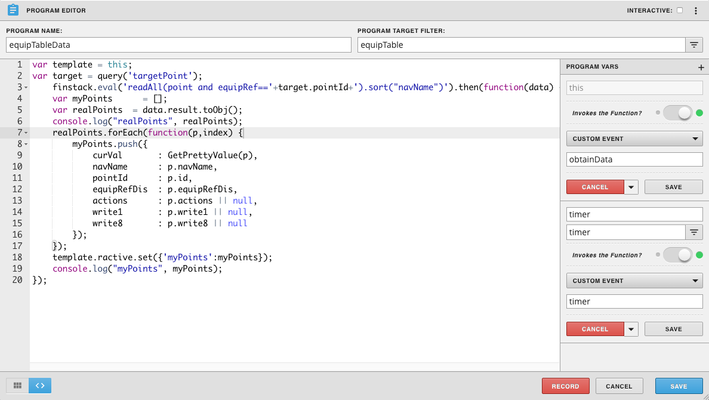
  • Under the left menu go to programs
  • Click the + to add a new program, and it will launch the program editor
  • Name your program under Program Name:
  • Under Program Target Filter we put equipTable, which will be a tag we add on the ractive component
  • In the top right, click the three dots and select variables
  • Hover over the word this, and click the gear that appears
  • turn on invokes the function and change the dropdown to custom event
  • In the box under custom event, type in obtainData and click the gray save button
  • Next click the + button next to Program Vars and click the gear that appears when you hover over newVariable
  • Type timer in the two boxes and turn on invokes the function
  • change the dropdown to custom event and type timer in the box below
  • Click the gray save button and then copy and paste the program code above into the main part of the program
  • Click the blue save button

  • The last step is to add a tag to the Ractive component to connect it to the program
  • Click on the ractive component and select the tag icon
  • Type in equipTable, so it matches what was typed as the Program Target Filter in the Program Editor
  • Click the check mark and you're done!