Overview Table with Scroll and Magic Bubbles
- Sarah Padilla (Unlicensed)
- Ricky Villa
Owned by Sarah Padilla (Unlicensed)
Last updated: May 08, 2019 by Ricky Villa
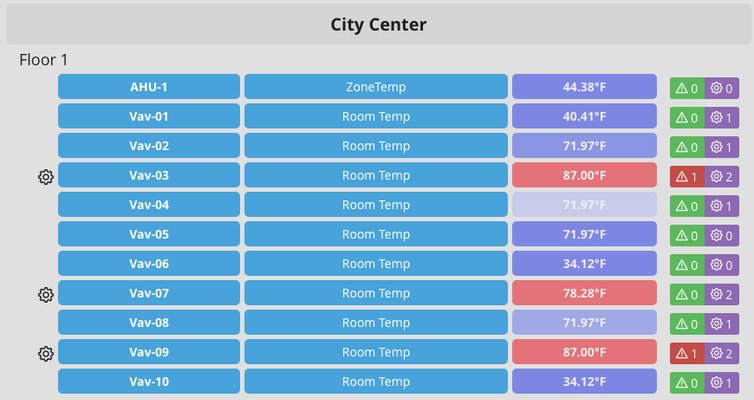
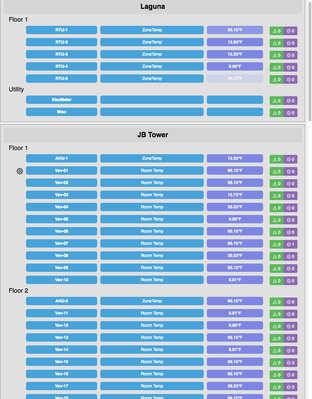

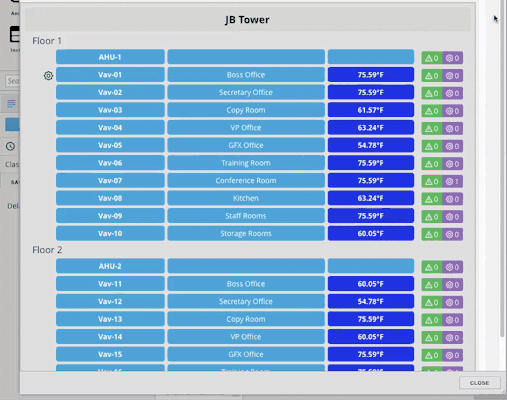
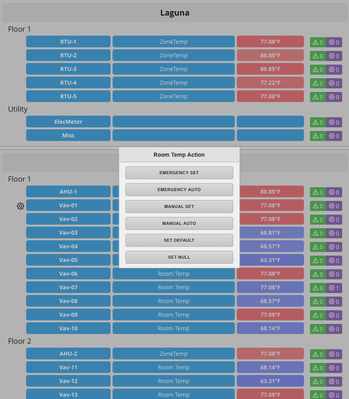
Description: This table should be placed on a floor and displays and overview of all the sites, floors, and equips. There must be the tags vipPoint and vipSp on the points. Magic bubbles appear by clicking on the site, floor, equip, and Room Temp. The color of the Room Temp is determined based off the Room Setpoint. If actions are available, a gear will appear at the start of the row. At the end of row, it shows the actions, and points override. If there is an alarm, it will appear red, otherwise it will be green.
Model: Overview.zip
Make Your Own
Ractive
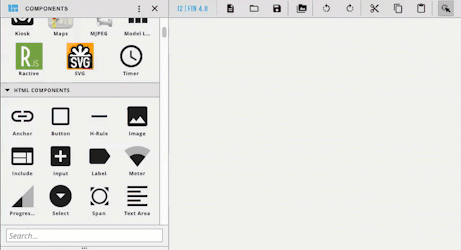
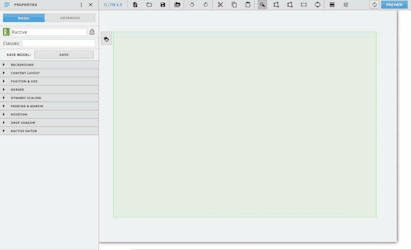
- Drag out Ractive from components on the left side menu
- Under Properties, click ractive editor, then open editor
- Copy and paste the code below for template, model, style, and init, into the corresponding tabs
Template
<div class="s-main scan-scroll">
    {{#myPoints}}
      <div class=" view-container s-box">
      <div class="s-site s-hand" on-click="magicB">{{dis}}</div>
        {{#each .subItems}}
          <div class="s-floor s-hand" on-click="magicB">{{idDis}}</div>
            {{#each .subItems}}
            <table class="s-fWd">
             <tr>
              {{> sub }}
             </tr>
            </table>
            {{/each}}
        {{/each}}
      </div>
    {{/myPoints}}
</div>

{{#partial sub}}
<td class="first">
  {{#.vipPoint}}
    <div class="s-gear {{#if .actions}}icon-gear{{/if}}" on-click="actions"></div>
  {{/.vipPoint}}
</td>
<td class="second">
    <div class="s-table s-hand" on-click="magicB"><b>{{navName}}</b></div>
</td>
<td class="third">
    <div class="s-table s-hand" on-click="magicB"> {{#.vipPoint}}{{#if navName}}{{navName}}{{/if}}{{/.vipPoint}} </div>
</td>
<td class="fourth">
    <div class="s-table" {{#.vipPoint}} on-click="magicBpoint" style="color:#000; background-color:{{#if color}}{{color}}{{else}}#47a3da{{/if}};opacity:0.5;"{{/.vipPoint}}>
     {{#.vipPoint}}<b>{{curVal.toFixed(2)}}{{unit}}</b>{{/.vipPoint}} </div>
</td>
<td class="fifth">
  <div class="margin small r-side s-center">
    <aside class="indicator-box s-center s-icons {{#if numAlarms == 0}}green{{else}}red s-hand{{/if}}" on-click="alarms">
     <aside class="icon-warning small-icon s-center view-light-text"></aside>
     <aside class="s-center view-light-text"> {{numAlarms}}</aside>
    </aside>
    <aside class="s-center s-icons purple">
     <aside class="icon-gear small-icon s-center view-light-text"></aside>
     <aside class="s-center view-light-text"> {{numManual}}</aside>
    </aside>
  </div>
</td>
{{/partial}}
Model
{
    data:
    {
        myPoints:[]
    }
}
Style
.s-main{
    flex-wrap: wrap;
    height: 100%;
    overflow: scroll;
    align-content: flex-start;
}
.scan-scroll{
    overflow: auto;
    -webkit-overflow-scrolling: touch;
}
.s-site{
    font-size: 20px;
    font-weight: bold;
    background-color: #d5d5d5;
    padding: 10px;
    border-radius: 5px;
    text-align: center;
    margin-bottom: 5px;
}
.s-floor{
    font-size: 18px;
    text-indent: 15px;
    margin-bottom: 5px;
}
.s-hand{
    cursor: pointer;
}
.s-scroll{
    height: 800px;
    overflow: scroll;
}
.s-hand{
    cursor: pointer;
}
.s-box{
    min-width: 420px;
    margin-bottom: 5px;
    margin-right: 5px;
    display: flex;
	flex-direction: column;
}
.first{
    width:7%;
}
.second{
    width:25%;
}
.third{
    width:36%;
}
.fourth{
    width:20%;
}
.fifth{
    width:15%;
}
.s-table{
    background-color: #47a3da;
    padding: 5px;
    border-radius: 5px;
    margin-right: 5px;
    margin-bottom: 5px;
    color: #fff;
    text-align: center;
}
.s-table:hover{
    background-color: #60bdf5;
}
.s-temp{
    text-align: center;
}
.s-fWd{
    width:100%;
}
.s-center{
    position: relative;
    display: flex;
    justify-content: center;
    align-items: center;
}
.margin .small .r-side {
    margin-right: 5px;
}
.no-flex{
    flex: 0 0 auto;
}
.s-icons{
    display: flex;
}
.purple{
    border-radius: 0 3px 3px 0;
    height:25px;
    width:40px;
    background: #8c68b2;
}
.red{
    border-radius: 3px 0 0 3px;
    height:25px;
    width:40px;
    background: #c34c46;
}
.green{
    border-radius: 3px 0 0 3px;
    height:25px;
    width:40px;
    background: #5cb85c;
}
.s-gear{
    font-size: 18px;
    font-weight: bold;
    margin-right: 5px;
    cursor: pointer;
    display: flex;
	flex-direction: row;
	align-items: center;
	justify-content: flex-end;
}
Init
this.ractive.fire("obtainData");
this.ractive.on("magicB", function(event) {
    var item    = this.get(event.keypath);
    if (item)
    top.app.ShowRelatedBubbles(item.id, item.id, false, event);
});

this.ractive.on("magicBpoint", function(event) {
    var item    = this.get(event.keypath);
    if (item)
    top.app.ShowRelatedBubbles(item.vipPoint.id, item.vipPoint.id, true, event);
});

this.ractive.on("actions", function(event) {
    var item    = this.get(event.keypath);
      var mainWin = window.parent;
     try {
        mainWin.app.ShowActionsFor (item.id);
        } catch (err) {console.error(err)}
});

this.ractive.on("alarms", function(event) {
   var item    = this.get(event.keypath);
      var mainWin = window.parent;
	try {
		window.top.app.OpenEquipTreeWithApp ("alarms");
		console.log("alarms");
		} catch (err) {console.error(err)}
});
Program
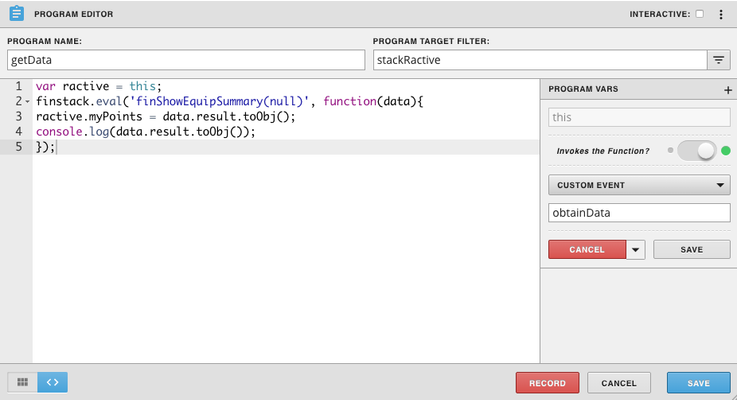
- Go to programs in the left menu
- Click the plus to add a new program, and it will pull up the program editor
- In the Program Target Filter type stackRactive
- Click the three dots in the top right corner, and select variables
- Click the gear that appears as you haver over "this"
- Turn on Invokes the Function
- Change the dropdown to Custom Event
- In the textbox below the dropdown type obtainData
- Click the gray Save button
- Copy and paste the code below into the main section and click the blue save
var ractive = this;
finstack.eval('finShowEquipSummary(null)', function(data){
ractive.myPoints = data.result.toObj();
console.log(data.result.toObj());
});
, multiple selections available,