Ractive List Points
- Sarah Padilla (Unlicensed)
- Ricky Villa

Description
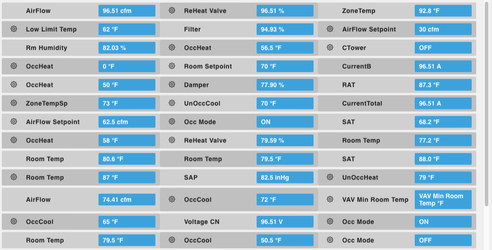
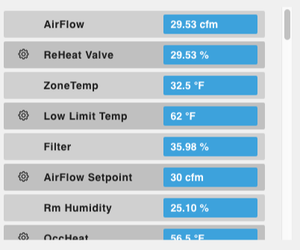
This component will return all the values from the query in a list. The list is resizable and will display a clickable gear if actions are available. Clicking on the name or value will pull up the magic bubbles for that specific point.
Completed Model (Basic)
Download: listPoints.zip
Resize the ractive model to the desired size, by dragging out the green square.
Video
Example: RactiveListPointsVideo.mov
Ractive Code
Template
<div class="s-main s-horizontal sflex scan-scroll">
    {{#myPoints}}
    <div class="marginTop s-horizontal s-middle s-row sflex view-superman-value {{#if @index % 2 == 0}} status-stale {{else}} status-disabled{{/if}}">
        <div class="s-hand s-gear marginLeft {{#if actions}}icon-gear{{/if}}" on-click="popUp"></div>
        <div class="s-hand s-name view-superman-label marginLeft single-line-text flexnw" on-click="magicB">{{navName}}</div>
        <div class="s-hand s-value view-superman-value marginLeft single-line-text flexnw" on-click="magicB">{{curVal}}</div>
    </div>
    {{/myPoints}}
</div>
This sets up the HTML for the list of points.
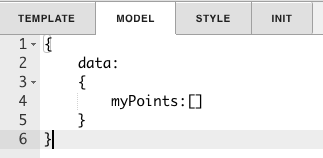
Model
{
    data:
    {
        myPoints:[]
    }
}
This sets up myPoints to get the data from the query.
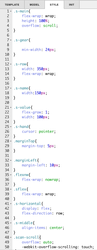
Style
.s-main{
    flex-wrap: wrap;
    height: 100%;
    overflow: scroll;
    align-content: flex-start;
}

.s-gear{
    min-width: 24px;
}

.s-row{
    flex-grow: 1;
    width: 350px;
    height:40px;
    flex-wrap: wrap;
}

.s-name{
    width:150px;
}

.s-value{
    flex-grow: 1;
    width: 100px;
}
.s-hand{
    cursor: pointer;
}
.marginTop{
    margin-top: 5px;
}

.marginLeft{
    margin-left: 10px;
}
.flexnw{
    flex-wrap: nowrap;
}
.sflex{
    flex-wrap: wrap;
}
.s-horizontal{
    display: flex;
	flex-direction: row;
}
.s-middle{
    align-items: center;
}
.scan-scroll{
    overflow: auto;
	-webkit-overflow-scrolling: touch;
}
This is the css to style the list. Changing the width in .s-row will change the length of the gray container bars for each point. Changing the width in .s-value will change the length of the blue container with the value in it.
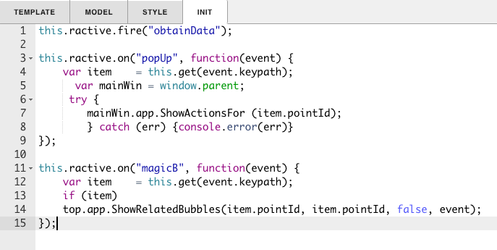
INIT
this.ractive.fire("obtainData");

this.ractive.on("popUp", function(event) {
    var item    = this.get(event.keypath);
      var mainWin = window.parent;
     try {
        mainWin.app.ShowActionsFor (item.pointId);
        } catch (err) {console.error(err)}
});

this.ractive.on("magicB", function(event) {
    var item    = this.get(event.keypath);
    if (item)
    top.app.ShowRelatedBubbles(item.pointId, item.pointId, true, event);
});
obtainData is what connects the Ractive model to the program. The function popUp is for the gears and magicB is for the magic bubbles.
Program
var template = this;
var target = query('targetPoint');
    finstack.eval('readAll(point and equipRef=='+target.pointId+').sort("navName")').then(function(data) {
    var myPoints      = [];
    var realPoints  = data.result.toObj();
    realPoints.forEach(function(p,index) {
        myPoints.push({
            curVal       : GetPrettyValue(p),
            navName      : p.navName,
            pointId      : p.id,
            equipRefDis  : p.equipRefDis,
            actions      : p.actions || null
        });
    });
    template.ractive.set({'myPoints':myPoints});
});
How To Make your Own
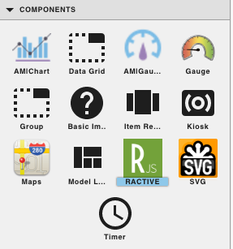
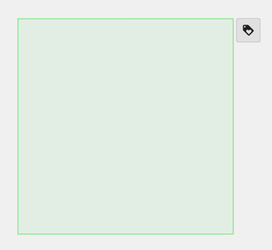
- Bring Ractive out from components on the left side menu, and click on it to have the green outline
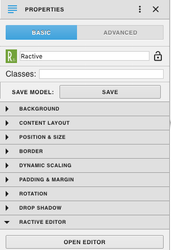
- Under properties open the ractive editor, and copy and paste from the Ractive Code given above for template, model, style, and init
- After copying and pasting, should look like the screenshots below

- After saving go to programs and add a new program

- Name your program, and set the program target filter to stackRactive
- Top right of program editor, click the three dots, and select variables
- Click the gear that appears as you hover over this
- turn Invokes the Function on and change the dropdown to Custom Event
- Type in obtainData in the line below and save
- Copy and paste the above code for program into the main part and save
- Save and you're done!